Category: Gear & Stuff
Categories
The US M1 Helmet
Tank’s first Kabar was this knife he bought for $20 from a mail order company.
During my early cop days in the mid-1980s, my interests shifted towards various weapons for obvious reasons, with guns and knives being the most common.
Now, I’m no psychologist, but I believe this stems from the idea that the more you know about these things, the less intimidating they seem. If you understand something better by knowing how it functions, surely it would help you when faced with the very item, knowing its capabilities — and limitations.

Kabars were the issued blade to US Marines.
First of Many
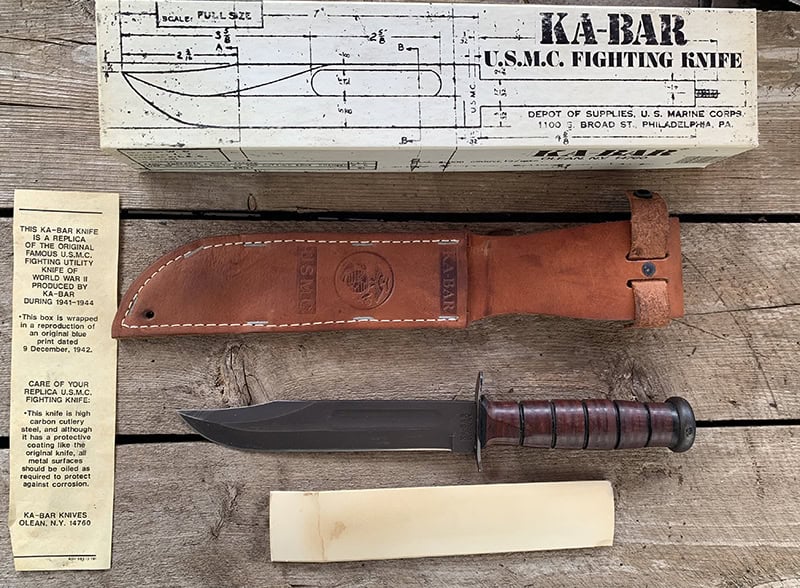
I ordered the classic USMC Fighting Knife from none other than KA-BAR themselves. Back then, the princely sum of $20 was all it took to make one yours. Made of 1095 carbon steel, the blades were very sharp. This knife started me on a knife odyssey, for this hefty blade had roots stemming back to WWII.
It looked and felt rugged enough to chop, cut, hammer, stab and slit anything that needed doing. I used the blade to gut and quarter deer while hunting, for camp chores, gardening and home jobs. The blade seemed indestructible! The more I used it, the friendlier and more useful it became.
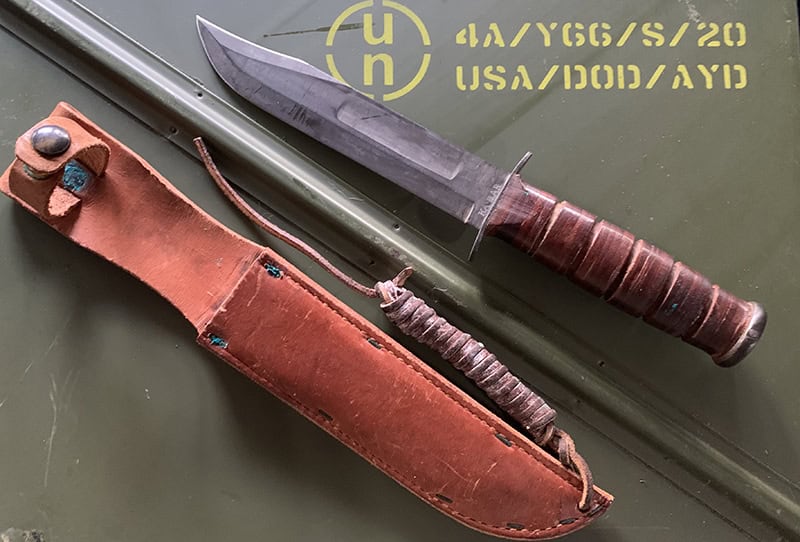
This WWII era KA-BAR was bought at a gun show years ago by Tank, who paid way too much for it at the time.
Real Deal
A few years later, while perusing a gun show, I stumbled upon a small table displaying vintage WWII knives. There before me stood an original WWII-era USMC fighting knife with a leather sheath. Being young, I let my excited face and bulging eyes give me away. The dealer knew he had one “hooked” and just needed to reel me in to close the deal. I won’t say what I paid for the knife to save embarrassment on my part, but I left with the knife.
Every time I pick it up, I still get that giddy feeling of awe and respect. Even though these blades were stamped out by the thousands by several different manufacturers, the heft and quality are still there.
A crude tool, consisting of sharpened steel, clip point blade and stacked leather washers, it was your basic utility tool, but in the right hands, it was deadly. Like a .30-30 lever-gun, it’s more the man behind the gun than the gun itself that makes it useful.
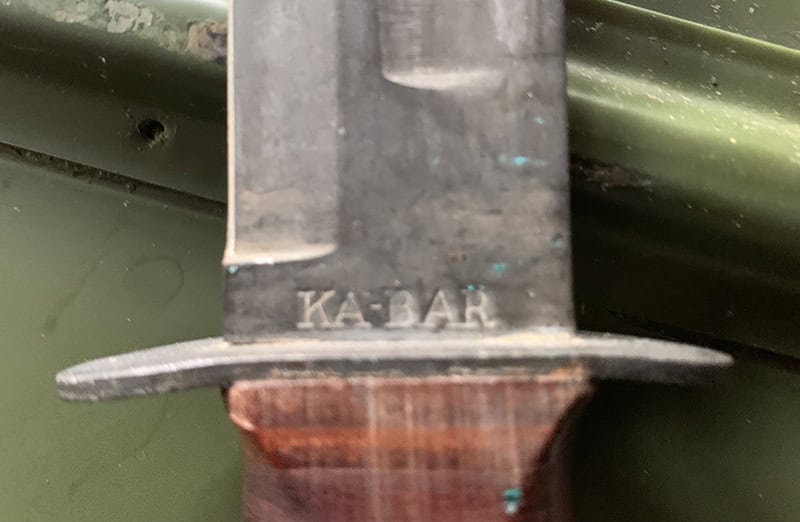
Close-up of the blade stamp.
It wasn’t long after I stumbled onto a plastic-sheathed USN MKII “frogman” fighting knife. Being a little more seasoned, I was starting to learn the art of negotiation while looking mildly interested. I bought that knife for half as much as I paid for the original KA-BAR, even though they usually go for more. Over the years, the knives started stacking up.
Randall Made was one of my favorite custom knife makers, as well as EK’s and other lesser-known factory blades used during different wars and conflicts.
Whether soldier, cop, outdoorsman, homeowner or be-bopper, one thing is for certain: everyone needs a good knife for those “just in case” moments when they need to cut, pry, scrape, or pound something. Nothing beats a nice piece of sharpened steel when you need it, much like a gun.
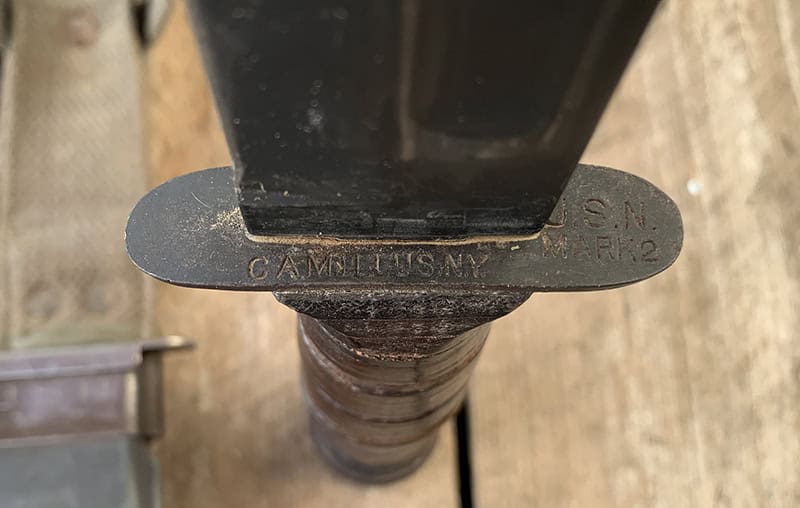
A Camillus USN MK II knife used by Navy UDT members during WW II.
There’s no item that symbolizes the USMC more than the KA-BAR knife. Just seeing one triggers thoughts of lean men with high-and-tight crew cuts, ready for battle in short order.
Listed as item 1219C2 in November of 1942, it was the answer for the fighting men during WWII. With a robust 7-inch steel blade, it was a formidable weapon as well as a utility blade. The stacked leather handle makes the blade easily identifiable at a glance.
The heavy steel pommel also serves as a pounding tool for field chores and as a striking instrument against enemy combatants. The knife was indispensable for close combat and survival tasks in the Pacific theatre during WWII.
The knife saw continued use in Korea, the Vietnam War, and other conflicts. The knife remains a symbol of military tradition and is still popular among current servicemen, outdoor enthusiasts and collectors of military-issued equipment.
Union Cutlery rebranded itself as KA-BAR in 1952, after an earlier incident when an Alaskan fur trapper encountered a wounded brown bear. The trapper’s rifle jammed, and he reportedly used his Union Cutlery Company knife to finish the bear off. In a letter to the company, the only legible words were the ka bar, meaning kill a bear. The company adopted the phrase as its official trademark in 1923.
Close-up of stamped knife guard.
In The Navy
Navy personnel were issued the USN MK II, having a hard plastic sheath for underwater demolition team members (UDT).
The major manufacturer during WWII was Union Cutlery Co, which was the original creator of the knife and later renamed itself KA-BAR. Camillus Cutlery produced the largest amount of USN MK II knives during WWII, approaching 1 million blades.
Robeson (ShurEdge) Cutlery Co. also produced the MK II and are highly sought after by collectors, due to their rarity.
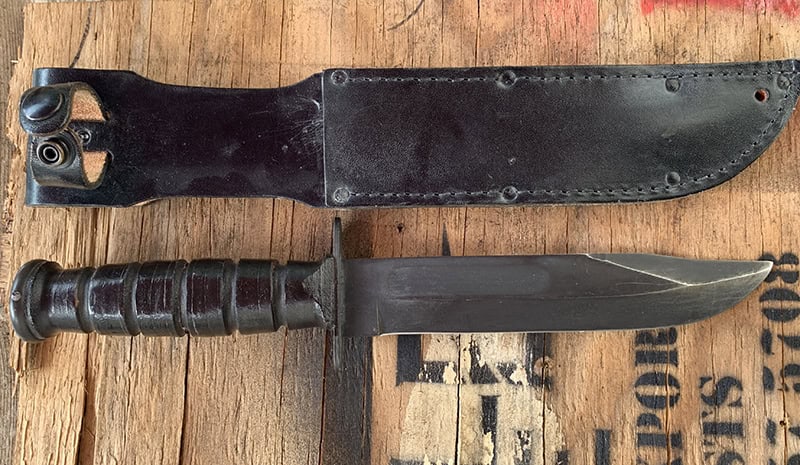
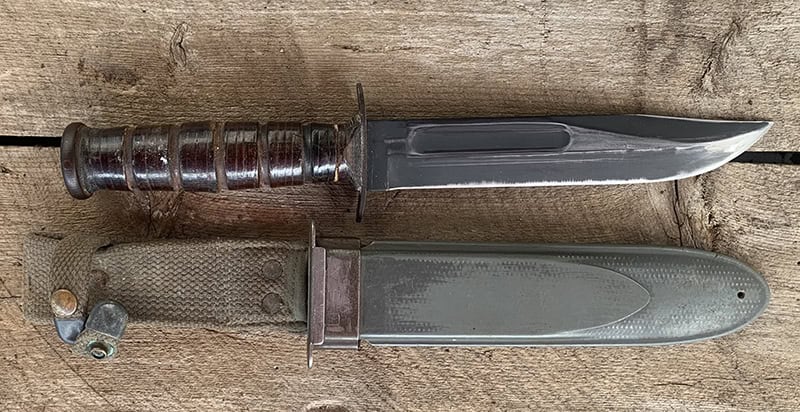
A newer Camillus USMC Fighting knife from the early 90’s.
Specs
• High carbon steel 9/64ths” thick blade
• All metal parkerized to eliminate reflection and protect metal
• Fully ground and sharpened swedge to allow cutting up or down point
• 7″ high carbon steel blade for excellent edge retention and ease of sharpening
• 1/32nd” blood grooves
• Compressed genuine cowhide leather washer handle with positive grip grooves
• Steel pinned pommel 3/8ths” thick
• Solid steel double quillion guard
• Fiber washers between the leather handle and the metal guard and pommel to prevent corrosion
• Full tang construction
• Heavy-duty oiled genuine cowhide sheath with exact full stitching and metal staples
KA-BAR keeps the same standards today as the original!
Post WWII
Ontario Knife Co was awarded a long-term contract to manufacture traditional USMC blades. Camillus Cutlery continued to make MKIIs throughout the Korean and Vietnam eras until 2007. Today, KA-BAR and Ontario continue making accurate renditions of the famous USMC fighting knife.
If you’re looking for a good utility blade, the KA-BAR is still a good option for someone who knows how to work a good piece of steel. The only limitations these knives have are the person using them.
Categories
Irons or Red Dots?
 As you can guess by now that I don’t like pretending to be homeless. Seeing that I have worked my ass off so that I can live in a fairly nice house in a good neighborhood. With the Worlds Greatest Wife of whom we share the same idea about this subject. Praise the Lord!!!!
That and about a 100 pounds ago.
The other major reason for my hatred of camping Was the US Army habit of taking my ass out to some pretty nasty A.O. to “Train” for an extended period. (Hint -After the 2nd or 3rd week it kinda gets old REALLY FAST)
So as you have figured out by now. I heartily agree with Modern Man and our Hebrew Friends & Neighbors on this subject. Grumpy

