Category: Gun Info for Rookies
Most of us have shot a classic .22 plinker but moved on to “bigger” and “better.” However — sometimes — simple pleasures are the best!
Early into my shooting career, some of my absolute favorite moments resulted from cool, calm days where I had all of the time in the world to sling .22 rounds at dime-sized targets — and with little concern about ammo cost or being battered by the forces of recoil!
As I investigated what else the rimfire world had in store for me, I would repeatedly come across articles referencing some of the kings of the category: the Winchester 52 and the Remington 37, for example. Many of these designs were once considered the gold standard of accuracy within 100 yards and my interest was firmly piqued.
Unfortunately, my dreams of owning these legends dissipated once I picked them up. Today, I’m a lot more excited by those rifles that, to me, represent a golden mean between raw accuracy and ease of use. Indulge me and I’ll tell you what I think makes for a perfect “offhand plinker.”
The Walther KKJ is an exceptionally well-made “sporter” rimfire rifle. If you can see it with the naked eye, you’ll hit it with this.
“Seeable” reactive targets don’t much care for minor point-of-impact shifts. A rifle with a pencil barrel can zap them, hot or cold.
Two Ends Of The Spectrum
On one hand, we’ve always been awash with lightweight, affordable rifles and many of them have been of extraordinarily high quality. I learned recently that Ruger has produced more than 5 million of its famous 10/22 rifles. I would reason that within a half-hour drive of your current location, you can find a gun store with a 10/22, new or used, currently sitting on the shelf.
It’s no mystery why the rifles are beloved. The 10/22 is easily shouldered and aimed. It is robust and reliable, and tolerant of a wide variety of ammunition. When I was in my late teens, I had fired a gun before. However, the groups I coaxed out of a 10/22 got me to think about shooting differently. “Maybe I have some talent for this,” I told myself.
Additionally, America’s used gun market is awash with a number of .22LR rifles intended as either entry-level tools for pest control or “boy’s” or “youth” rifles that would serve as a child’s first introduction to marksmanship without mom or dad having to break the bank. The Winchester 67, Remington 514, and Stevens 15 are all prototypical examples of the type. In general, they are light, easily operated and despite their humble origins and no-frills materials, they tend to shoot surprisingly well!
Still, spend some time with them and their limitations come into focus. Most have very simple folded metal or “buckhorn” sights, thin barrels prone to heating up quickly and stiff triggers. Budget price points often necessitated budget materials so expect beechwood or plastic stocks, along with stamped steel construction of various small parts.
The Winchester 69 has Clayton’s vote for offering
buyers the most usable accuracy for the least spend.
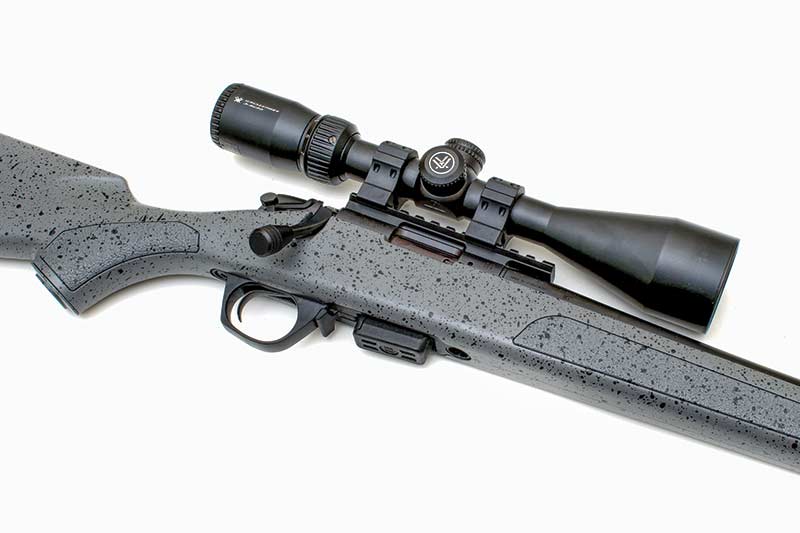
The Bergara BMR — Its light weight makes for a rifle that can still be comfortably shot offhand even with a mounted scope.

Winchester 63 with a period-correct Weaver low-magnification scope. Light and simple is often best!
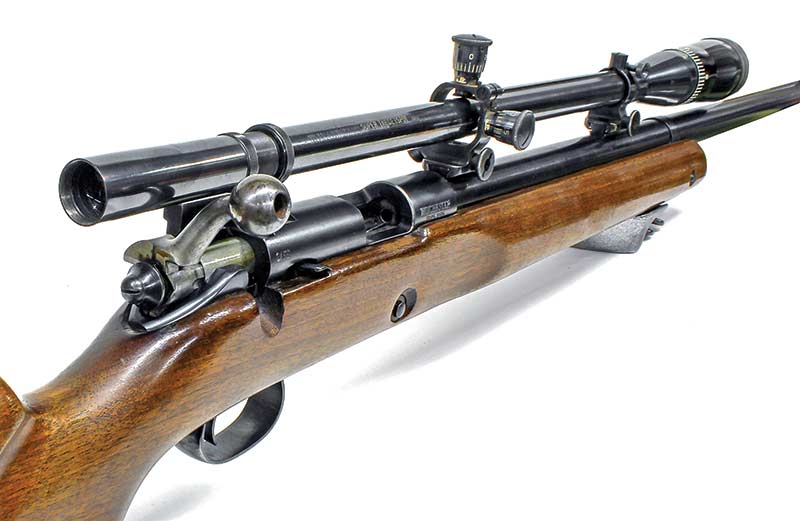
Winchester’s vaunted Model 52 is of the perennial kings of rimfire accuracy and craftsmanship, it’s also a boat anchor!
The Other End
As one moves from “budget” to “premium” in the rimfire rifle category, the upgrades are obvious. At the upper tier of the quality spectrum, buyers can expect to find longer, thicker barrels that aid accuracy. A 26″ tent-pole of a barrel not only offers more runway for the powder of a rimfire cartridge to fully and completely burn, but it gives open sight users more distance to ensure perfect alignment between the front and rear units.
The barrel thickness also ensures it heats and cools in a more uniform manner, which reduces any temperature-based point of impact shifts.
Along with those long, gorgeous barrels and hand-fit actions, you’ll also usually find very generous and beautiful walnut furniture, often with metal fixtures for the buttstock, sling attachments and other accoutrements. One look at these guns and you’ll immediately be transported back to an era where no cost was spared to provide the rimfire shooter with the best accuracy the day’s engineering and experience could allow.
The trade-offs, however, are size and weight. Most of the .22s you’ll find in rimfire competitions tend to be big. Extra mass provides more stability and precision, but makes it a rifle much harder to heft and shoot offhand. It’s not to say one can’t do so but those interested in the attempt normally have specialized shooting jackets dedicated to such a purpose.
The same goes for adding one of the most common and historic tools for improving one’s group: the scope. As my military buddies like to say, “Ounces make pounds.” Where rimfire rifles are concerned, I’ve found a 24-oz. scope moves offhand shooting on a big, wood-stocked rifle from the realm of “challenging” to “impromptu strength training.” Show me a guy who can heft a scoped Winchester 52D and shoot a great group offhand, and I’ll show you a guy who looks like Hulk Hogan.

Above, the Ruger 10/22 is well-represented in America’s gun stores, and for good reason.
The Middle Path
For the rest of us, many of the design specs and equipment choices maximizing mechanical precision come at the expense of practical accuracy. In simpler terms: Bring the scope to eye level, and your arms will almost instantly begin to feel like wet noodles and the reticle will wobble all over the place. To quote the old infomercials: There has to be a better way!
Indeed, there is no shortage of rimfire rifles which got an extra degree of TLC from the maker over the budget model yet weren’t fully optimized for bench work. The Winchester 69 remains perhaps my favorite rifle of all time. Yes, the trigger guard is stamped steel and the trigger pull isn’t astoundingly light, but the gun is like a laser in my hands. Within 75 yards, if I can see it, I can hit it. Of course, beyond that I probably can’t see it!
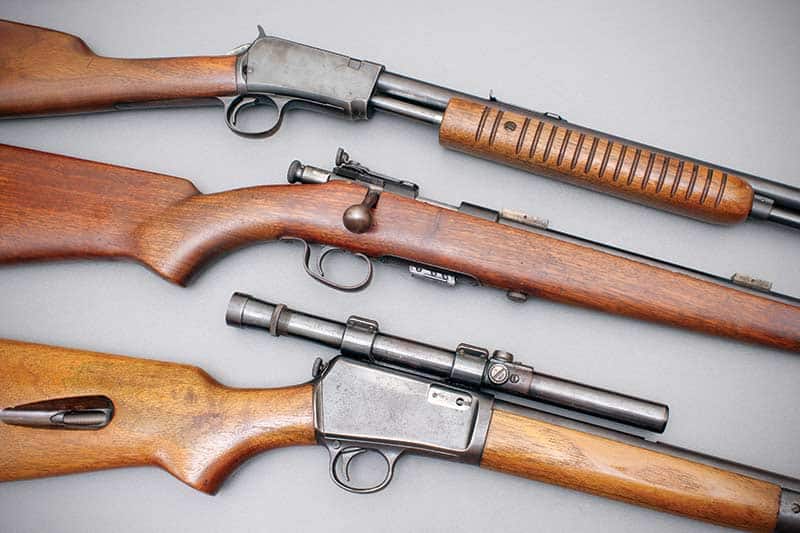
I also have a tremendous affinity for a number of quality pump-action rifles. Often, models like the Remington 12, Winchester 62 and Browning Trombone exhibit very high quality workmanship, are fast into action, and shucking rounds in and out of these platforms is a joy.
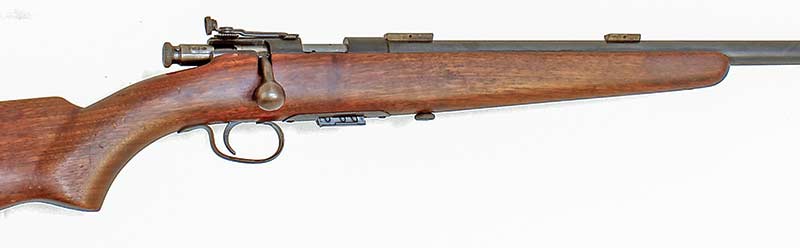
Still, I’m not picky. Just about any mag or tube-fed rifle with a thinner barrel, decent wood and a good set of aperture sights has my eye. To this latter point, I find “peep” sights allow for tremendous practical accuracy without the weight of a scope and mounts, yet they also eschew the alignment imprecision that often goes hand-in-hand with buckhorns or folded steel sights.
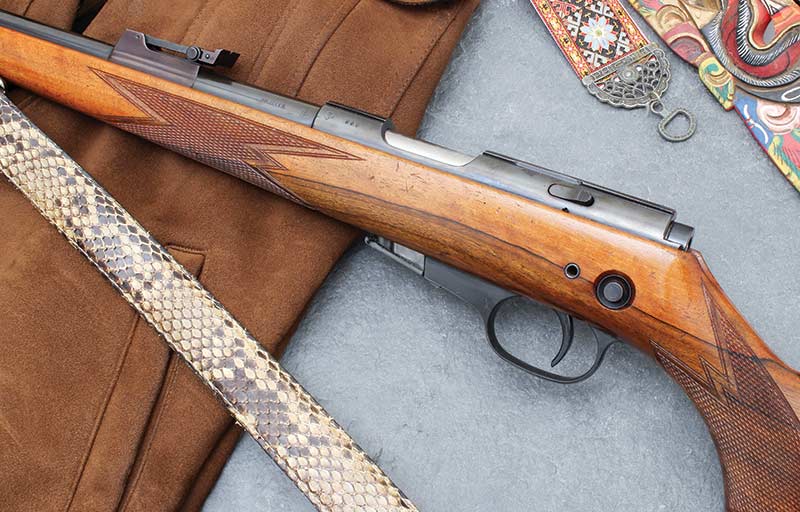
One key to finding a great offhand plinker is to look for the phrase “sporter.” Through the generations, the term has defined guns designed to be used afield — i.e., picked up and shot. Winchester made its storied 52 in a “sporter” configuration (a gun perpetually on my “one day” list), and Browning still makes its excellent T-bolt rifle as a sporter.
The wood-stocked version of Springfield’s new 2020 Waypoint rimfire rifle also comes with an accuracy guarantee and a stated weight of 6 lbs., 3 oz. Truly, a “best of both worlds” deal.
Elsewhere, composite materials help to keep the weight down. I purchased my Bergara BMR not only because of the Spanish gunmaker’s well-established reputation but because it was light enough for me to heft even with a scope included.
With a user-adjustable trigger — currently set at 2.5 lbs. exactly — and capable of eye-popping groups from the bench, I don’t feel like I’m giving up much to the walnut-stocked, bull-barreled monsters of yore.
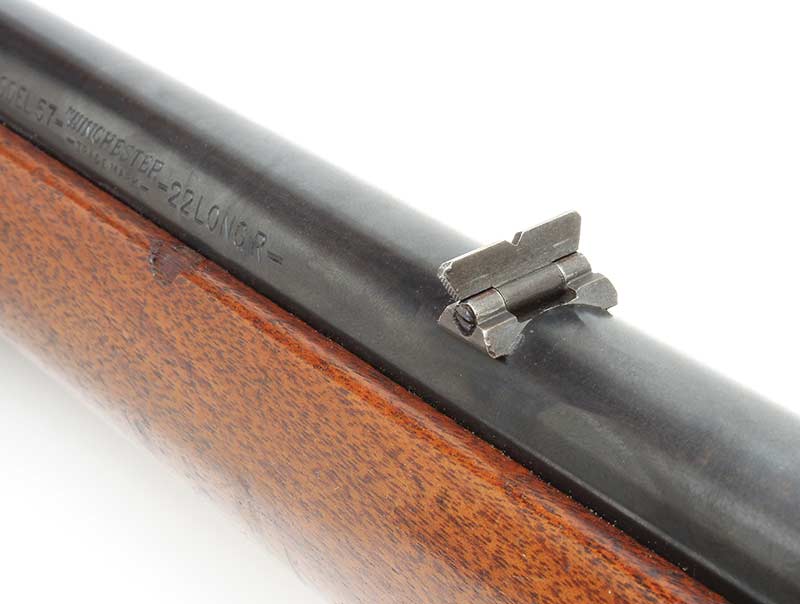

Many sporter-weight rimfire rifles feature simple sights often challenging to aging eyes, but (right) the aperture sight is a godsend on a small-caliber rifle, enabling high precision with hardly any additional weight.
Freedom of Choice
Our own Massad Ayoob recently wrote he didn’t like the finger grooves on the third-generation GLOCKs because he didn’t like a gun telling him how he needed to shoot it. The same goes for me with the weight of many .22 rifles — a gun telling me it needs to live on the bench isn’t usually one that’s fun for me to work with.
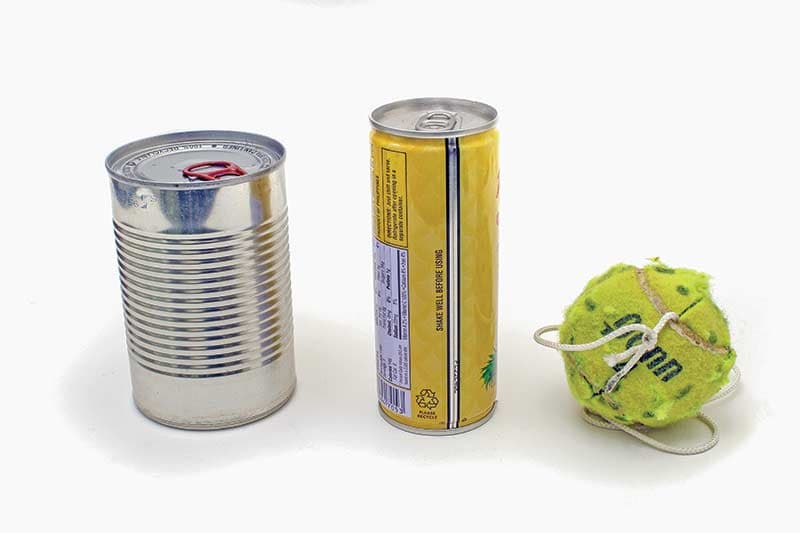
Sure, the long guns I’ve gravitated to might very well give up some accuracy at the 50-yard line and beyond. I don’t know how many dudes are winning rimfire matches with clapped out “department store” rifle. Regardless, there have been countless golf balls, shotgun shells, playing cards and wood chips obliterated by my ugly, dinged-up .22 and the slight impact shift between a hot and cold barrel doesn’t normally matter on targets I don’t need magnification to see.
Ironically, the older I get, the more time I seem to spend with designs historically positioned as youth rifles. That is, they’re lithe, simple and inexpensive. To me, the feats of marksmanship putting a smile on my face are those coming as a result of me using my own two eyes and hands to zap something just at the threshold of my vision. Almost always, I’m going to reach for a .22 rifle to scratch the itch.
If it’s been some time since you’ve gotten away from the bench rest, or if you’re the kind of shooter who has regarded any sort of .22 as a novelty, here’s your invitation — buy a svelte, light rimfire rifle. It probably won’t cost you very much and I bet you’ll immediately rediscover just how fun offhand shooting can be.
In a move that has triggered debate among gun rights advocates and lawmakers, West Virginia Senate Bill 1071, commonly referred to as the “Machine Gun Bill,” will not proceed in the current legislative session. Senate President Randy Smith (R-Preston) announced his decision to block the bill, citing what he calls significant legal and drafting issues rather than any opposition to Second Amendment rights.
The bill, introduced late in the session, aimed to expand access to fully automatic machine guns for eligible West Virginia residents.
Specifically, it advocated creating the Office of Public Defense within the West Virginia State Police, which would oversee the purchase, sale, and distribution of machine guns to individuals for state defense purposes. Supporters contend the bill aligns with Second Amendment protections, bolsters personal and community security, while complying with federal background check requirements.
SB 1071 initially cleared the Senate Judiciary Committee on Monday, March 2, following a contentious meeting that ended in confusion.
Committee Chairman Tom Willis called for a recess, and after discussions, the bill appeared to advance with strong support.
However, it never reached the full Senate floor or the Finance Committee, stalling ahead of the crossover day deadline on Wednesday, March 4, the point by which bills must pass their originating chamber to remain viable.
Smith explained his rationale in statements released today, describing the legislation as “poorly drafted” and submitted on the final day for Senate bills.
He consulted with multiple attorneys, members of West Virginia’s National Rifle Association, and the West Virginia Citizens Defense League (WVCDL), all of whom reportedly advised that the bill would likely fail in the House of Delegates and invite court challenges. “This bill, as it was submitted to us, would be unable to pass the House of Delegates and would face numerous judicial challenges to its implementation upon passage,” Smith stated.
Speaking to multiple senators, WVCDL lobbyist Art Thomm implied that the NRA does not support the bill.
Ammoland News spoke to NRA-ILA President John Commerford, who denied that the NRA had anything to do with killing the bill.
In fact, Commerford stated that the NRA is looking forward to working with the sponsor of the bill to improve it for next year.
Mr. Commerford also confirmed to AmmoLand News that Thomm does not work for the NRA and hasn’t worked for the gun rights organizations for a few years.
The NRA has a new West Virginia State Director starting Monday. The lawmakers AmmoLand News spoke to said they believed the NRA was opposed to the bill’s passage.
Critics of the decision, including bill sponsor Sen. Chris Rose (R-Monongalia) and Sen. Laura Chapman (R-Ohio), voiced frustration over the lack of transparency.
Rose noted that reviving the bill would require suspending constitutional rules and obtaining a two-thirds majority, a hurdle he deemed unlikely at this stage. “Traditionally speaking, this bill would be dead at this time,” Rose said. Chapman reiterated these sentiments, calling the process opaque: “The bill is dead, and it was killed without transparency and without consensus, despite the fact that this bill had overwhelming support by this body.”
Gun Owners of America (GOA) has mobilized supporters to pressure Smith for a floor vote.
In an urgent call to action, GOA claimed the bill “mysteriously disappeared” despite passing committee and urged constituents to contact the Senate President, pointing out that 93% of West Virginia gun owners reportedly support such measures. “We have an extremely small window to get this done,” GOA stated.
The bill’s failure emphasizes continuing tensions in West Virginia’s Republican-dominated legislature over gun rights legislation.
While the state has some of the most permissive gun laws in the nation, including permitless carry, efforts to challenge federal restrictions on machine guns, which have been tightly regulated since the 1934 National Firearms Act (NFA) and further restricted by the 1986 Hughes Amendment, commonly experience scrutiny for possible conflicts with national law.
During committee discussions, concerns were raised that the bill may unintentionally expose residents or state police to federal violations, with West Virginia Troopers Association President Lonnie Faircloth voicing concerns about transferring machine guns to private citizens.
Opposition within the committee was limited but notable. Sen. Ryan Weld (R-Brooke) voted against the bill, and Sen. Joey Garcia (D-Marion) questioned its adherence to federal regulations. Despite this, the measure had obtained considerable backing from gun rights groups and some lawmakers who viewed it as a stand against supposed federal overreach.
As the legislative session winds down, the fate of SB 1071 acts as a reminder of the procedural and statutory hurdles even popular ideas can face. Smith reasserted his commitment to Second Amendment issues, suggesting that a better-drafted version could be considered in future sessions.
For now, however, West Virginians seeking machine guns have to navigate the existing National Firearms Act licensing process, which remains stringent and costly.