Category: Gun Info for Rookies


Tom McHale schools us on the proper use of quick turrets and scope reticles when shooting for long distances in this continuation of his article series on long-range shooting.
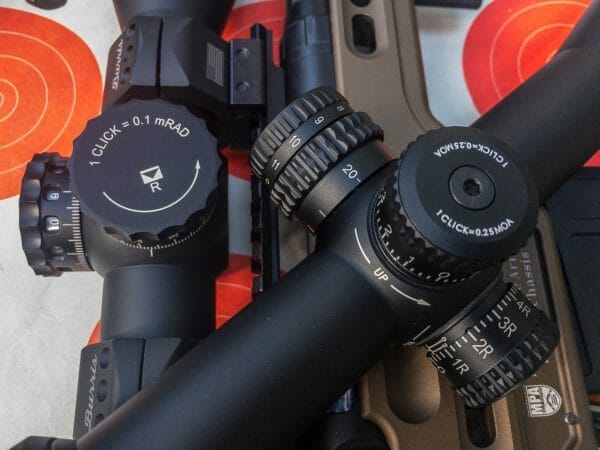

USA –-(Ammoland.com)- Turrets and reticles generally compliment each other, although sometimes they can perform the same function.
On old-school rifles, one commonly used the turrets for initial zeroing and the reticle for shooting. As the “turrets” were capped and required a screwdriver or coin to make adjustments, they weren’t conducive to on the fly adjustments in the field.
The idea was that you would do a one-time set to get the rifle shooting to where the cross hairs were indicating at a certain distance. Later, shooting in the field, the user would rely on holdover to account for longer distances.
Before we get into nuances and differences of turret and reticle combinations, we can limit the scope of turret types. Since this is a series about long-range shooting, we’ll stick to “target” or “tactical” turrets. Those differ from more traditional capped turrets that are designed primarily for initial zeroing of a rifle.
Here, we’ll focus on turrets that remain exposed and are intended to be used in the field on a shot-to-shot basis to adjust for elevation, windage, and target movement. These taller drums aren’t just big and bulky to look cool – they show you the adjustment markings so you can adjust for each different shot requirement.
There are numerous concepts to consider when making an optics decision when it comes to turrets and reticles, so let’s try to hit some of the biggies.
Oh, one more note before we start. To keep this article less than “one billion” words, we’re going to skip differences between first and second focal plane scopes when talking about reticle holdovers. We’ll be covering that topic separately next month.
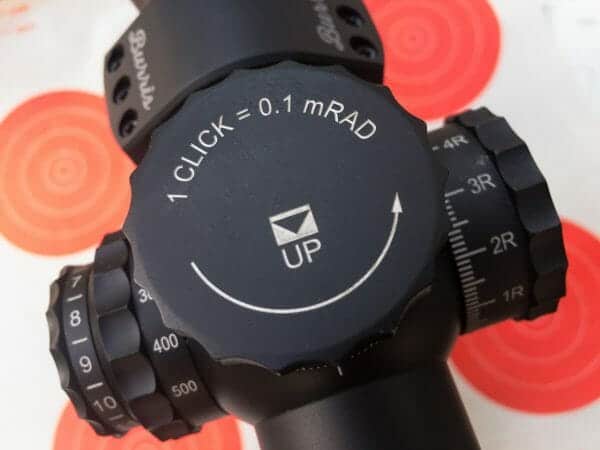
Mismatched Turret and Reticle Graduations
On far too many scopes (in my opinion) you’ll find a reticle graduated in milliradians combined with turrets that adjust in minutes of angle. Sure, they both do the same thing, but it gets confusing. A milliradian represents 3.6 inches at 100 yards while a minute of angle corresponds to 1.04 inches at the same distance.
To put that practical terms, if you choose to make a shot adjustment through the reticle of one milliradian, there’s no “exact” way to do the same adjustment with the turrets unless you resort to (brace yourself)… math!
Maybe companies do this for economies of scale so they can manufacture one scope body and offer it will all sorts of MOA, mil, and ballistic compensation reticles.
Whatever the reason, it drives me nuts. It’s kind of like having car speedometers marked in miles per hour with highway speed limit signs that only show the metric numbers.
The benefit of using the same units of adjustment on the reticle and turret is simplicity. You can make the same shot adjustment using either a reticle holdover or a turret adjustment. That’s especially handy when you use both to make a shot.
For example, you might adjust the elevation turret for drop and use the reticle to account for wind drift. You’re always working with the same units of measurement, and that’s a good thing.
Most minute of angle scopes feature .25 MOA per click adjustments. That represents a smidgen over a quarter of an inch at 100 yards. Most mil-dot scopes use .1 milliradian per click adjustments. That’s about .36 inches per click at 100 yards.
Standard Mil-Dot and MOA Reticles
Here comes my institutional bias. There, I warned you.
There are infinity trillion reticle designs on the market, and at least half of those are cool and useful. To me, the most practical are those that offer straightforward mil or minute of angle increments.
The reasons will become more evident as we talk about ballistic compensation reticles next, but in short, I like the flexibility of mapping my own bullet trajectories to a standardized scale.
If the reticle shows a constant array of minutes or mils with fractional indicators between them, you don’t have to remember obscure reticle designs like “OK, so the second and third lines below the crosshair are 6.3 minutes of angle apart according to the manual,” or “that circular thing is 4.2 mils wide…”
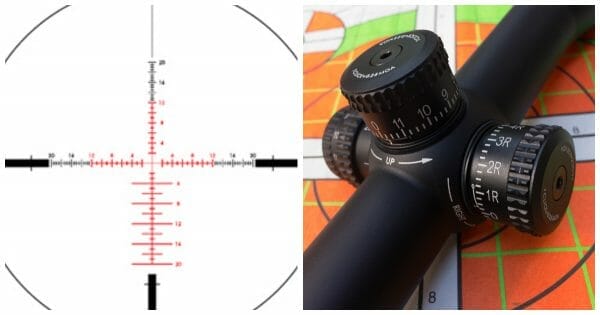
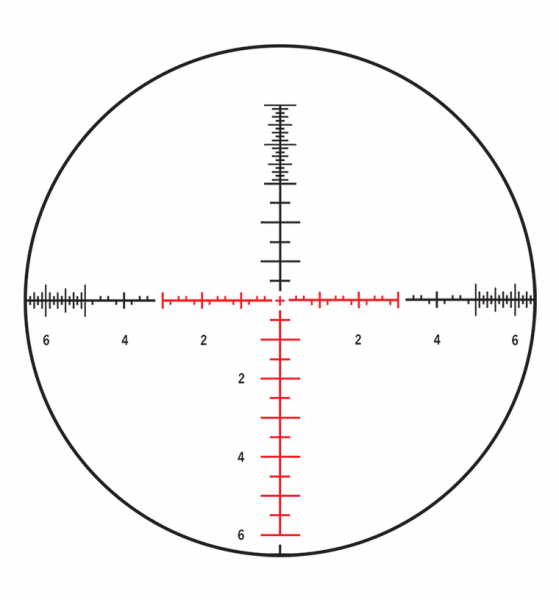
One added benefit is that a traditional mil or minute of angle reticle can move from rifle to rifle and caliber to caliber with ease. Not being “hardcoded” to the trajectory of a single round, you can do whatever you like with it.
Give me two “rulers” in a cross pattern any day, so I can easily see each mil or minute of angle adjustment in whole and fractional increments. Since a picture is worth a thousand words, I’ve included one here. These reticles, in almost any style, make me happy.

Ballistic Compensation Reticles
Most optics companies offer reticles that have markings which correspond to the trajectory of individual cartridges.
For example, since the trajectories of standard .223 Remington and .308 Winchester rounds happen to be so similar, you might run across scopes that have markings for specific yardages in the reticle itself for those calibers. These work fine as long as you stick to standard ammunition and conditions.
The drawback is a loss of precision. As we’ll see when we build a long range shooter’s databook later in this series, for every combination of rifle, ammo, and weather conditions, the trajectory is different.
Ballistic compensation reticles get you close, but by definition, they can never be as precise as mapping your own rifle and ammo combination at each desired distance. Also, a change in temperature and pressure will throw off BDC reticles even more.
If your goal is to get “close enough” then BDC reticles are great. They’re simple to use and fast to get on target. If you need maximum precision, then go with standard reticle graduations and make your own distance/adjustment map based on actual performance.
Custom Turrets
Some manufacturers offer custom turret marking services. Here’s how that works.
You gather and submit specific information about your gun, scope, ammunition, and normal shooting conditions. This includes inputs like sight height above the bore, bullet ballistic coefficient, actual velocity from your rifle, zero distance and average temperature, pressure, humidity, and altitude in your area.
The manufacturer uses that information to calculate the ballistic trajectory of your round and makes a reticle marked with yardage distances. So, to adjust for a 600-yard shot, just spin the dial to 600 yards and, in theory, you’ll be close to dead on.
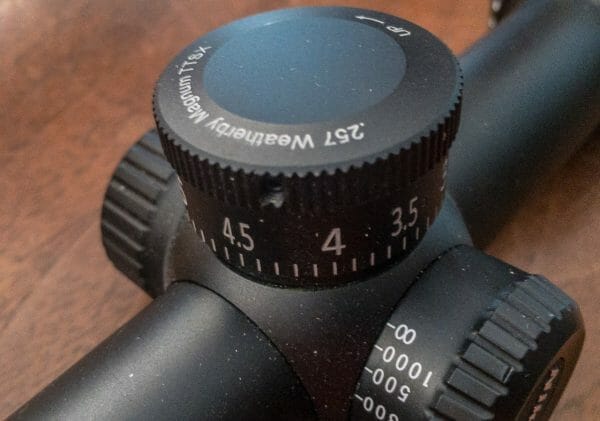
I’ve tested a couple of these, and they work well for applications where you’ll stick with the same rifle and ammo and where you’ll be shooting in similar altitude and temperature conditions. If you travel to places where conditions differ, then you’ll be off.
Which to Use? Turrets or Reticles?
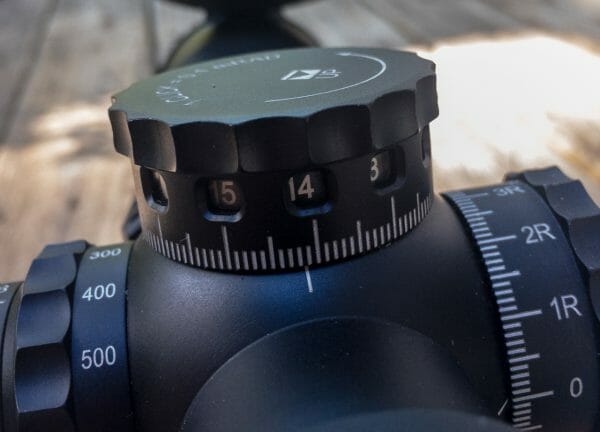
Depending on your optic, there may be some redundancy between the turret and the reticle. While traditional hunting scopes may have a single crosshair, your long-range ready optics will likely have a complex set of windage and elevation graduations.
Part of the decision as to whether to hold over with the reticle or use turret adjustments depends on how much time you have. If you have time before a shot, using the turrets for elevation adjustments to account for bullet drop and the reticle to account for windage and moving targets is a great approach.
That allows you to forget about the drop and focus on reading the wind or establishing the correct windage lead adjustment. The related benefit is that wind changes rapidly, so by the time you make a windage turret adjustment, you might have to do it all over again.
So, What to Buy?
If you want flexibility and precision, stick with a graduated reticle with standard and consistent milliradian or minute of angle marks.
For simplicity, make sure that the reticle pattern matches the click adjustments – mil to mil and MOA to MOA. Which system is entirely a matter of personal preference, as is the complexity of the reticle.
Some, like the Horus TReMoR3 reticle, look amazingly complicated, but they’re not as intimidating as they appear. The purpose of such reticles with an upside down Christmas tree of marks is merely a visual tool that allows fast holdover adjustment for both windage and elevation at the same time. It’s all about options.
About
Tom McHale is the author of the Practical Guides book series that guides new and experienced shooters alike in a fun, approachable, and practical way. His books are available in print and eBook format on Amazon. You can also find him on Facebook, Twitter, Instagram, and Pinterest.


Recently, a buddy called me and asked if I would check out his Ruger 10/22. It was “jamming,” as he described it. That seemed strange because 10/22s are famous for being reliable.
When he brought it over, the problem was obvious: The rifle had not been cleaned in a long time—perhaps ever. My buddy is far from being a gun guy.
A firearm means no more to him than a hammer does to a carpenter. He needs it to dispatch vermin around his place or put meat on the table, but maintaining it is a concept vacant from his wheelhouse.
When he brought it over, the problem was obvious: The rifle had not been cleaned in a long time—perhaps ever. My buddy is far from being a gun guy.
A firearm means no more to him than a hammer does to a carpenter. He needs it to dispatch vermin around his place or put meat on the table, but maintaining it is a concept vacant from his wheelhouse.

Today’s shooters—as have most for more than a century—are in love with rimfire firearms, except for this buddy. They are relatively quiet, have little to no recoil, are quite accurate and relatively cheap to shoot.
Each year, well more than a million rimfire cartridges are expended. With the many rounds sent downrange, problems are bound to occur.
Whether you are a plinker, a small-game hunter or sophisticated target shooter, keeping your firearm running is a top priority—or it should be. Here are a few tips on keeping your rimfire gun running.
Cleanliness is next to Godliness
That may seem to be an antiquated idea, but it is a fact that clean gunsfunction more reliably than dirty guns. However, as blasphemous as it may seem, too much cleanliness can shorten the life of your firearm. Let me explain.
There is a notion held over from the past that guns and gun barrels must be scrupulously cleaned after every shooting session. In the days of blackpowder and corrosive primers, that was a truism.
Even today, black powder shooters are wise to clean their firearms after a shooting session. The residue from combusted blackpowder is hydrophilic, meaning that it attracts water and in the case of the black powder residue, it can literally suck it out of the air.
The same is true for shooting cartridges loaded with corrosive primers. The residue left behind from those primers are salts—mostly potassium chloride—and they attract moisture, thus setting up an environment for corrosion in the barrel.
This is why so many barrels from older guns are pitted to some extent. Today, however, modern primers and powders are generally non-corrosive, unless you are in a very humid climate.
A lot of shooters have discovered that their favorite gun does not require a thorough cleaning each time it is used. Modern barrels—most are made from 4140 chrome-moly for blued barrels; stainless steel for others—can maintain their accuracy for several hundred rounds without cleaning.
Cleaning, if not done properly, can actually accelerate the wear on a barrel, thus stealing some life from it. The smaller the bore, the more likely it is to do damage to the barrel. Since most rimfires are smaller bores—.22 and .17 cal.—over-cleaning the bore can be a real issue.
The risk comes from cleaning rods that can flex and thereby scrape the internal surface of the barrel. Using eyes instead of a properly fitted jag and worn brushes that use twisted steel to retain the bronze bristles combined with a zealous arm behind it has worn out many a barrel.
Consequently, many shooters do not clean their barrels until they see a decay in accuracy.
Those who live or shoot in humid environments will probably need to clean their barrels more often than those in dryer climes. The residue from shooting can have microscopic fissures in it so that the effects of humidity are enhanced.
Their barrel-cleaning schedule will be determined by trial and error. If you shoot and then wait a week to clean, and see evidence of rust on the cleaning patches, then a more rigorous schedule must be worked out.
But there’s more
Of course, there is more to gun cleaning than just the barrel. The breech section of the gun is subject to fouling as well, and this can be critical to keeping the gun functioning.
Rimfire ammunition is notoriously filthy. It leaves behind a lot of crud. Don’t believe me? Take a piece of cardstock and place it within 6″ of the muzzle. Fire the gun and notice all the crud around the bullet hole.
Some of that crud doesn’t get blown out of the barrel, so guess where it collects—in the receiver, along with the operational components. That area needs more regular attention, whether it is a break-open single shot or a fast-firing semi-automatic.
Shooters all have their preferred method of dealing with this fouling, and the details may vary a bit. My preferred method is to spray the hell out of the fouled area with brake cleaner, a product available at most automobile service stores.
Brake cleaner is a solvent under a bit more pressure than most aerosol cans that easily loosens the fouling and blows most of it out of the gun. This means that cleaning the gun on your kitchen table—at least this part of the cleaning—won’t be welcome by anyone else sharing that table for dining.
Take it outside, and be sure to use goggles or a face shield to protect your eyes. Don’t ask me how I know this, but I can assure you that you do not want to find out why first hand.
*One more caveat: Be careful about using brake cleaner with plastic—the current buzzword is “composite”—parts.
The solvent may attack some composites and either pit them or dissolve them. If your gun has plastic in or around the breech, you will have to use traditional solvents and rags unless you have a source of compressed air.
Slip sliding away
Another old-school saw says that lubricating a firearm is not necessary unless you live in a humid environment. This is a holdover from the days of petroleum-based lubricants that were viscous and low in volatility. The worry was that the lubricant would attract dust and grime from the outside and foul-up the gun.
Again modern technology has come to the rescue. Too, an increase in knowledge, hence maintenance practices, has pretty well negated this argument.
Fact is, components that slide together to make something—in the case guns—operate correctly requires some lubrication. There are generally two schools of thought regarding lubrication.
The lazy, “I got no time for fancy stuff,” group takes a spray can of whatever is claimed as gun oil and sprays everything until it is dripping, then puts the gun away. There is, however, a better way.

Many gun oils are available in a squeeze bottle with a rotating delivery tip. It doesn’t take that much more time to carefully apply a drop or two—sometimes more, depending on the individual firearm—and gently wipe off the excess with a rag.
Not only do you not have to deal with the gun leaking the stuff everywhere, but you don’t leave excess lubricant in some place on the gun that would attract dust and grime, negating its reliability.
It does not necessarily mean dismantling the firearm; most of the time it can be done with the gun assembled. In rare cases where lubricant must be sort of surgically inserted, an old hypodermic syringe is handy. A Q-tip, a.k.a. cotton swab, for cleaning, as well as lubrication, is also a handy item in your gun maintenance kit.
The spray can is not a complete no-no. I usually have a can with me at my range or a competition for emergency cleaning and lubrication when there is not an opportunity to tear into a gun.
Sometimes just spraying the gun’s action, shaking out and wiping off the excess can mean the ability to stay out at the range or complete the match.
Now here’s a tip not often publicized: Lubricating your ammo can go a long way toward keeping your rimfire running. But before you go and dip your ammo in a can of oil, let me explain.
You must be very careful about lubricants that touch your ammunition. Many fine gun lubricants have the ability to creep into every nook and cranny.
This can be a good thing when working on your gun, but if it creeps into a cartridge, it can cause the cartridge not to fire.
There are, however, dry lubricants that when carefully applied can enhance the reliability of your rimfire. This mostly applies to semi-automatics, but I now try to lube all my rimfire ammo. Here’s the safe way to do it: 
You’ll need a cloth—I use an old silicone gun cloth that I keep in a zip-lock bag just for this purpose—a can of dry silicone lubricant and ammo that is already clean.
By clean, I mean that old, cruddy ammo kept in a box or jar won’t work. Fresh ammo in its original packaging is what you should be using. Lay the cloth out on a suitable surface and spray it with the dry lube.
This is important: Wait until it dries. Place a given amount—I usually grab a good handful of ammo, say, 50 rounds—onto the cloth.
Carefully bring up the edges until it resembles a loose pouch. Shake and roll the ammo around the cloth to ensure each cartridge gets lubed. You can either put these rounds back in the box for use or load up a magazine(s) directly from the cloth. It is surprising how effective this is in slicking up the feeding and extraction of your gun.
A dry silicone lube is the best. The reason you wait until it dries on the cloth is to ensure the lube cannot creep into the cartridge.
Another good use for dry lube is your magazines. Especially with blowback semi-automatics, the area around the top of the magazine can get caked in crud. And again a caveat: Be careful when using aggressive solvents like brake cleaner with plastic magazines.
You might spray a bit of it on a rag, and test it on a non-critical and unobtrusive part of the magazine. The same is true with dry lube. Make sure the solvent isn’t going to screw up your plastic magazine.
I asked my buddy if his rifle was still accurate. “How the hell would I know?” he replied, “It still hits rabbits.” So I left the barrel alone. I removed the action from the stock and sprayed the receiver liberally with brake cleaner.
While it was dripping, I hit it with a few blasts from my air hose. Then I hit the areas where the bolt rides in the receiver with a few drops of Ballistol. I also cleaned up the magazine and hit it with some dry lube.
Bingo! The rifle was running as good as new again. Total time: about 10 minutes.
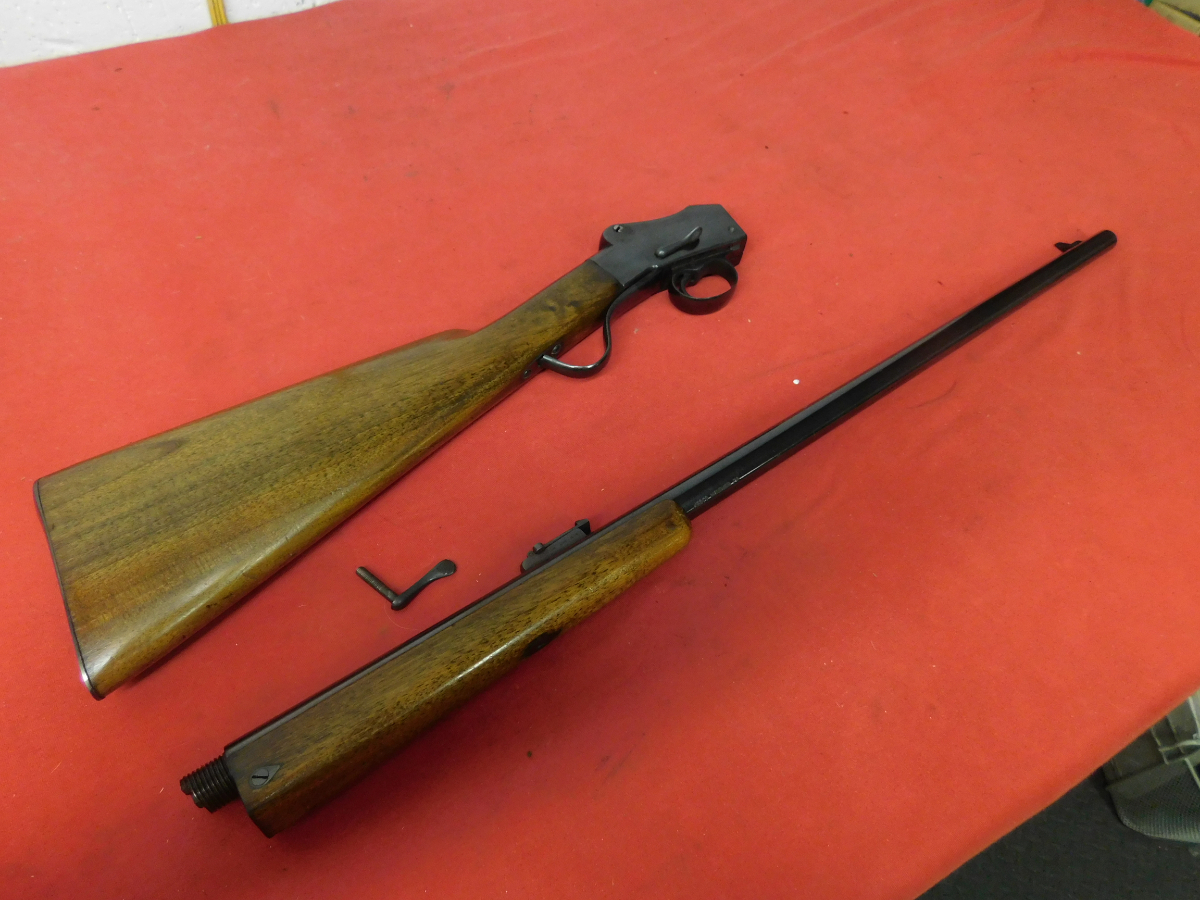
What I think would make for a great rifle to have in the field. As one could break it down and then put in your rucksack. To then act as a have around as a “keep out of sight camp rifle”.
Which could be used as a way to fill the pot with fresh meat. Or if need be, to be a really nasty surprise. To those who mean you harm in the field.
Grumpy


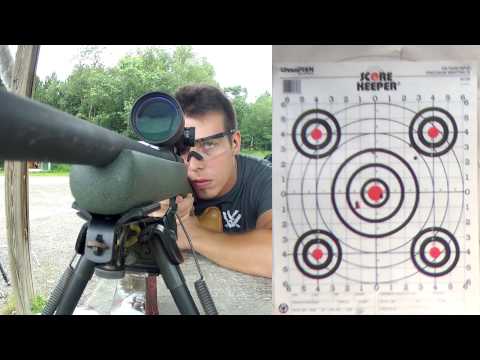
Some of you have noticed the Remington 870 SBS (short-barreled shotgun) that’s made some appearances in our defensive shotgun series over the last few weeks. Honestly, the shotgun isn’t all that remarkable aside from the NFA-length barrel.
Internally, it’s just like the millions of other 870s out there, and I’ve equipped it with some pretty mundane, albeit useful parts to make it more suitable for home defense.
But a lot of our readers and viewers have been asking questions about the 14-inch barrel and whether it’s something I would recommend, so that’s the topic of today’s video:
Video Review: Remington 870 SBS
I wasn’t planning to review this gun, but since I’ve been using it in the last few videos, you guys have been asking a lot of questions about it, so today I’m going to deliver some answers.
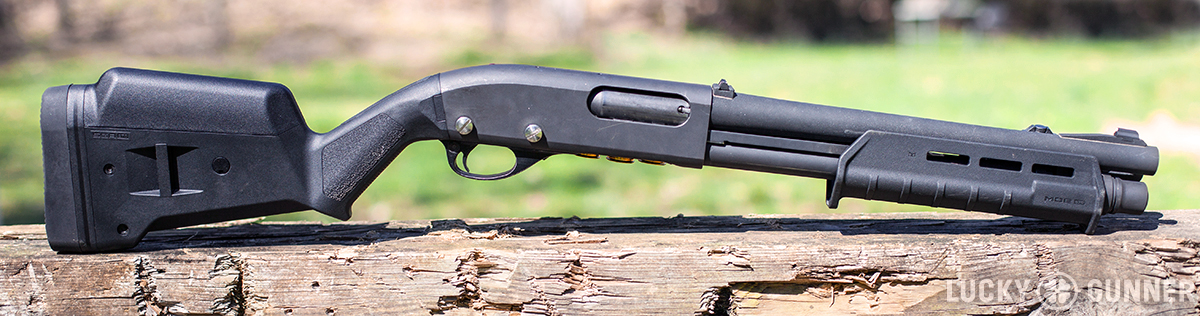
This is my Remington 870 12 gauge short barreled shotgun. It started out as a cheap surplus police shotgun that I bought with no barrel. If you look closely, you can tell that it’s pretty well used, but it’s in great mechanical condition.
I replaced the stock with a Magpul SGA stock. I’ve removed all of the spacers in order to get the length of pull as short as possible and I’ve added one of the Magpul cheek risers to raise the comb height.
The forend is also from Magpul. It’s actually not my favorite design — I’m not crazy about this lip here in the back, but I like that it’s really easy to attach a light.
You can put a piece of rail on any of these slots on the forend and attach whatever light you want. I’ve got this Inforce WMLX attached here, which works pretty well with the way I normally grip the forend.
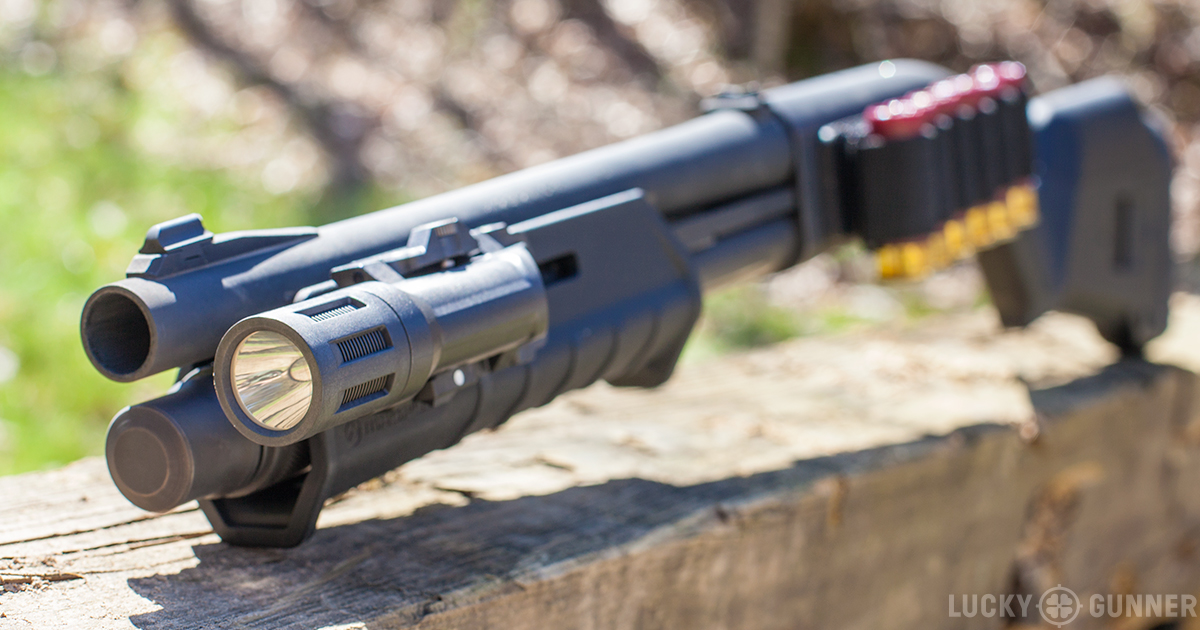
The mag tube extension is the only accessory I kept that was on the shotgun when I bought it. It’s a Vang Comp Systems +1 extension, so I can get a total of five rounds in the tube.
The side saddle is also from Vang Comp. It’s a plate with Velcro on it that attaches with screws through the receiver. These Velcro-backed cards with the elastic loops just stick right to the plate.
The barrel is actually a Remington factory 14-inch barrel with a fixed modified choke. Remington doesn’t typically sell these to the general market, but you can sometimes find them on the auction sites.
I got this one for a little under $200. It came with XS express sights pre-installed — they’ve got a v-notch rear and a big white dot on the front. I’m not a big fan of the XS sights on handguns, but I really like them for this shotgun. I’ve found them to be a lot quicker to use than a ghost ring and more accurate than a bead sight.
The Remington 870 is probably the easiest platform to start with for a short barreled shotgun, because it doesn’t require any custom work and the factory barrels aren’t too hard to come by.
Because this shotgun has a barrel under 18-inches, it does fall under the National Firearms Act regulations. That basically means I had to pay a $200 tax and do a bunch of paperwork and wait a few months for Uncle Sam to process all that before I could legally install this barrel.
If you want to know more about how the whole NFA thing works, I’ll put a link to more information in the video description.
But I think the more pressing question a lot of you have is whether I think the short barrel is worth the extra $200. That’s going to depend a lot on your individual situation, but I do think it’s got some pretty compelling advantages.
I like the way the gun balances better versus a typical 18 inch barrel. It’s not a drastic difference, but it’s noticeable. It also doesn’t sacrifice much in terms of shot spread. I can easily keep all the pellets inside the vital zone of a target at 15 yards with Federal Flite Control 00 buckshot.
Most importantly though, the short barrel on the Remington 870 SBS is a lot more maneuverable inside a house.
I’ve done some dry practice at home and at the range with some obstacles set up and I was surprised at just how much easier it is to get around furniture and doors and that kind of thing.
I’m not suggesting anyone try to go hunt bad guys and clear their own house alone. But even just staying put in one room, the shorter barrel is easier to work with and for me, it also makes the gun a little quicker retrieve from where I have it stored.
There are some disadvantages to the short barreled shotgun. It’s got a shorter magazine tube than you can get with a longer barrel, and that means you have one or two fewer rounds of ammo capacity.
More ammo is certainly a good thing, but I’ve explained before why capacity is not nearly as critical with a shotgun as with a handgun or a carbine.
The purpose of using a shotgun to solve a problem is precisely because historically, they haven’t required multiple hits to stop a threat.
To paraphrase Tom Givens, if you’ve got five rounds in a shotgun, then you’ve got a “five bad guy gun.” And personally, I’m pretty happy with that.
Capacity is not the only perceived disadvantage. The short barrel may not be as PR friendly as a more typical shotgun and that might be a big deal for some people. You also have to fill out paperwork and get permission from the ATF any time you want to take a short barreled shotgun across state lines, which is kind of a pain if you travel a lot.
Overall, for me personally, I think the benefits of the 14-inch barrel outweigh the potential disadvantages but it’s not what I’d call an essential modification.
If you’ve already got a decent shotgun with an 18 or 20-inch barrel, your money is probably better spent on a few cases of ammo and a good training class.
But if you’ve still got some room in the budget after that, I do think the short barrel makes the shotgun more convenient to use and might be worth considering.
—