
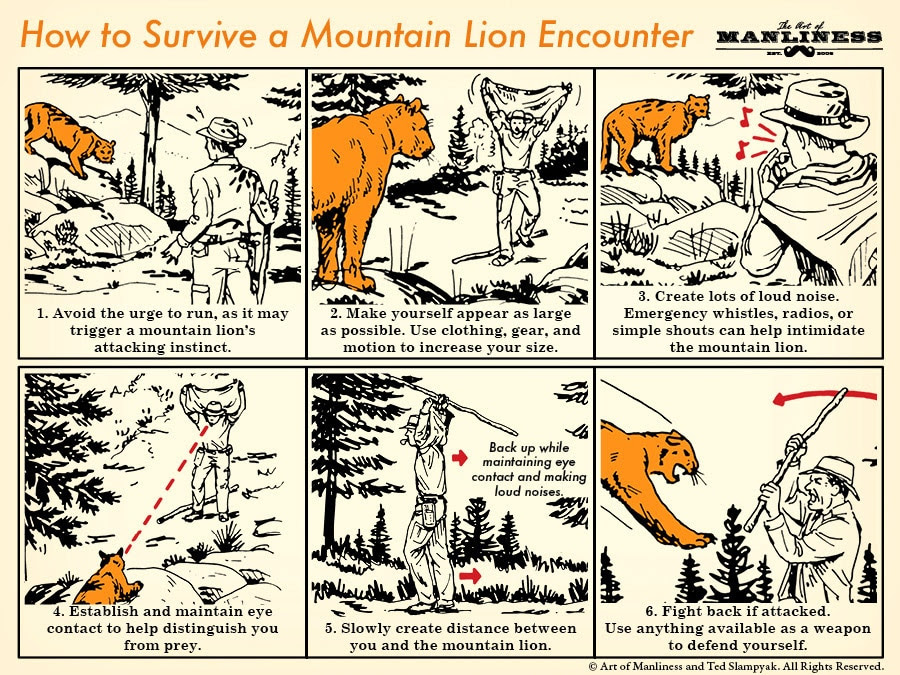
Spotting large predators in the wild is a thrill for any hiker or outdoorsmen, but coming face-to-face with a 220-pound cat can turn a walk in the woods into a fight for your life. Also known as cougars in some parts of the country, mountain lions tend to attack when cornered, or when they believe you might be a reasonable piece of prey. The key to avoiding a deadly encounter on the trail starts with a calm reaction.
Like this illustrated guide? Then you’re going to love our book The Illustrated Art of Manliness! Pick up a copy on Amazon.
Illustrated by Ted Slampyak
Categories
French Pistols
|
Le Français Pistols by Ed Buffaloe
The French town of Saint-Étienne was a well known center for textiles from the 11th century and of arms manufacturing from the 16th century.
In 1893 the company began to manufacture a palm pistol known originally as Le Mitrailleuse (usually translated as “machine gun”), but which was renamed to Le Gaulois within a year or two.
In 1912 Etienne Mimard began to design a new self-loading pistol. His pistol, unlike most others of the period, owed nothing to John M. Browning’s designs, but was quite original.
Le Français has a very unusual recoil spring design. The spring itself is positioned vertically in front of the magazine well.
The magazine is held in place by two short wings that extend laterally from the floor plate, which fit into notches in the bottom of the grip.
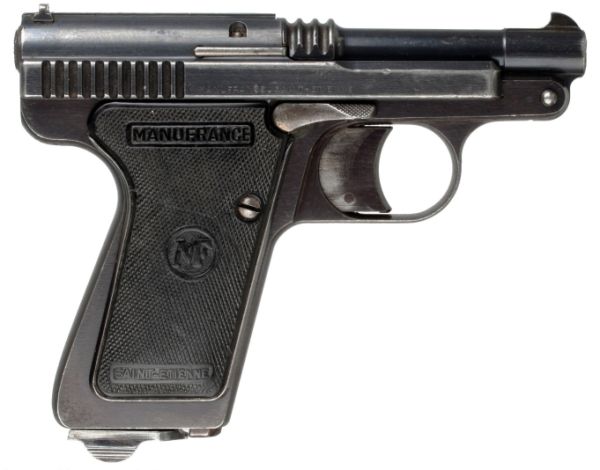
The 6.35mm poche or pocket model was the original Le Français design, introduced in 1914, with a 60mm (2.36 inch) barrel. With an overall length of 112mm (4.4 inch), it is easily concealable in pocket or purse. “ LE FRANCAIS “ CAL 6.35 BREVETE S.G.D.G. On either side of the above inscription are two trademarks. On the left are two crossed cannons and an arrow pointing downward, with an M on the left and an F on the right. To the right of the inscription is a circle with MFin the center and SAINT curving above and ETIENNE curving below it. MANUFACTURE FRANCAISE D’ARMES ET CYCLES DE SAINT ETIENNE Late pistols are unmarked on the left side of the slide.
Early Le Francais models have a grip frame with parallel sides and a magazine that is held in place by two short wings that fit into notches in the bottom of the frame (as described above). Intermediate models have a grip frame that is flared at the bottom rear, but still retains the floorplate magazine catch. Late models have the flared grip frame with a thumb-operated magazine release at the heel of the grip. The flared grip frame was almost certainly designed to accommodate the pin for the magazine release lever. In 1939 a number 812 extra light model (modèle extra-léger) was introduced with an aluminum alloy frame. The barrel, barrel latch, slide, trigger guard and magazine release were chromed steel. The grips were mother of pearl. The extra light model weighed 245 grams (the standard model weighed 320 grams). There was also a model number 811 with a fluted barrel, “lightning” cuts on the top of the slide, and mother-of-pearl grip plates. Production was halted by the war, so these models are extremely scarce. In 1965 four cooling fins were added to the breech of the Modèle de Poche. The plug in the end of the breech was enlarged slightly, but still retained the hole for the firing pin. The magazine was provided with a ring at the base to hold a spare cartridge to go in the chamber (like the type Armée–see below). The Poche with these features only appeared in the catalogue for two years.
In 1922 the 6.35mm type Policeman model was introduced. It had the identical frame and magazine as the Le Français, but featured a longer 87mm (3.42 inches) barrel, and had an overall length of 157mm (6.18 inches). The longer barrel made it slightly less concealable, but capable of greater accuracy . The plug over the end of the breech screwed in, rather than having bayonette lugs, and covered the firing pin completely, preventing the entry of dirt and lint. The rear sight on the Policeman, secured by a screw, doubles as a spring which engages notches in the breech plug to hold it in place so it does not come unscrewed.The Type Policeman was offered in four grades, similar to those for the pocket model. Originally these were Numbers 5, 6, 7, and 8, but later on model numbers were assigned: 826, standard model; 832, improved model; 838, deluxe model; and 844, grand deluxe model. “ LE FRANCAIS “ TYPE POLICEMAN CAL 6.35 BREVETE S.G.D.G. The right side of the slide is marked like the Poche model, as described above. In 1934 the magazine was provided with a ring at the base to hold a spare cartridge (like the type Armée–see below). Since there were no gripping surfaces on the slide, and a cartridge could only be inserted into the chamber manually, there was always a spare cartridge available with the magazine. In 1965 four fins were added to the breech. The type Policeman was produced until 1968. It was carried by some members of the National Forestry Service, though it was probably never used by police. Cadiou and Richard state incorrectly that the type Policeman was available in 7.65mm. The Type Policeman was serialized in the same range as the Modèle de Poche.
The 6.35mm Champion was a target model that appeared in the Manufrance catalogue from 1926 to 1934 as the No. 10. It’s frame and magazine were identical to those in the earlier two models, but the Champion was equipped with a long 150mm (5.9 inch) barrel with precision rifling. A grip extension was provided to better fill the hand for target shooting–it did not increase the magazine capacity. The front sight was dovetailed into the barrel, and so could be adjusted for windage. The rear sight was screw adjustable for elevation. The long sight radius was said to provide excellent accuracy.The firing pin on the Champion was longer and heavier than on the other models, but came with a lighter spring. In addition, the firing pin was grooved so it could be pulled back manually, cocking the action. This allowed for firing in a single-action mode. The greater mass of the firing pin provided sufficient inertia to ignite primers, but the light spring and single-action trigger allowed for a smooth, light trigger pull. The screw-in plug at the rear of the Champion was even more elongated than that of the Policeman, and was drilled at the rear to allow the firing pin to protrude through it.
After World War I, the French General Staff set about upgrading their military weapons across the board. By the mid-1920s all major weapons manufacturers in France were working on pistol designs to submit for testing. The Le Français type Armée, chambered for the 9mm Browning Long cartridge, was Manufrance’s submission for a military pistol. It was tested extensively between late 1928 and early 1933, but was not well received. A number of minor problems were encountered, but probably the major objections to the gun were that it was blowback operated, had no extractor, and was double-action only. According to Huon, some documents specify a reduced load for the cartridge–and the 9mm Browning long was already considered marginal. Huon characterizes the type Armée as, like all the Le Français pistols, essentially a defensive weapon and hence fundamentally unsuitable for military use.The Type Armée had to have a redesigned frame, which was considerably larger than any previously made, and featured a flared grip strap for greater comfort in the hand. Huon gives the barrel length as 83mm (3.27 inches), but this is a misprint. Doane gives the barrel length as 127mm or 5 inches. The overall length of the gun is 202mm (7.95 inches). Doane describes it as “the Type Policeman on steroids.”
There were no grip screws–the bottom of the steel backplate fitted into a slot in the bottom of the frame, and the grips were held in place at the top by the slide. The magazine held 8 rounds.The gun was first sold in 1928 and was given model number 12 (later 850) for the standard model, model number 14 (later 856) for the deluxe finish version, and model number 16 (later 862) for the ‘Grand Luxe’ version. TYPE ARMÉE The right side of the slide is marked in very tiny all-capital sans-serif characters: MANUFACTURE FRANCAISE D’ARMES ET CYCLES DE SAINT ETIENNE The word MANUFRANCE is stamped in a small oval on top of the slide.
The 7.65mm Le Français was the first and only Manufrance pistol to have slide serrations or an extractor. It was made on a larger frame than the Poche or the Policeman–somewhat similar to the Type Armée. The barrel was 83mm long (3.27 inches). Total length was 152mm (5.9 inches). The trigger guard was integral with the frame. The magazine held eight rounds, and featured a release button on its base that was pressed from left to right. There were three cooling fins on the barrel over the breech. The barrel is retained by a manually removable pin like the Type Armée, and is raised by a small coil spring just behind the pin. The front sight is integral with the barrel, whereas the rear sight is dovetailed into the slide. There is a lanyard ring at the base of the grip on the left side. Grip plates are of checkered black plastic with “MF” in a circle at the center, “Manufrance” at the top, and “Saint-Étienne” at the bottom.The left side of the slide is marked in all-capital sans-serif characters as follows: LE FRAICAIS_CAL. 7.65 The right side of the slide is marked in all-capital sans serif characters as follows: MANUFRANCE_SAINT-ETIENNE
The bottom of the barrel is marked BREVETE S.G.D.G. / CAL.7.65 with the two Manufrance trademarks described above on either side. The top of the slide is checkered and features the words LE FRANCAIS in an oval logo.The 7.65mm Le Français was possibly the best self-loading pistol ever made by Manufrance, but it came far too late to compete successfully with similar guns from other major manufacturers. Only just over 10,000 were made–production ended in 1965; however, the gun continued to be assembled from existing parts, and remained in the catalogue until 1969. This model was never exported, is rarely seen in the U.S., and sells at a premium not warranted by the quantity made but based entirely on its relative scarcity outside of France. The entire line of Le Français pistols was simple, well made, remarkably accurate, and–as the advertisements were careful to point out–always safe, but always ready. Their disadvantages were the lack of an extractor on most models, and a rather heavy double-action trigger. Additionally, the dual purpose spring that works the release lever and tensions the magazine is easily broken. J.B. Wood says this spring is easily made, but you must have the original to work from. Note: This article is based largely on Huon’s book Les Pistolets Automatiques Français, with some very good supplemental material from the other sources, particularly Stewart’s 1973 article, the 1931 Manufrance Catalogue, and finally an article by Colin Doane serialized in AutoMag, the news magazine of the National Automatic Pistol Collectors Association. Any errors are my own. |
||||||||||||||||||||||||||||||||||||||||||||||||||||||||||||||||||||||||||||||||||||||||||||||||||||||||||||||||||||||||||||||||||||||||||||||||||||||||||||||||||||||||||||||||||||||||||||||||||||||||||||||||||||||||||||||||||||||
|
Copyright 2009-2016 by Ed Buffaloe. All rights reserved. |
||||||||||||||||||||||||||||||||||||||||||||||||||||||||||||||||||||||||||||||||||||||||||||||||||||||||||||||||||||||||||||||||||||||||||||||||||||||||||||||||||||||||||||||||||||||||||||||||||||||||||||||||||||||||||||||||||||||
|
||||||||||||||||||||||||||||||||||||||||||||||||||||||||||||||||||||||||||||||||||||||||||||||||||||||||||||||||||||||||||||||||||||||||||||||||||||||||||||||||||||||||||||||||||||||||||||||||||||||||||||||||||||||||||||||||||||||


Categories
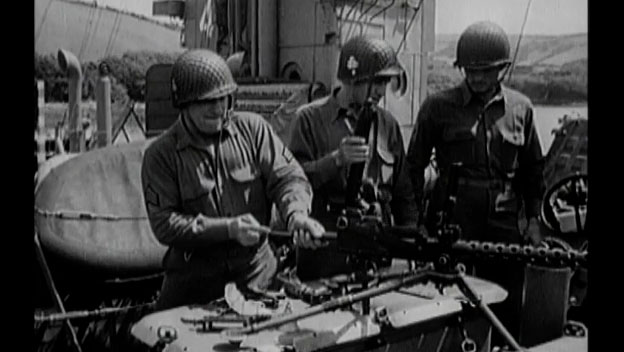
From the History Channel D Day Normandy 1944


Seventy Three years ago today, America and her sturdy Allies began the Liberation of Western Europe from the Horrors of the Nazi. It was one of the great things that helped furthered the Life & Liberty of all mankind.

D-DAY
 Play video
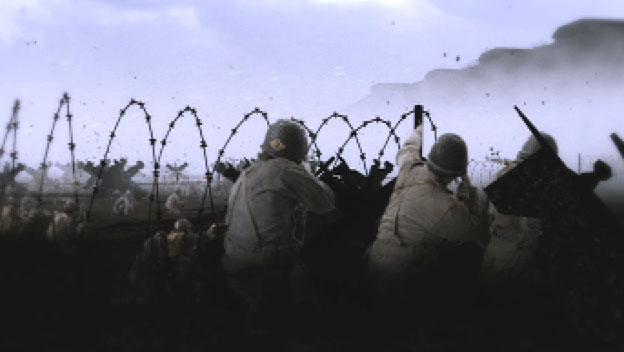
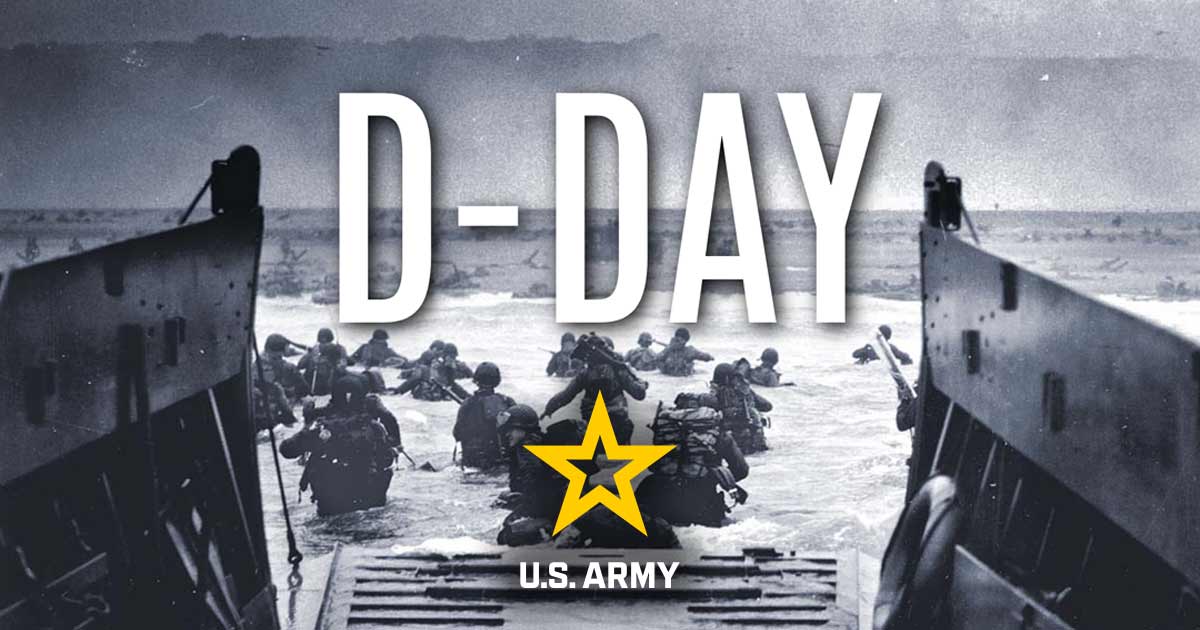
During World War II (1939-1945), the Battle of Normandy, which lasted from June 1944 to August 1944, resulted in the Allied liberation of Western Europe from Nazi Germany’s control.
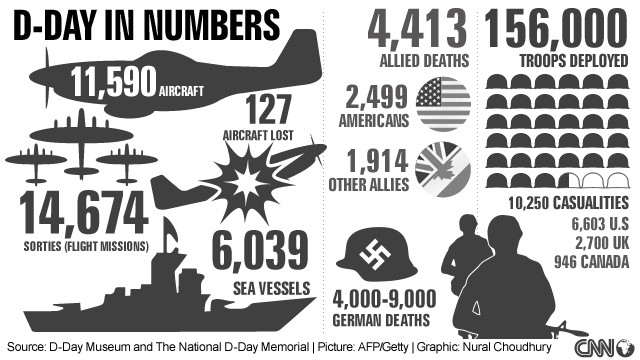
Codenamed Operation Overlord, the battle began on June 6, 1944, also known as D-Day, when some 156,000 American, British and Canadian forces landed on five beaches along a 50-mile stretch of the heavily fortified coast of France’s Normandy region.
The invasion was one of the largest amphibious military assaults in history and required extensive planning. Prior to D-Day, the Allies conducted a large-scale deception campaign designed to mislead the Germans about the intended invasion target.
By late August 1944, all of northern France had been liberated, and by the following spring the Allies had defeated the Germans. The Normandy landings have been called the beginning of the end of war in Europe.
PREPARING FOR D-DAY
After World War II began, Germany invaded and occupied northwestern France beginning in May 1940.
The Americans entered the war in December 1941, and by 1942 they and the British (who had been evacuated from the beaches of Dunkirk in May 1940 after being cut off by the Germans in the Battle of France) were considering the possibility of a major Allied invasion across the English Channel.
The following year, Allied plans for a cross-Channel invasion began to ramp up. In November 1943, Adolf Hitler (1889-1945), who was aware of the threat of an invasion along France’s northern coast, put Erwin Rommel(1891-1944) in charge of spearheading defense operations in the region, even though the Germans did not know exactly where the Allies would strike.
Hitler charged Rommel with finishing the Atlantic Wall, a 2,400-mile fortification of bunkers, landmines and beach and water obstacles.
In January 1944, General Dwight Eisenhower (1890-1969) was appointed commander of Operation Overlord. In the months and weeks before D-Day, the Allies carried out a massive deception operation intended to make the Germans think the main invasion target was Pas-de-Calais (the narrowest point between Britain and France) rather than Normandy.
In addition, they led the Germans to believe that Norway and other locations were also potential invasion targets. Many tactics was used to carry out the deception, including fake equipment; a phantom army commanded by George Patton and supposedly based in England, across from Pas-de-Calais; double agents; and fraudulent radio transmissions.
A WEATHER DELAY: JUNE 5, 1944
Eisenhower selected June 5, 1944, as the date for the invasion; however, bad weather on the days leading up to the operation caused it to be delayed for 24 hours.
On the morning of June 5, after his meteorologist predicted improved conditions for the following day, Eisenhower gave the go-ahead for Operation Overlord. He told the troops: “You are about to embark upon the Great Crusade, toward which we have striven these many months. The eyes of the world are upon you.”
Later that day, more than 5,000 ships and landing craft carrying troops and supplies left England for the trip across the Channel to France, while more than 11,000 aircraft were mobilized to provide air cover and support for the invasion.
D-DAY LANDINGS: JUNE 6, 1944
By dawn on June 6, thousands of paratroopers and glider troops were already on the ground behind enemy lines, securing bridges and exit roads. The amphibious invasions began at 6:30 a.m.
The British and Canadians overcame light opposition to capture beaches code named Gold, Juno and Sword, as did the Americans at Utah Beach. U.S. forces faced heavy resistance at Omaha Beach, where there were over 2,000 American casualties.
However, by day’s end, approximately 156,000 Allied troops had successfully stormed Normandy’s beaches.According to some estimates, more than 4,000 Allied troops lost their lives in the D-Day invasion, with thousands more wounded or missing.
Less than a week later, on June 11, the beaches were fully secured and over 326,000 troops, more than 50,000 vehicles and some 100,000 tons of equipment had landed at Normandy.
For their part, the Germans suffered from confusion in the ranks and the absence of celebrated commander Rommel, who was away on leave. At first, Hitler, believing the invasion was a feint designed to distract the Germans from a coming attack north of the Seine River, refused to release nearby divisions to join the counterattack.
Reinforcements had to be called from further afield, causing delays. He also hesitated in calling for armored divisions to help in the defense. Moreover, the Germans were hampered by effective Allied air support, which took out many key bridges and forced the Germans to take long detours, as well as efficient Allied naval support, which helped protect advancing Allied troops.
In the ensuing weeks, the Allies fought their way across the Normandy countryside in the face of determined German resistance, as well as a dense landscape of marshes and hedgerows.
By the end of June, the Allies had seized the vital port of Cherbourg, landed approximately 850,000 men and 150,000 vehicles in Normandy, and were poised to continue their march across France.
VICTORY IN NORMANDY
By the end of August 1944, the Allies had reached the Seine River, Paris was liberated and the Germans had been removed from northwestern France, effectively concluding the Battle of Normandy. The Allied forces then prepared to enter Germany, where they would meet up with Soviet troops moving in from the east.
The Normandy invasion began to turn the tide against the Nazis. A significant psychological blow, it also prevented Hitler from sending troops from France to build up his Eastern Front against the advancing Soviets. The following spring, on May 8, 1945, the Allies formally accepted the unconditional surrender of Nazi Germany. Hitler had committed suicide a week earlier, on April 30.
The Normandy invasion began to turn the tide against the Nazis. A significant psychological blow, it also prevented Hitler from sending troops from France to build up his Eastern Front against the advancing Soviets. The following spring, on May 8, 1945, the Allies formally accepted the unconditional surrender of Nazi Germany. Hitler had committed suicide a week earlier, on April 30.
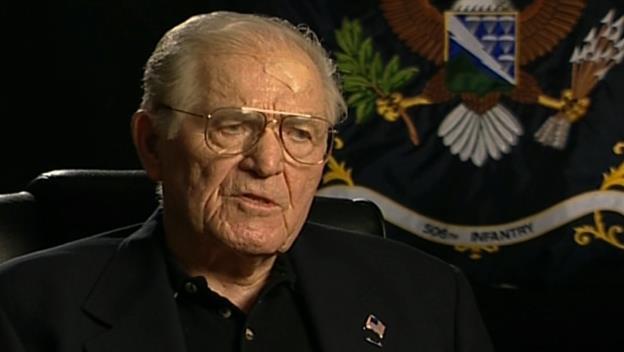
As far as I am concerned. Anybody that was there on that day was & is one Hell of a Man.
That & this should be posted outside of all of our Embassies as a subtle warning. I.E. Don’t Fuck with us or Else.
Categories
A NSFW Picture Dump
.jpg_thumbnail0.jpg)
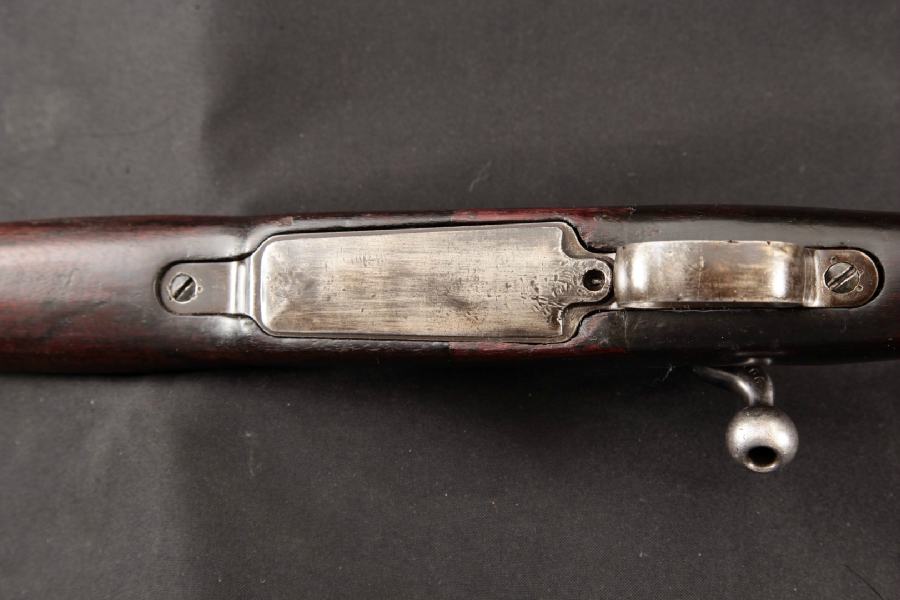
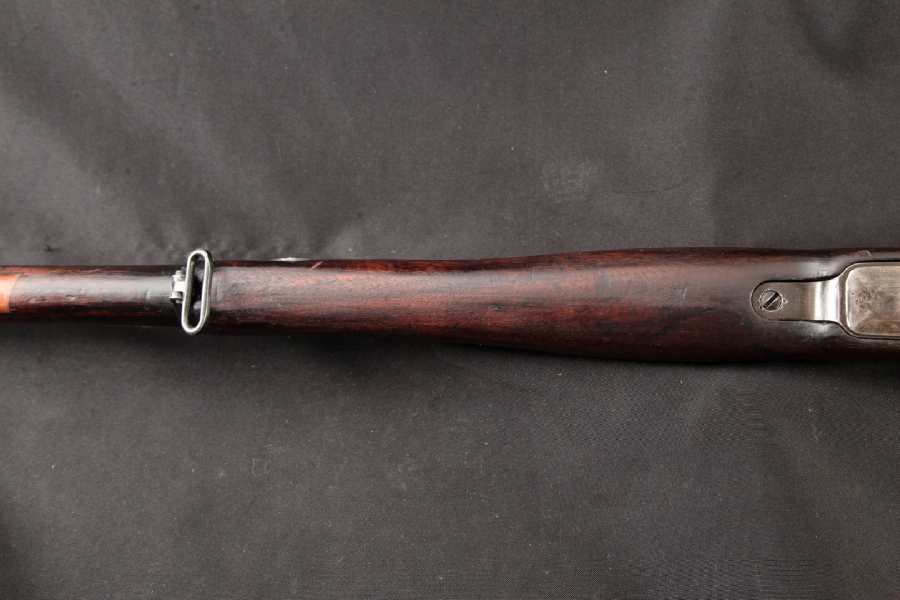
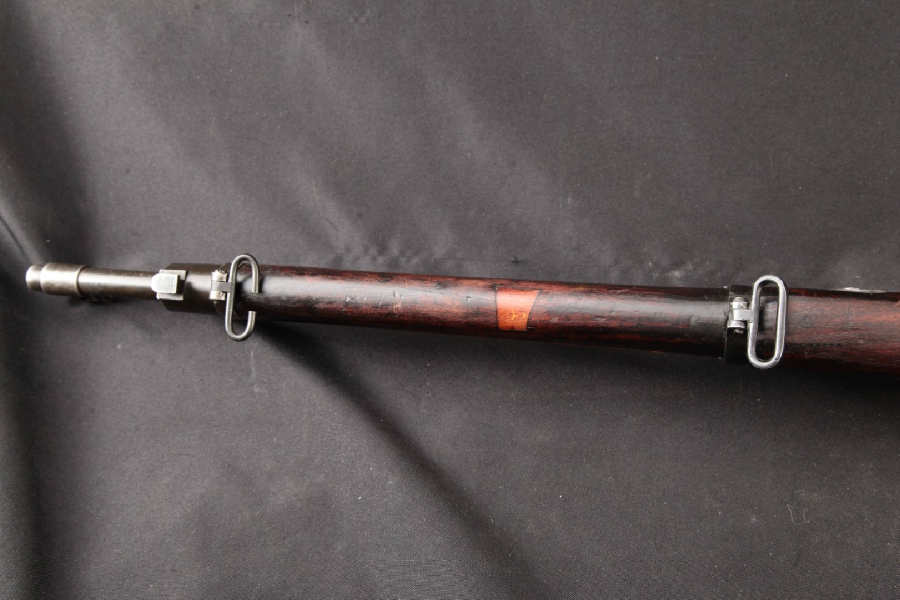
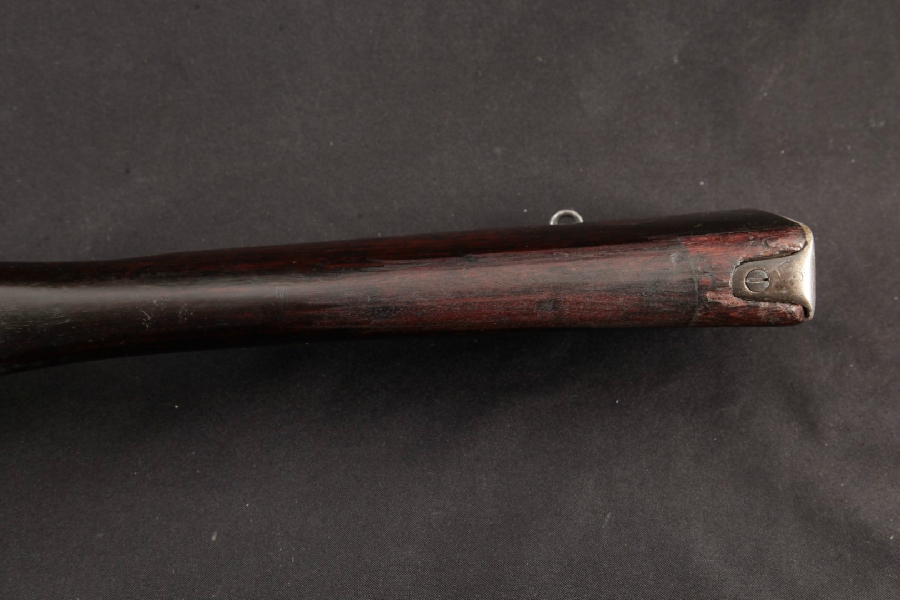
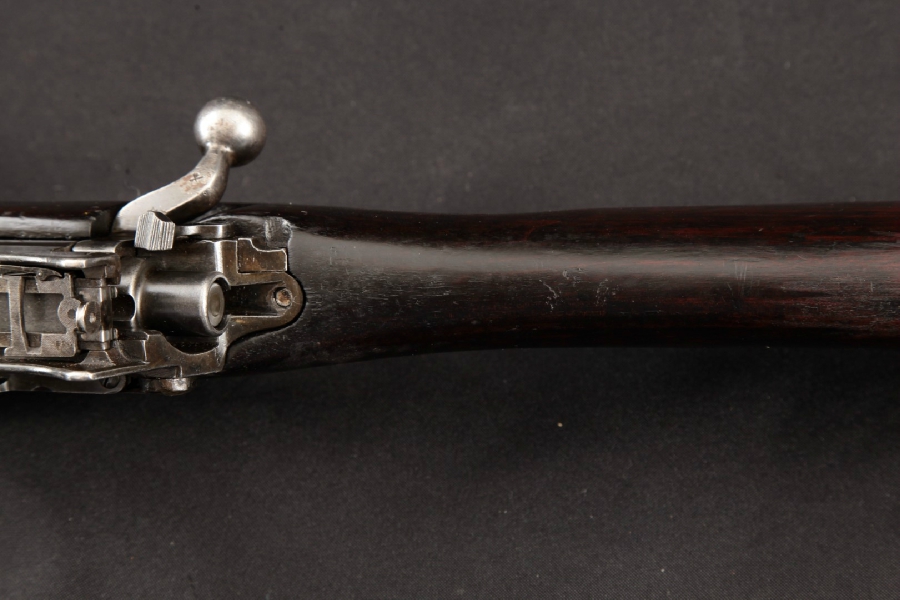

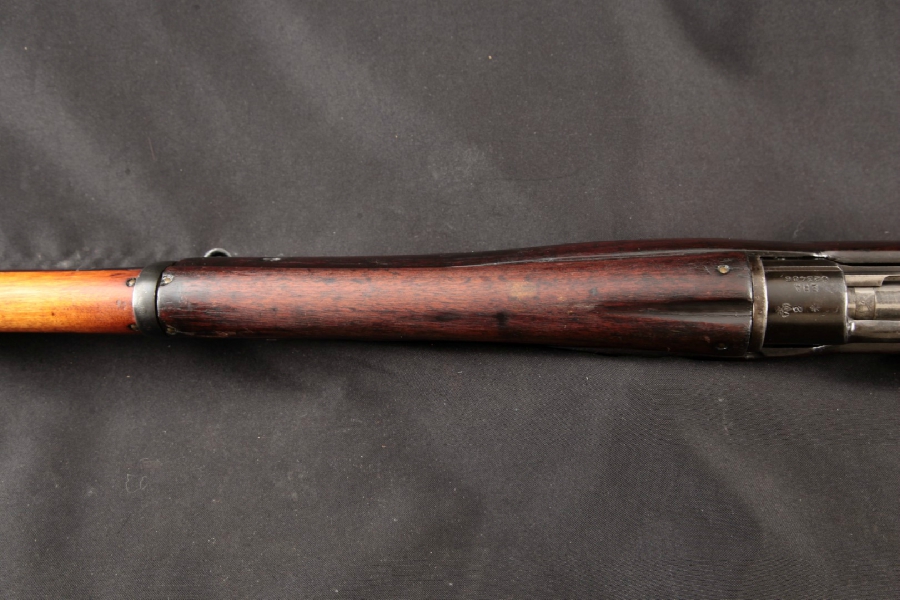
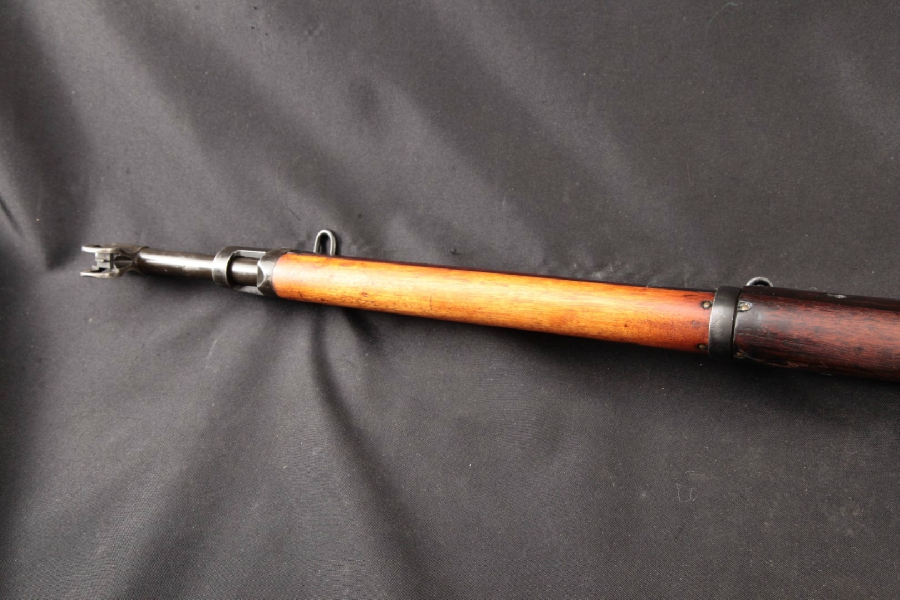
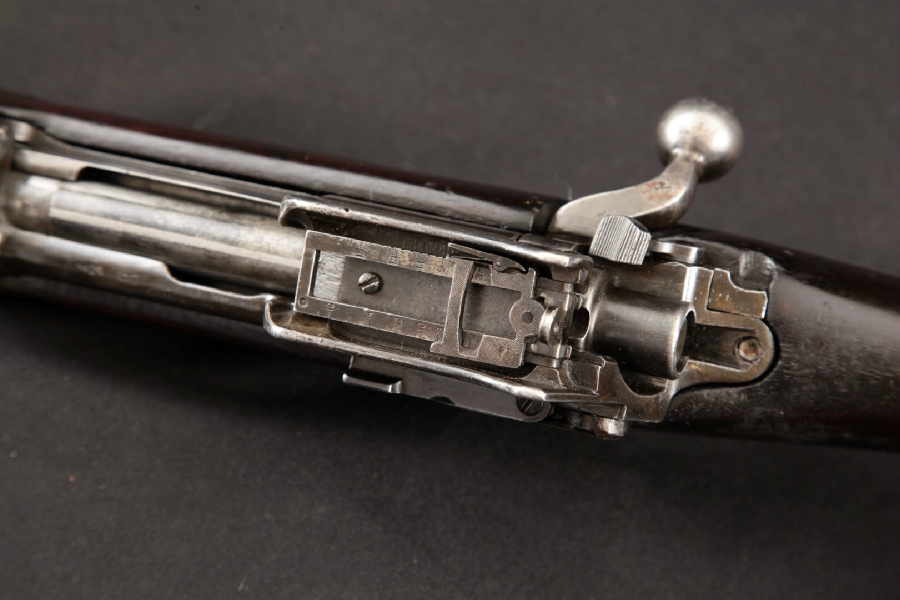
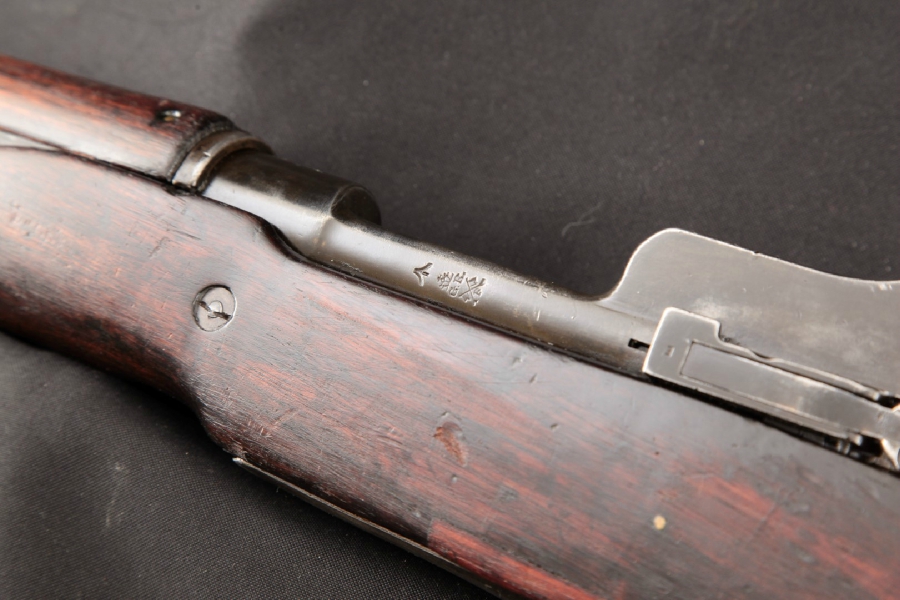
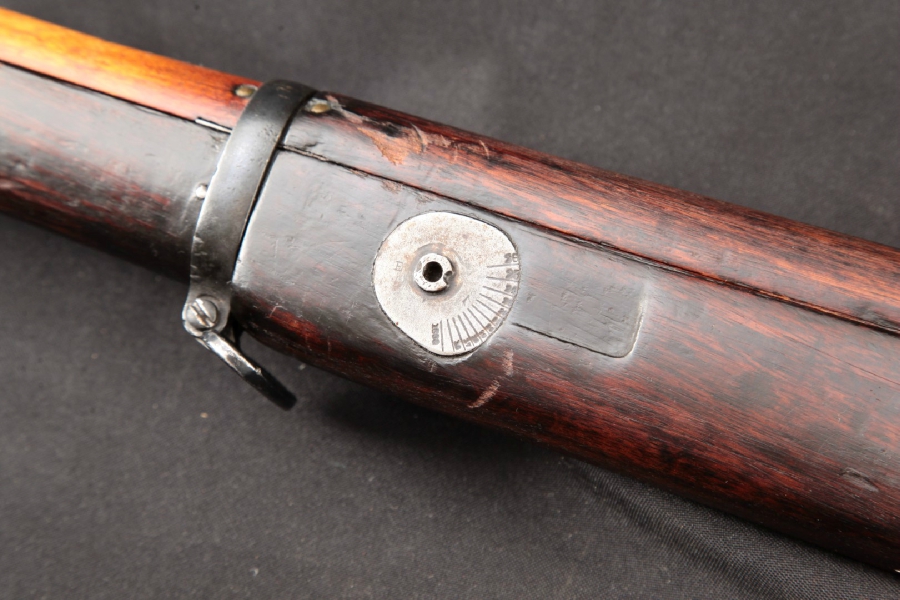
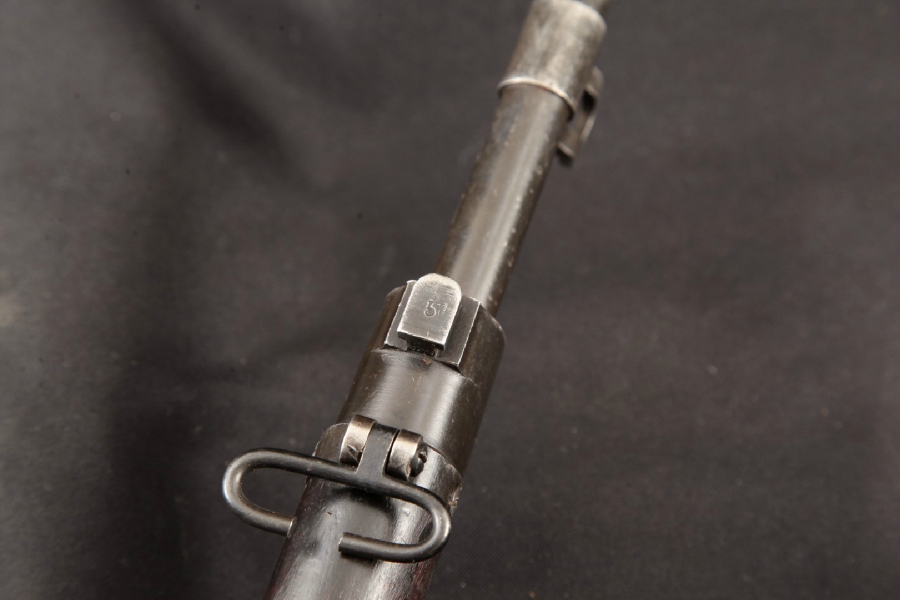
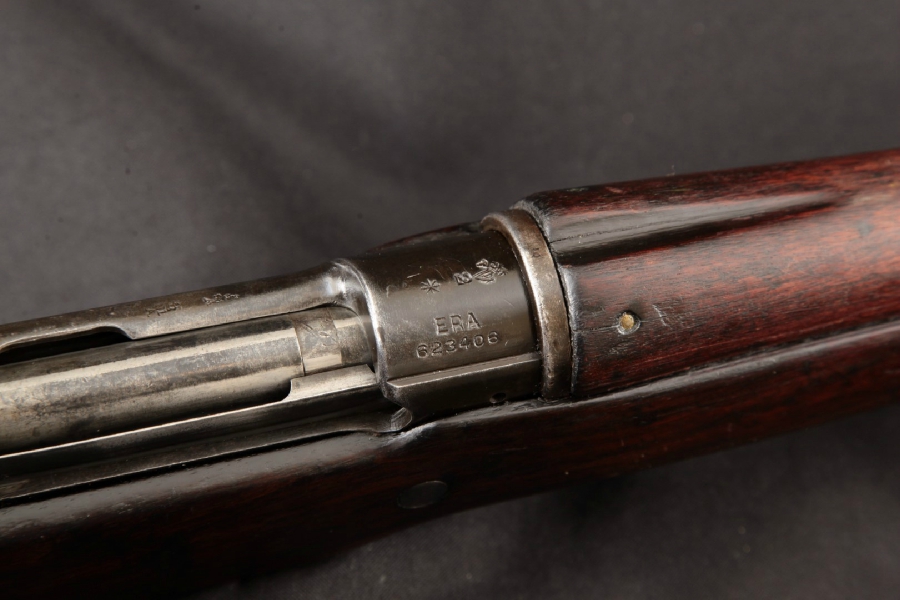
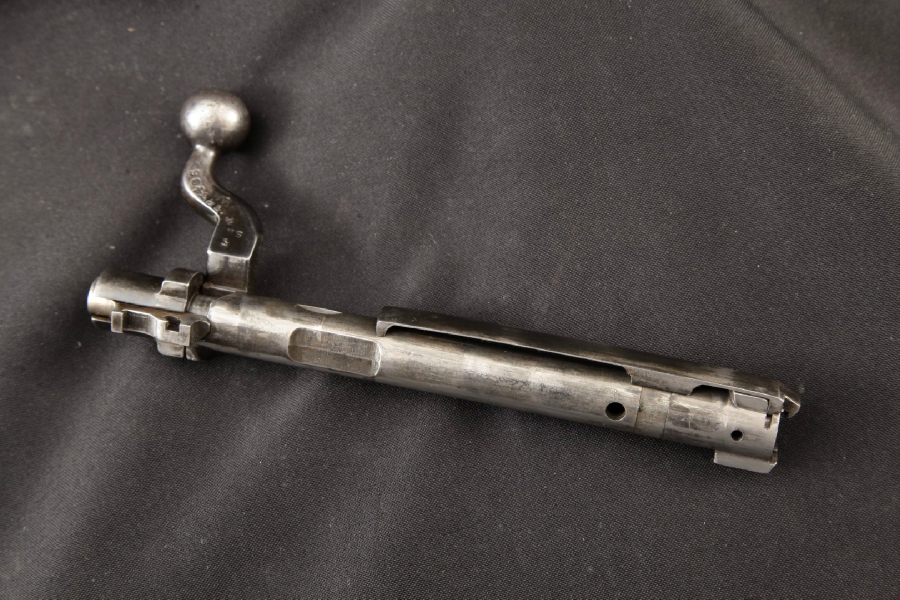
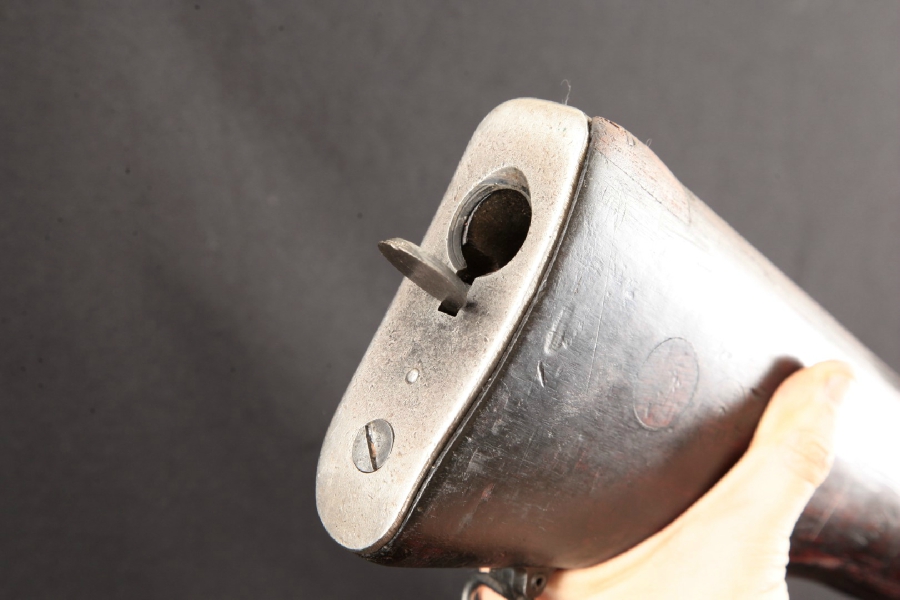
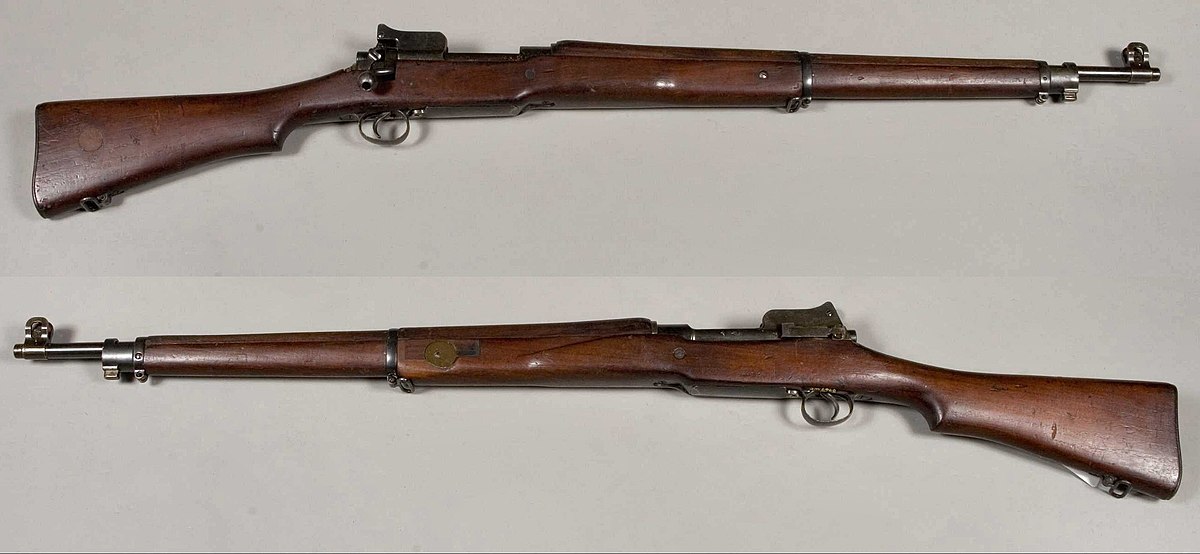
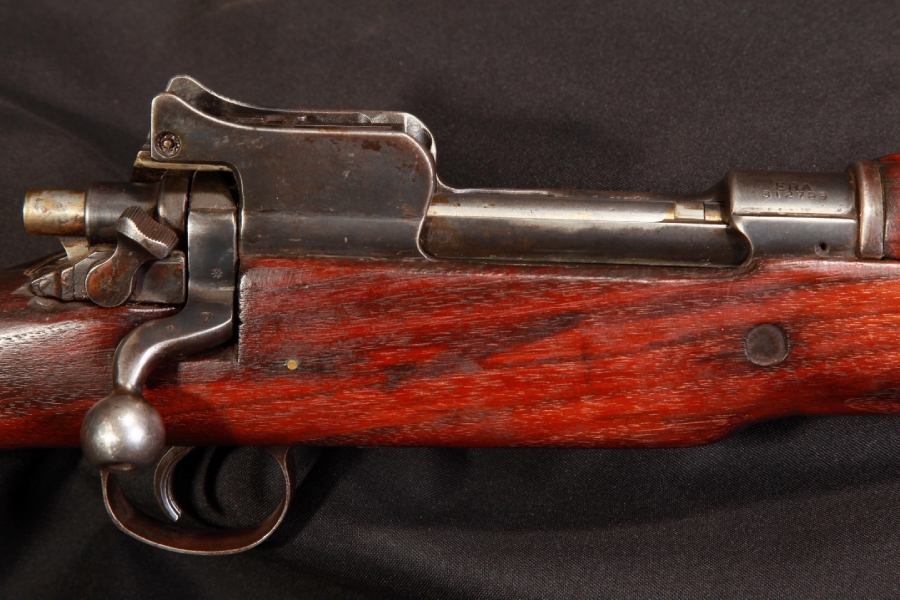
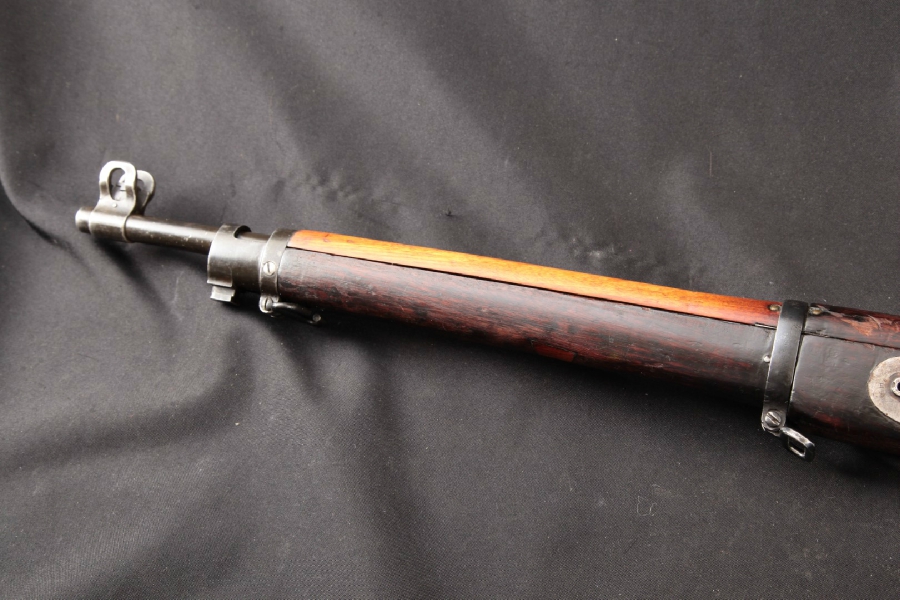
This Pattern 1914 rifle was made as a contract rifle for the British during World War I.
The primary contractor (Vickers) was unable to produce more than a handful of rifles, so the P14 became a de facto afterthought.
As the UK had an urgent need for rifles, and contracts for the new rifle were placed with arms companies in the United States. T
hey decided to ask these companies to produce the new rifle design in the old .303 caliber for convenience of supply. The new rifle was termed the “Pattern 14”.
In the case of the P14 rifle, Winchester and Remington were selected.
A third manufacturer, Eddystone Arsenal – a subsidiary of Remington – was tooled up at the Baldwin Locomotive Works in Eddystone, Pennsylvania. Thus, three variations of the P14 and M1917 exist, labeled “Winchester,” “Remington” and “Eddystone”.”
Canada’s long-running and unlikely Sherman obsession
Today the Canadian Army rocks some gently used (mainly former Dutch Army) Leopard 2A4+/2A4M/2A6M main battle tanks but their armored tradition goes way back. In the 1930s, the branch trained with early US M1917 tanks and Vickers MKVI light tanks then by 1941 was using MkIV Churchills.
In World War II, Canada actually rolled their own tanks, producing 1420 locally-built Valentines at the Canadian Pacific Railway’s Angus Shop in Montreal. While most of the V’s went to the Soviet Union for use on the Eastern Front, the Montreal Locomotive Works built a modified version of the M3 Lee medium tank as the Ram to equip Canuck units in Northern Africa early in the war.
In 1943, MLW switched from the Lee/Ram to the Sherman (called “Grizzly” in Canadian service), which included British radio gear, a 2-inch smoke mortar mounted on the turret and a cast hull as opposed to the more common welded-hull version.
The 1st Canadian Armoured Brigade was equipped with Grizzlies in time for the invasion of Sicily in July 1943.
In all, MLW made 188 Canuck Grizzlies while others were acquired from allies.
The novice Canadian Armored Corps in Italy caught hell from both the terrain and German PzKpfw IV’s when 36 Shermans from the Three Rivers Regiment (Tank), CASF (now the 12e Régiment blindé du Canada) took on the brunt of the veteran German 16th Panzer Corps near Termoli in one of the most epic armored engagements of Canadian military history.
The 2nd Canadian Armoured Brigade, and the 4th Canadian Armoured Division, training in Britain for Operation Overlord, had their Ram tanks swapped out with the new tank just before D-Day.
They also caught hell in Northwestern Europe.
A rare colorchrome of a Sherman V of the Canadian 29th Reconnaissance regiment (The South Alberta Regiment). The Tank was commanded by Major David Currie (VC), and the tank was named ‘Clanky’. This photo was taken in Normandy around Arromanches in July of 1944. Photo via TheShermanTank.com
A pair of burnt-out Canadian M4A2 Shermans of the 10th Armored Regiment (The Fort Garry Horse) at the foot of the church at Rots – June 1944
Some Grizzlies were converted into the Skink anti-aircraft tank with a turret mounting four 20 mm Polsten guns– a very effective anti-personnel and AAA platform.
“Tank AA, 20 mm Quad,” better known as the Skink was Canadian self-propelled anti-aircraft gun, developed in 1943-44 fully enclosed mounting on the chassis of the Grizzly Canadian-built M4A1 Sherman
Other variants included the Badger flame tank and Kangaroo APC, both made from Sherman hulls.
When Hitler was vanquished, the Canadians left their Grizzlies/Shermans in Europe while in 1946 they picked up 294 “Easy Eight” M4A2(76)W HVSS Shermans cheap– just $1,460 each (Late model Shermans cost $200,000 to make in 1945). They were left overs from Lend Lease production meant for Uncle Joe in Moscow but by that stage of the 1940s, the U.S. would rather sell them at scrap prices that give them to the Soviets.
The batch of M4A2(76)W’s (M4A3E8’s) were kept in Canada proper for training purposes, even though they were different from the Shermans forward deployed along the Rhine.
When Korea came, the Canadians borrowed 20 Shermans from the U.S. Army and Marines in-country and, after using them in often very heavy combat and tense DMZ patrol from 1951 to November 1954, returned all 20 back to the U.S.
Trooper Andy Parenteau of the Lord Strathcona’s Horse (Royal Canadians) sleeps on the back of a Canadian Sherman M4A3(76)W HVSS tank, Korea. Note the American ration box and United Nations/Canada crest on the tail
British forces used Centurions in the conflict– speaking of which…
In 1952, the Canadian Army bought the first of what would be 274 Centurion Mk 3 Tanks and split these MBTs between the active units in Germany (with their Grizzles being passed on to Portugal) and at home, later adding 120 Mk 5’s to the arsenal– while transferring the Easy Eight Shermans to reserve units.
They remained in service until 1978 when Canada replaced their aging Centurions with 127 new German-built Leopard C1 (equivalent to Leopard 1A3 with laser rangefinder) MBTs and, as the buy was limited and 114 were based in West Germany, just a handful were sent home to Canadian Forces Base Gagetown, New Brunswick for training.
The days of large tank lots in Canada had come to an end.
This led to the retirement of the last Canadian reserve force Shermans in the 1970s, one of the last Western countries to do so.
Canadian Easy Eight Shermans in reserve units 1970s out for a Sunday drive
You have to admit, the camo scheme looks good on these tanks…and they were an instant WWII veterans parade every time they left the armory
After retirement, many Canadian Shermans remained in use well into the 1980s– as targets.
Ex-Canadian M4 Sherman used for target practice with anti-tank weapons, 1986
It should be noted that as late as 1989, the Finning Tank Drill, a rock drill used in logging road construction, was produced in British Columbia from Sherman hulls while BC’s Morpac Industries, Inc., still produces heavy-duty, off-road load crawlers based on Sherman components. It is very likely these civilian mods will be in the wilds of Canada’s western forests for decades to come.
Here is a Finning caught in its natural state:
Today some 60~ intact models are thought to still exist in the country as gate guards and museum pieces and they pop up from time to time in both their Grizzly and later Easy Eight variants for sale at reasonable prices.
The Ontario Regiment (RCAC) Museum in Oshawa, Ontario has a pair of great working Shermans, (“Bart” #78-904 and “Billy #78-856).
Overall, not a bad track record for the often derided Sherman.
When I first dipped my toes into precision rifle competition the very first match that I attended did not allow competitors to use laser rangefinders to get distances to the target. This was familiar territory for me since I’d been trained in range estimation using the reticle in the Leupold M3A and Steiner binos. Getting an accurate range estimation using just a reticle requires a good deal of skill and prior information though, such as the dimensions of the target. If you didn’t know the dimensions of the target you were in a bit of a pickle but laser rangefinders don’t suffer that disadvantage. Although you don’t have to know the size of the target to get a range, using a laser rangefinder isn’t always as easy as point and click. Laser rangefinders were once expensive luxuries but the newer models are smaller, range farther, and pack more features than the models from just a decade ago. However, it’s a good idea to research the options that are out there now to make sure that your money is well spent and that the unit will meet your needs.

New laser rangefinders pack in a lot of bang for the buck. The Leica 1200 CRF at the top was good for its day but newer models like the Sig KILO below provide the ability to range farther, range in meters or yards, account for angles, and adjust the brightness of the display
How Does It Work?
In simple terms, the laser rangefinder will emit an infrared beam towards a target while another sensor looks for the reflection coming back. Once the sensor has detected that reflection it calculates the range based on the time it took to get back to the unit and displays it for the user. Current generations of rangefinders can not only do that in less than a second but also provide the angle to the target by way of an internal inclinometer as well as differentiate between clutter and the actual target. The rangefinders that have a “brush” mode accomplish this by programming the rangefinder to essentially ignore close readings and display the farthest distance. This is especially helpful for long range hunters that may have to punch through scrubs or foliage in order to get a reading on an animal. Nearly all of the off-the-shelf rangefinders work the same way so what sets a $300 rangefinder apart from a $3,000 one?
Emitter and Sensor Quality
In the world of electronic devices, you tend to get what you pay for and laser rangefinders are no different. One area that sets apart good laser rangefinders from great ones is the quality of their sensor and emitter package. You may find that rangefinders at the lower end of the pricing spectrum use an emitter with a less focused beam coupled with a sensor that isn’t as sensitive to the reflected signal. The result is a rangefinder that can maybe do 800 yards off of a reflective target in perfect conditions as opposed to 1000+ yards. More expensive laser rangefinders with a higher maximum distance rating will use an emitter that has a tighter beam divergence in addition to a sensor that is better able to pick up the reflection off a variety of materials.
If you notice that some rangefinders use a Class 1 laser and some use a Class 3R laser I wouldn’t get too wrapped around the axle about it. Class 1 lasers are more or less eye safe while Class 3R lasers are less so but still ok around humans as long as you take precautions. The laser classification doesn’t necessarily mean that a rangefinder with one type is going to be better than the other one. Again, the overall performance is going to be determined by the focus of the beam and the quality of the sensor used to pick up the return.
Optical Performance
The optical performance of the rangefinder is going to play a part in how well you can range objects, mostly in how well you can see the target. All laser rangefinders have some level of magnification, most of the monocle rangefinders have 7X but sometimes you’ll see 6X and 8X too. I like the 7X magnification, it offers a good balance between being able to see targets against brush or in shadows while still having a good field of view. Some of the binocular laser rangefinders will have a higher magnification, typically 10X or so, which is just about perfect for hunting situations where you may have to look through brush or scan a far hillside.
Going hand in hand with the magnification of the unit is the quality of the glass. I try not to be a glass snob but it really can make all the difference in a laser rangefinder. I’ve used laser rangefinders before where the image looking through the unit was so dark it almost seemed like you were wearing sunglasses. Now most rangefinders do have a coating on the lens to help you see the display inside but you’ll want a laser rangefinder with good glass quality. Good enough that you can spot a gray, shot up piece of steel against a far hill while it’s sitting in the shadows of the brush. That might sound a little far-fetched but that very scenario occurs at nearly every match I’ve been to.
Beam Divergence
I mentioned it a little bit earlier but when I was talking about the focusing of the laser I was talking about beam divergence. Laser beams do not stay as focused points of light forever and ever. If you take a laser pointer and aim it a close object you’ll probably see a nice point of light there. Now, aim that same laser at a far wall and you’re likely to see an oblong patch of light instead of that defined point. The beam from the laser pointer spreads out and the same thing happens to the beam in a laser rangefinder, this is called beam divergence. The manufacturer can focus the beam in different dimensions to suit the overall requirements of the laser rangefinder. Ideally, you want the tightest beam divergence that you can get, since too wide of a divergence can cause the unit to provide false readings. The beam divergence in my Leica 1200 CRF is .5 X 2.5 mils, which translates to 1′-6″ X 7′-6″ at 1,000 yards. That’s not too bad as rangefinders go, I can still range trees at over 1,000 yards, but my Leica is over a decade old, many of the newer models have a much tighter beam divergence for better ranging.

I used my Leica 1200 CRF to range a piece of farm equipment more than 130 yards beyond it’s stated maximum range. The combination of high quality emitter and sensor along with ideal lighting conditions helped push the boundaries of this compact laser rangefinder. The beam divergence at this range is approximately 2′-0″ X 10′ – 0″, luckily the farm equipment was huge.
Rangefinder Features
We’ve talked about the aspects of a laser rangefinder that help explain how it provides the range, now let’s talk about some of the things it should do. When you’re out looking for a new rangefinder my first piece of advice is to start looking for one that has a maximum distance rating 20-30% more than what you think you need. If you get a unit that will range farther than you need it to, you can count on it to be able to hit those targets you need to get a range on in less than perfect conditions. The rangefinder should also be able to give you the slope distance to the target, which is extremely important for a rifleman that’s shooting in steep terrain. Whether you’re shooting uphill or downhill the actual distance the bullet is affected by gravity is less than the gun-to-target distance because gravity is pulling straight down. Knowing this slope distance is very important when shooting at steep angles because just using the gun to target distance could result in a miss. Integral ballistic computers are also becoming more and more common with laser rangefinders, something precision rifleman and hunters alike can appreciate. Some units only display relatively generic ballistic information while others can offer custom gun profiles. Probably one of the best full-featured rangefinders on the market is the Sig KILO2400ABS, a compact laser rangefinder with a built-in Applied Ballistics computer.

The Sig KILO can range to the 1/10th yard and automatically provides the adjusted range for slope when in AMR mode. This takes the guesswork out of adjusting the range for high angle shots.
Challenges
Laser rangefinders can be hamstrung but a number of factors that can dramatically reduce their range and effectiveness. Ambient lighting conditions can be the Achilles Heel of a rangefinder, with bright sunny days being the worst for trying to max out a laser rangefinder. On really bright sunny days I’ve had my Leica 1200 CRF, which I know can range past 1,200 yards, fail to range anything past 900 yards. In my experience, ideal conditions for a rangefinder are when the light is more diffused such as on overcast days or in the evening as the sun is going down.

Overcast lighting conditions such as this are ideal for laser rangefinders if you want hit the limits of their ranging ability. Bright, sunny conditions can reduce the effective range of some laser rangefinders by 30%.
Additionally, things like the orientation, color, and size of the target can all play into how well you’ll get a reading at distance. A laser rangefinder works best when hitting a flat surface since it gives it the best chance of reflecting back a good signal. If the target is angled away this can increase the chances of the sensor not picking up the beam. Likewise, dark colors also do not do particularly well when trying to reflect a beam back to the unit, lighter colors work best in this regard. I think it also goes without saying that trying to range small objects that are far away can also be challenging so try to pick large objects with lightly colored flat sides if you can.
Rangefinder Best Practices
To get the most out of your rangefinder here are some things that you can do to help get an accurate distance reading.
- First, hold the rangefinder as steady as you can. If at all possible, mount the rangefinder to a tripod since this will be about as stable as you can get it. Some rangefinders come with a built-in 1/4-20 but if you have to use a two-handed grip, brace against something for more stability.

Using a tripod is the best way to get accurate long range readings with a laser rangefinder, especially if the target is small. Some rangefinders have a built-in 1/4-20 attachment point, however, in some cases you may have to use a secondary mount. This universal optics mount from Precision Rifle Solutions is an excellent way to mount laser rangefinders for a steady hold on a long-range target.
- Make sure the batteries are fresh. If you have been getting irregular readings or no readings on objects you know it should hit, switch the battery out for a fresh one.
- Choose your target wisely. As it was mentioned above, choose your target wisely to ensure you have a good chance of getting a good reflection. Avoid small targets, angled away from you that are dark in color. If you are ranging vegetation, choose the densest part that you can find.

There’s a road sign at the end of that tree line, you can’t see it, but with the help of the tripod mounted laser rangefinder I was able to easily get a hit on it multiple times.
- Range objects multiple times. When you are ranging a target, hit it multiple times to make sure the beam isn’t hitting an object in front of or behind the target. If you get two hits that are the same, aim the reticle off the side and get another reading. If that reading is a lot different then the other two you know the first two readings probably good to go.

This picture is a good example of how terrain can be deceiving if you’re not careful when using a laser rangefinder. While the building looks like it’s just beyond the trees, there’s actually a 900 yard separation between them.
- Keep the laser rangefinder protected. Scratched or damaged lenses can degrade the performance of the unit so when not in use keep the rangefinder in a protective case. Remember, a clean lens is a happy lens.

Most laser rangefinders come with a padded soft case for storage. These cases aren’t going to win you any style points but they do a good job of protecting the unit when not in use. Use them, the last thing you want to do is damage the lenses and potentially turn the rangefinder into a paperweight.
- Read the instructions. To get the most out of the features your rangefinder might have, read the instructions and then go out and practice with it. Learn its limitations, what the buttons do, and the best ways to hold it to get an accurate range reading.

If you have to range vegetation, go for the thickest, darkest section you can find to help improve the chances to getting a hit to bounce back.
- It should go without saying but the laser rangefinder does emit a laser beam that can be harmful if directed at someone’s eyes. Don’t point the rangefinder at someone’s face and hit the range button, this isn’t kindergarten or an infantry platoon.


In Conclusion
As you may have guessed by now laser rangefinders are an incredibly effective tool for long range shooting, but they are not miracle workers. That being said if you are going to get a laser rangefinder to fill out your long-range kit then spend as much as you can, buy once cry once applies here. When I bought my Leica 1200 CRF over ten years it was one of the best compact rangefinders you could get and pricey. Now, after a decade of use, it’s a little worse for wear but it works great and still ranges to beyond it’s stated limit so the cost is justified.
For some great laser rangefinder options check out the table below.
| Laser Rangefinder Guide | ||||
| Manufacturer | Range | Angle Compensation | Multi-Mode | Ballistics |
| Bushnell Elite 1 Mile ARC | 5-1760 yards | Yes | Yes | Yes |
| Bushnell Fusion 1 Mile ARC Binoculars | 5-1760 yards | Yes | Yes | Yes |
| Leica Rangemaster 2700-B | 10-2700 yards | Yes | Yes | Yes |
| Leupold RX-1300i | 6-1300 yards | Yes | Yes | No |
| Sig KILO2200MR | 3400 yards | Yes | Yes | No |
| Sig KILO2400 ABS | 3400 yards | Yes | Yes | Yes |
| Vortex Ranger 1500 | 9-1500 yards | Yes | Yes | No |
Maybe a teacher could use these during PE?
Grumpy
Editor’s note: FM 21-20 (1946) was the Army’s field manual for physical training, and consisted of exercises and fitness programs developed during World War II, which were then codified after its conclusion. The focus of the recommended exercises was getting men who had been living a fairly cushy lifestyle hardened up and ready to battle the Axis powers. We’ve highlighted many of these WWII-era workouts before, and today we’ll take a look at another aspect of GIs physical training: combative contests.
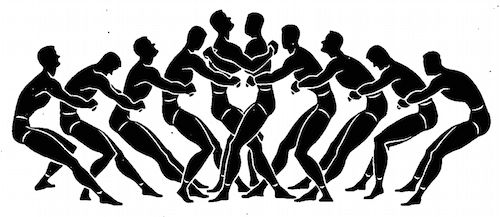
Combative contests were all-out, rough-n-tumble matches that tested a soldier’s strength, stamina, and “will to win.” They were designed to add some fun leaven to the more routine workouts the GIs did, like calisthenics and running, and to build the men’s competitive spirit. As FM 21-20 observes, “Because of this competitive factor, men will put in more effort than they ordinarily do in conditioning exercises.” Engaged in mano-a-mano or between teams, such contests develop “many valuable character qualities such as initiative, persistence, cooperation, confidence, [and] physical courage.”
The next time you and your buddies get together, try out some of these contests — go toe-to-toe with your bros, find out if you’re as tough as a WWII GI, and see who comes out the victor!
The Value of Combative Contests
This type of activity consists of individual and group contests of a rough and strenuous nature. The purpose of such contests is to develop aggressiveness, initiative, and resourcefulness in personal combat; to develop proper footwork and weight control; and to train the men to react violently with a maximum of energy for the purpose of overcoming an opponent. Regardless of previously developed habits in maneuvering in such contests, the men should be instructed to attempt to over-throw the opponent at once. Hence, in these contests, every man is trained to give his all. Defeats suffered in early practice will be compensated for by habits of aggressiveness and by the quick and adaptive thinking which grow from such practice.
Contests – Individual Competition
1. Pull-Hands

Establish three parallel lines 10 feet apart. The men are paired so they face each other about 3 feet apart, both equally distant from a middle line. They grasp each other’s wrists. At the starting signal, each man attempts to pull his opponent back across his base line. Any contestant pulled across his opponent’s base line is loser. After a predetermined time, any player pulled across the middle line is also the loser. If the hands become separated, they are rejoined at the point of separation as in the beginning. The contestant who first wins three bouts is the winner.
2. Hop and Pull-Hands
The men are matched in pairs. Each man grasps his opponent’s right hand, and hopping on his right foot, attempts to pull his opponent over the middle line. Either contestant automatically loses if he touches his rear foot to the ground. The contestant who first wins three bouts is the winner. On successive bouts, they alternate hands and feet.
3. Back-to-Back Push

Two contestants stand back-to-back with elbows locked. Each contestant has right arm inside opponent’s left arm. A base line is established 10 feet in front of each contestant. At the starting signal, each, by pushing backward attempts to push the other over his (the opponent’s) base line. The contestants are not allowed to lift and carry their opponents. Pushing only is permitted. A contestant pushed over his own base line loses the bout. The contestant who first wins three bouts is the winner.
4. Back-to-Back Tug
Two contestants stand back to back with both arms linked at the elbows. Each contestant has his right arm inside opponent’s left arm. A baseline is established 10 feet in front of each contestant. At the starting signal, each attempts to drag the opponent over his baseline. Lifting and carrying are permitted. Contestants must maintain original positions with arms linked. Either contestant carried across his opponent’s baseline loses. After a predetermined time, the player carried the farthest is also the loser. The contestant who first wins three bouts is the winner.
5. Back-to-Back, Arms Between Legs
Contestants are paired off, back to back. A baseline is established 10 feet in front of each man. Each bends forward and, extending his right arm between his legs, grasps his opponent’s right wrist. At the starting signal, each attempts to pull his opponent across his baseline. After a predetermined time, any player who has pulled his opponent over his baseline or over to his side of middle line is the winner. Repeat with left hand and then both hands. The contestant who first wins two bouts is the winner.
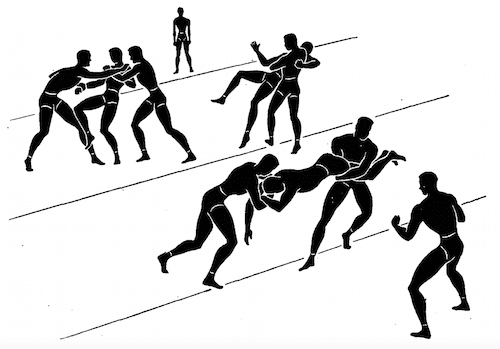
6. Knock Them Down
At starting signal, each man attempts to knock opponent off his feet in any manner he chooses. He may tackle, push, pull, lift, or wrestle. First man who has any part of body except feet touching ground loses.
7. Step On Toes
The men are paired off. At starting signal, each man attempts. to step on toes of his opponent. Activity continues until the stop signal. This is a vigorous activity if continued for about a minute.
8. Arm Lock Wrestle
The contestants sit on the floor, back to back, with legs spread and arms locked at the elbows. Each contestant has his right arm inside his opponent’s left arm. At the starting signal, each endeavors to pull his opponent over to the side so that his left arm or shoulder touches the floor. The contestant who first wins three bouts is the winner.
9. Wrestling from Referee’s Hold
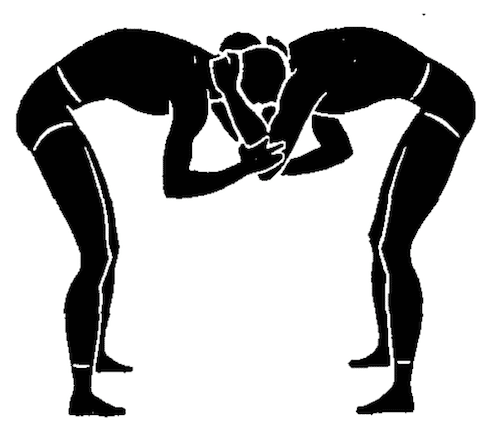
The men assume what is known in wrestling as the referee’s hold. Each contestant grasps back of opponent’s neck with left hand and opponent’s left elbow with right hand. In this position each man attempts to pull or push his opponent across a line or out of a circle.
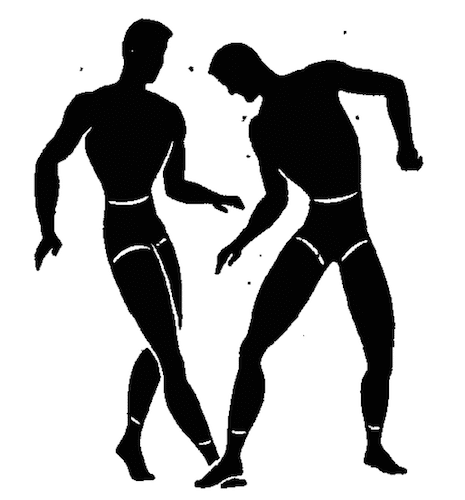
10. Bulling
The men assume the referee’s hold, each grasping opponent’s neck with left hand and opponent’s left elbow with right hand. Each attempts to force his opponent to move one foot by pushing, pulling, or otherwise manipulating him.
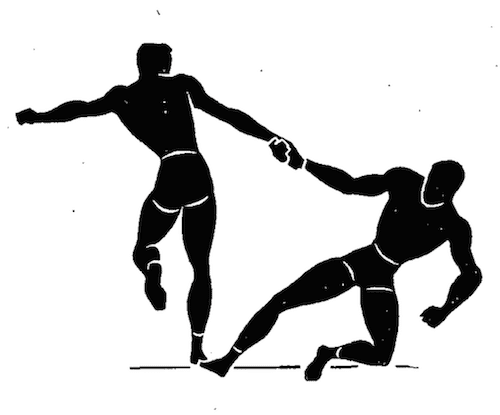
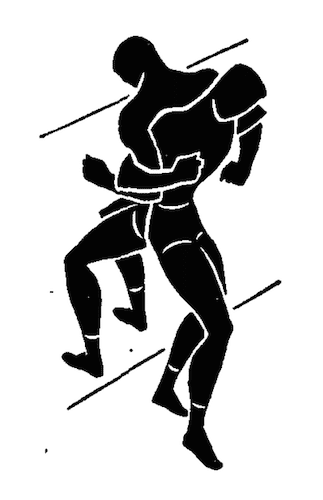
11. Rooster Fight
Each contestant, with arms folded across chest, hops on right foot. He uses right shoulder and right side of chest to butt his opponent. The object is to make his opponent lose his balance and fall, to unfold his arms, or to touch his free foot to the ground. The contestant who first wins three bouts is the winner.
12. Rooster Fight (Alternative)
Each contestant grasps his left foot with right hand from behind, and right arm with left hand. He hops on his right foot, and by butting his opponent, or by feinting and sudden evasions, forces him to let go of foot or arm. (The name is derived from the position of left leg.)
13. Stick Pull
Three parallel lines are established 10 feet apart. Two men grasp a wand, stick, or softball bat with both hands. Starting at the middle line, each man attempts to pull his opponent over his base line. The contestant who first wins three bouts is the winner.
14. Pull-Stick Tug-of-War

Two men are seated on the ground with soles of feet in contact. Each contestant grasps a stick or softball bat so that it is directly over their feet. At the starting signal, each contestant tries to pull his opponent from sitting position to feet.
15. Stick-Twist
With right palms upward and left palms downward, both contestants grasp a wand or softball bat. Upon the starting signal, the contestants try to twist the stick to the left, or counter-clockwise. After several bouts of this nature, the position of palms is changed, and the stick is twisted to the right, or clockwise. The contestant who first wins three bouts is the winner.
16. Stick-Wrestle
With right palms upward and left palms downward both contestants grasp a wand or softball bat. At starting signal both wrestle for the stick, attempting to take it away from the opponent by any means.
17. Wrist-Wrestling
Two men lie on backs, side by side, and head to feet, in such a position that the insides of right (left) elbows are side by side; fingers are interlocked; feet are spread and other arm is by side. Each man tries to press his opponents’ wrist down over against his own side. The contestant who first wins three bouts is the winner.
18. Hand-Wrestling
The men stand facing each other. Right feet are forward and braced side by side. The men grasp right hands on the first bout (left in second bout, etc.), with little fingers interlocked. Each attempts by pulling, pushing, making a sideward movement, or otherwise maneuvering to force his opponent to move one or both feet from the original position. The contestant who first wins three bouts is the winner.
19. Harlequin Wrestling
Each man stands on his left (right) foot, holding his opponent’s right (left) hand. The object is to overbalance the opponent or to force him to put his free foot to the ground. Pushing with shoulders is not permitted. A modification of this contest is to hold free foot with free hand.
20. Indian Wrestling

Two men lie on the ground, side by side, with heads in opposite directions. They link right elbows. Upon the signal of the instructor or by mutual agreement, each man raises his right leg, with knee approximately straight, far enough to engage heel of his opponent. To time the contest, each man usually raises his leg three times rhythmically, and the third time engages the opponent’s heel, attempting to roll him over backward. The right leg is used for three bouts, then the left leg for three bouts.
21. Wrist Bending

Opponents pair off and face each other; raise arms forward; and with palms up, lock fingers. At the starting signal, each man attempts to bend his opponent’s wrist. The hands are brought downward between contestants. The man winning three bouts first, is the winner.
22. Wrestling to Lift Off Feet
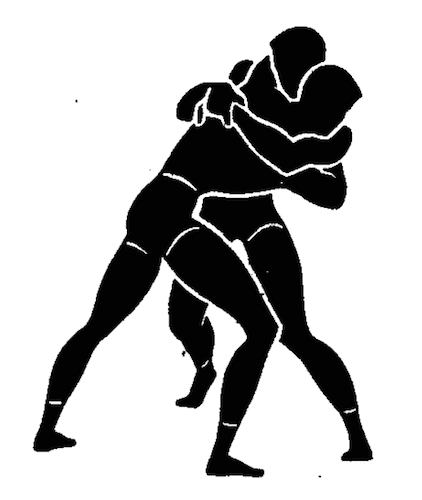
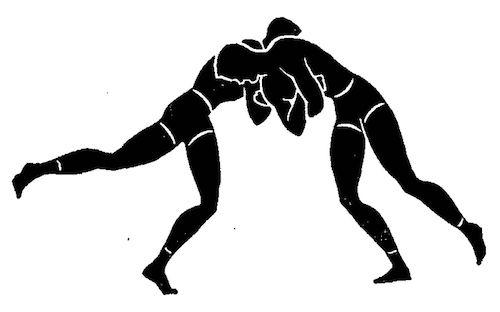
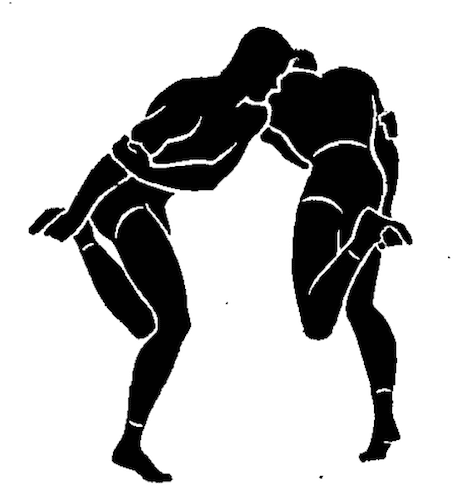
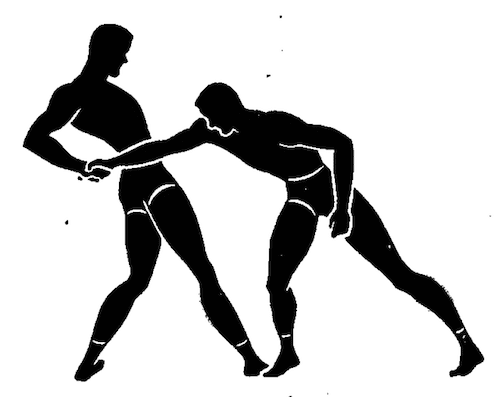
The contestant maneuvers to grasp the opponent with front or rear waist-hold, and to lift him off his feet.
23. Wrestling
Each man tries to force his opponent to touch the ground with some other part of his body than his feet.
Contests – Group or Team Competition
1. Bull in Ring
No equipment needed. Group forms in a circle holding hands. One man, termed the “Bull,” is placed in the center. If there are more than 20 men in the ring, there are two “Bulls.” The “Bull” tries to break out by charging the ring so the clasped hands are forced apart. If the “Bull” gets out, he immediately tags another player who becomes “Bull.” This game may be played by two teams, each of which forms a circle. An opposing player is the “Bull” in each circle. At the starting signal each attempts to break out by going over, under, or through. The first man to break clear wins a point for his side. The contest continues until each man has been a “Bull” in his opponents’ circle.
2. Ring Push

Players are divided into two clearly designated teams, both of which enter a large circle. At the starting signal, players of each team attempt to push all opponents out of circle. Players forced from the circle are eliminated. All players must keep arms folded across the chest throughout. The contest continues until all the members of one team are eliminated.
3. Ring Push (Sitting)
This activity is performed in the same manner as #2 above. However, all men are seated on the ground, back to back.
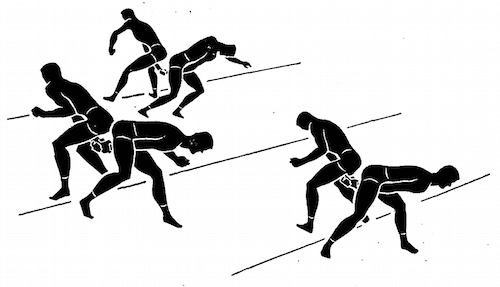
4. Line Charging
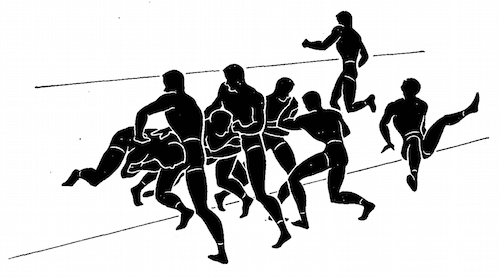
Two teams form lines facing each other about 1 foot apart. The players of each team are 1 foot apart. A line is established 10 feet behind Team “B.” At the whistle, team “A” attempts to break through the line of team “B.” Team “A” may use its hands; team “B” may not. The players of team “B” usually assume a crouched position. After 3 to 5 seconds (usually 3 at first, 5 seconds later), the referee blows his whistle and counts the number of men who have broken through the opponent’s line and reached the baseline. The team which has the greatest number of contestants reach the baseline in three attempts wins. Indoor competition may be conducted on a string of mats.
5. Island
The players are divided into two distinctively marked teams. The teams line up on opposite sides of an area approximately 10 feet square. At the starting signal, all players rush forward to the middle of the area where they attempt to remain. The players attempt to throw their opponents out of the area. If a player is forced from the island he may return if he can before the contest is terminated. The team having the greatest number of players on the island at the end of 2 minutes wins the game. Indoors a mat may be used as the island.
6. Catch and Pull Tug-of-War
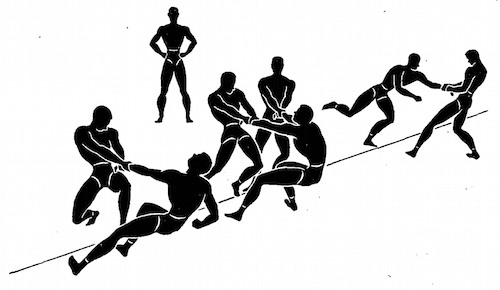
Two teams line up on either side of a line on the ground. The men attempt to grasp an opponent’s hand or wrist and pull him across the line. Two or more of one team may gang up on one opponent. When an individual touches the ground on the other side of the line, he retires to the rear of his captor’s territory as a prisoner. The contest continues until all men of one team have been pulled across the line. If any men refuse to approach closely enough to engage their opponents, the referee declares them defeated. Such practices should be discouraged, however. As a variation, those pulled across the line may join with their opponents in attacking former teammates continuing until no one is left on one side.
7. Goal Line Wrestling
This activity is performed similarly to #6 above except that a line is drawn 15 feet behind each team and when a player is carried or pulled across line behind his opponent’s side, he is declared “dead” and out of competition.
8. Horse and Rider Fights
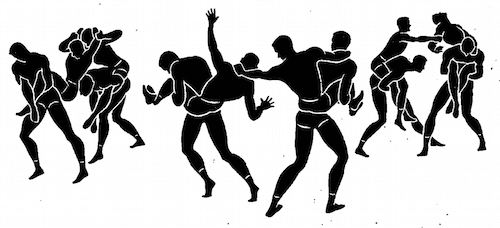
Players are divided into two teams and paired off. One player of each pair sits astride the hips of his partner and locks his feet in front. At the starting signal, the “horses” move forward so that the “riders” can reach each other. Each “rider” attempts to overthrow an opponent. The “horses” are not allowed to help the “riders.” The “riders” are allowed to use all fair wrestling tactics; they are not allowed to interfere with the “horses.” The “rider” who touches the floor in any way, either forced down from his “horse” or overthrown with his “horse” first loses. Last team up is the winner. This contest should only be conducted where it is not dangerous to fall.
9. Human Tug-of-War
Two teams line up in two columns facing each other. Team members stand close together. Each man places his arms about the waists of the men in front of him (grasping his own left wrist with his own right hand is the strongest grip). The leading man of each team grasps his opponent about neck and shoulders. The team breaking first or having one or more men pulled over the line separating the two teams after 30 seconds is the loser.