Category: Gun Info for Rookies
 Nothing in life is perfect — and this is especially true with a sight picture with iron sights. For centuries, iron sights — also called open sights — have been the de facto device for aiming both rifles and handguns. If you take one thing away from this how-to on irons sights, it should be this: focus on the front sight. If done correctly, the rear sight and the target will both be fuzzy — and that’s okay. Like I said; nothing in life is perfect.
What Are Iron Sights?
Let’s discuss handgun sights first. While there’s a wide variety of iron sights, all have the same primary features: a rear sight with a notch in it, and a front post that’s aligned in that notch to aim the pistol.
The rear notch can range from a square notch to a V- or U-shaped notch. On a handgun, in many cases there is a dot — either painted white or luminescent — on either side of this notch. The dots help the shooter more quickly locate the rear notch (and align the front sight).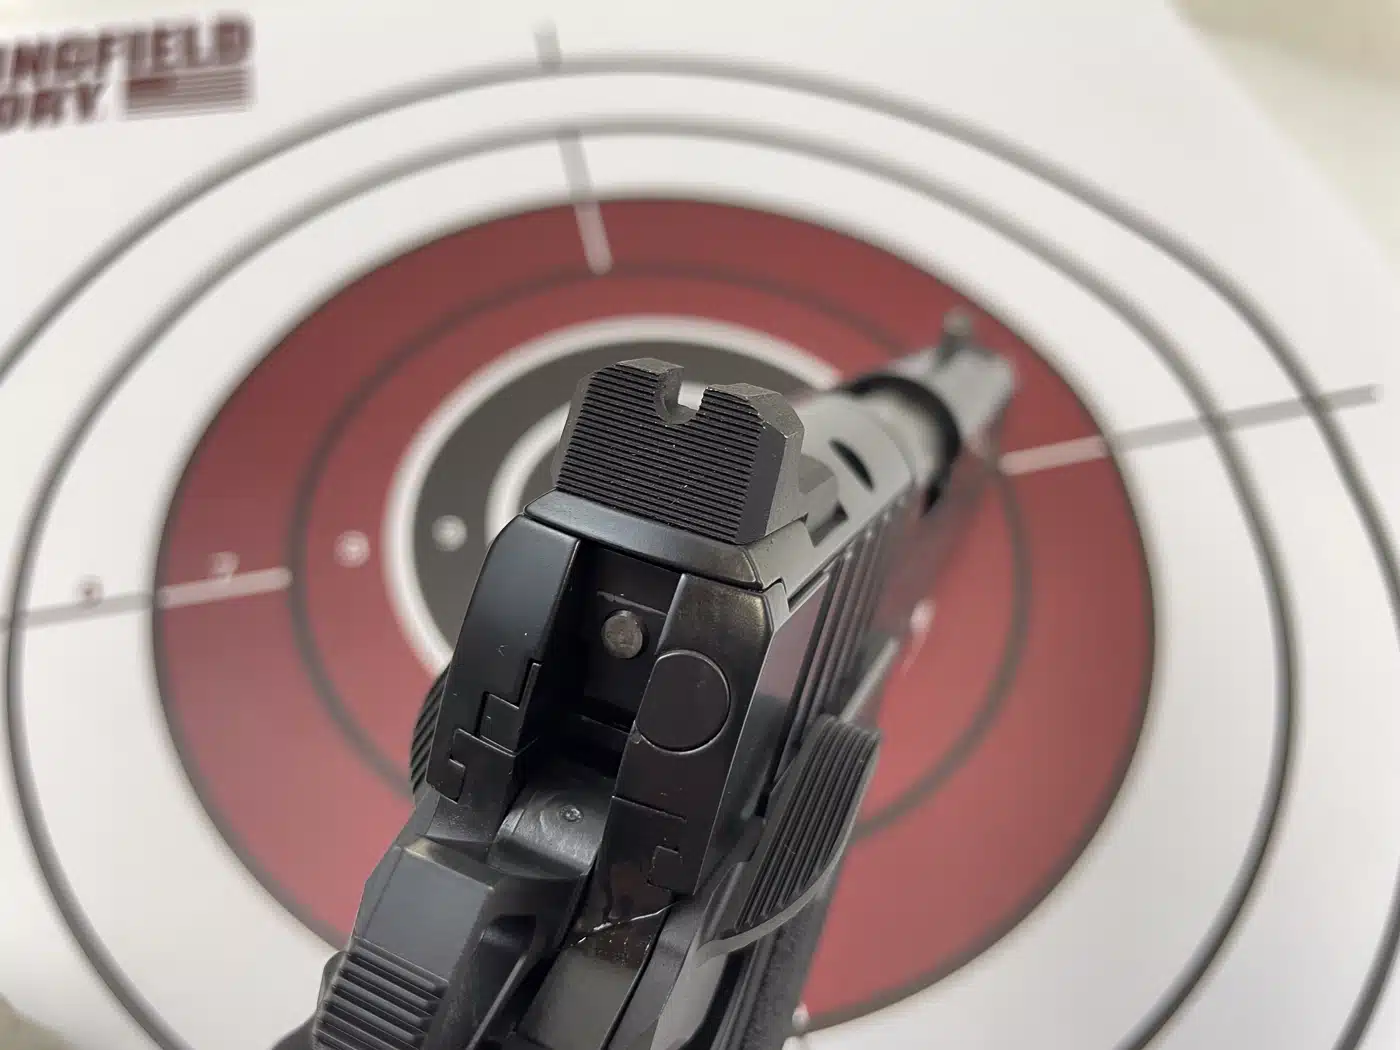
Rear sights on handguns can be fixed or adjustable. Adjustable sights are usually found on target handguns and allow the user to adjust windage (left or right) and elevation (up and down) via a turn of a screw.
Fixed sights are just that fixed. Most can be drifted left or right to adjust windage (unless it is machined directly into the slide of the pistol), but most come from the factory adjusted to hit anywhere from 10 to 25 yards depending on the size, caliber, and type of pistol. The front sight post can be plain, or have a dot or a bead.
Rifle sights are similar, but different. The rear sight on an AR-15 and M1A is typically an aperture sight, also called a peep sight. This is a disc with a hole in the center. Usually, the rear sight can be adjusted for both windage and elevation.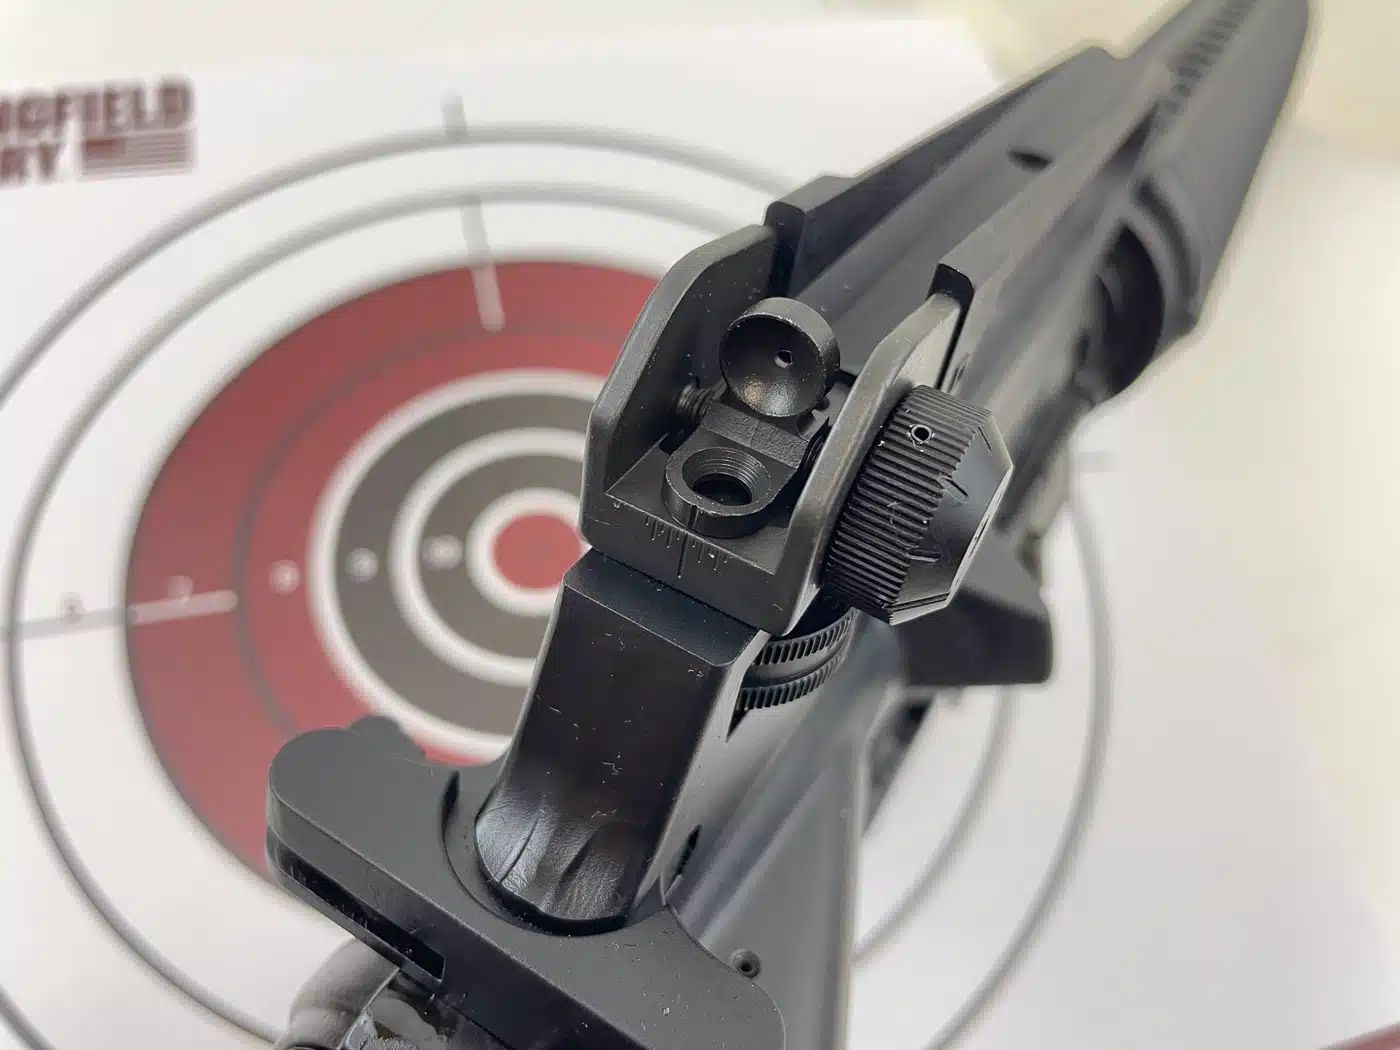
On some AR-15 rifles, there are two rear aperture sights; one with a small hole and one with a larger hole. The small hole rear aperture sight is used for normal shooting while the large aperture rear sight is used for close quarters when fast target acquisition and a larger field of view is needed. The front sight is typically a post.
On rifles like the M1A and AR-15, there are protective wings on either side of the front post to protect it in the event the rifle is dropped. The wings ensure the post is unscathed during an accidental drop. On an AR-15, the front sight can typically be adjusted for elevation.
Now that you know a front sight from a rear sight, let’s discuss the sight alignment process.
Step 1: Equal Height, Equal Light
The key to aligning open sights on a handgun is to align the front post in the notch of the rear sight. The top of the front sight should be flush with the top of the rear sight. That’s where the “equal height” part comes in.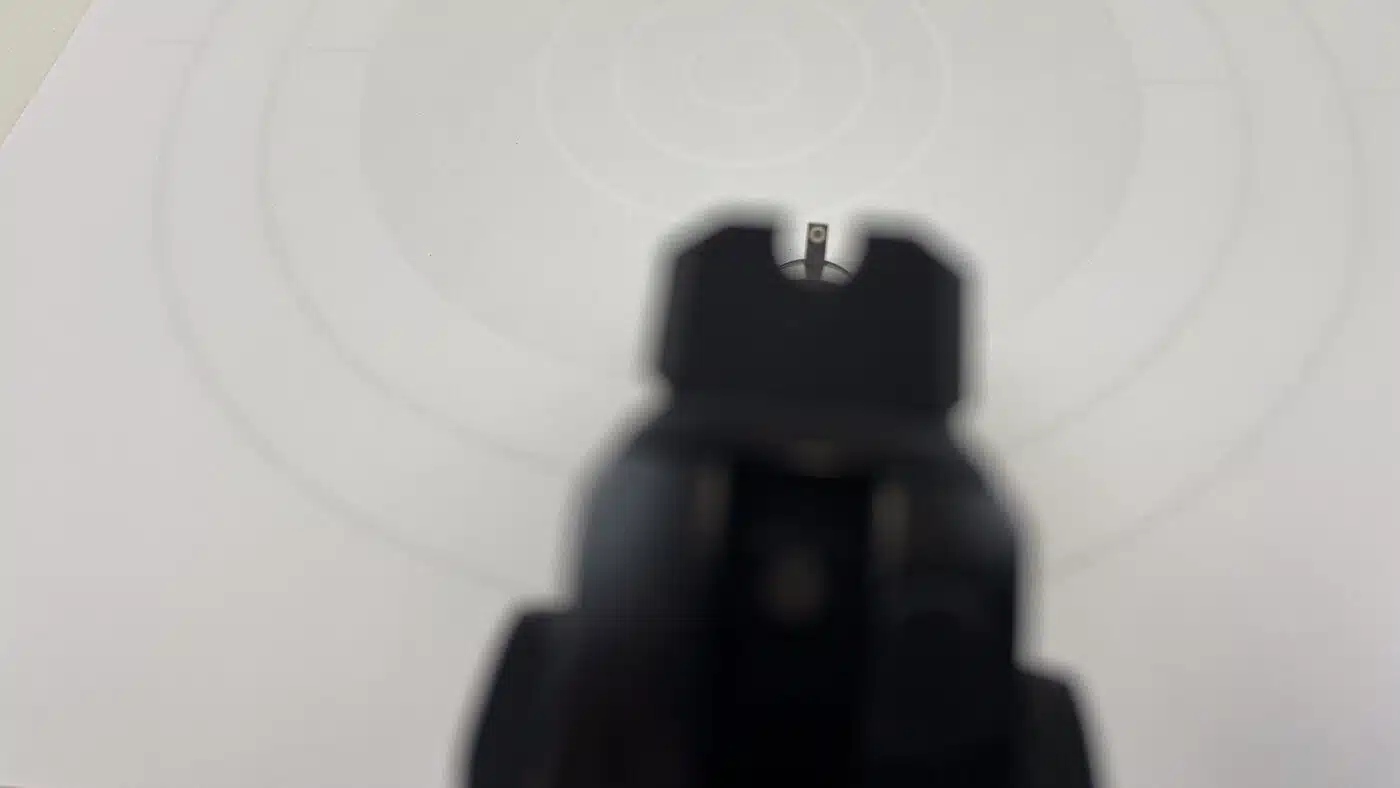
Next is to ensure the front sight post is positioned in the center of the notch. The “equal light” phrase means there should be the same amount of space or light on each side of the front sight post when it is aligned in the notch.
I know this may sound complicated, but once you understand the concept, sight alignment happens ultra-fast. In a rifle, the process is basically the same. The shooter looks through the rear sight aperture and centers the top of the front sight post in the center of the aperture.
Now that you know how to align handgun and rifle open sights, let’s talk sight picture.
Step 2: Sight Picture
What does “sight picture” mean? Sight picture is when the shooter aligns the sights while focusing on the front sight and placing the front sight on the target. This is the “imperfect” part I mentioned since, while the front sight is in clear focus, the rear sight and target are fuzzy or even blurry.
Don’t be bothered by the fuzzy rear sight and target. Our eye can only focus on one thing at a time when aiming a gun, and when aiming with open sights there are three planes our eye is using: one at the rear sight, the second at the front sight, and the third is the target. Remember to focus on the front sight.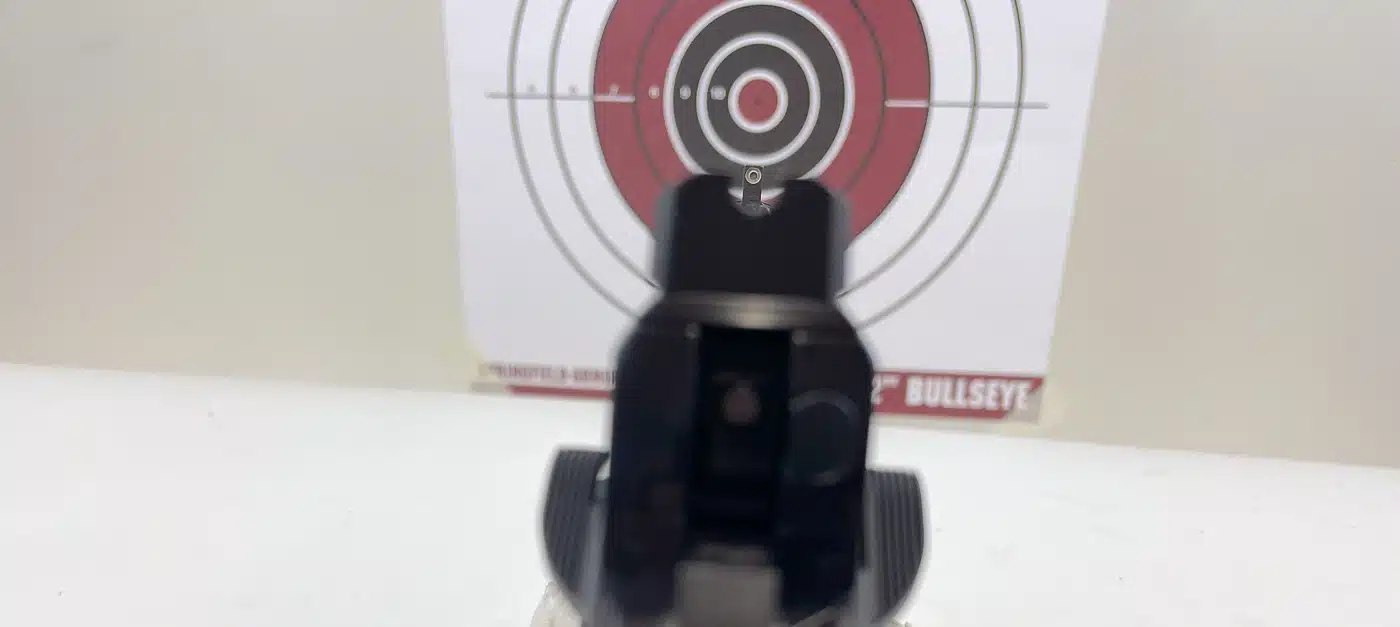
There are different types of sight picture depending on the spot where you place the front sight. For instance, a center-of-mass sight picture is when the front sight is placed on the target so the bullet strikes the exact point of aim.
Aim at the middle of the target, and (if you do your part) the bullet will hit the middle of the target. Center-of-mass sight pictures are typically used in defense and combat shooting, and generally speaking most fixed sight handguns will shoot center of mass.
A six o’clock hold is when the front sight is placed just below the desired point of impact, and the bullet’s point of impact is the center of the bullseye. A six o’clock sight picture is usually used by target shooters who have adjustable sights on their firearm and can adjust the point of impact to be slightly above the aiming point.
This approach allows you to see the desired targeting point more clearly (rather than obscuring it behind the sights). In my opinion, if you conceal carry for defense, the center of mass method should be used.
Step 3: Firing the Shot
Now that the sights are aligned and you have a sight picture, you are ready to fire the shot. This is the tricky part. With a firm grip on the handgun, press the trigger back while keeping the sights aligned and holding the sight picture. Assuming there are no jerks or flinching, the shot should hit according to your sight picture.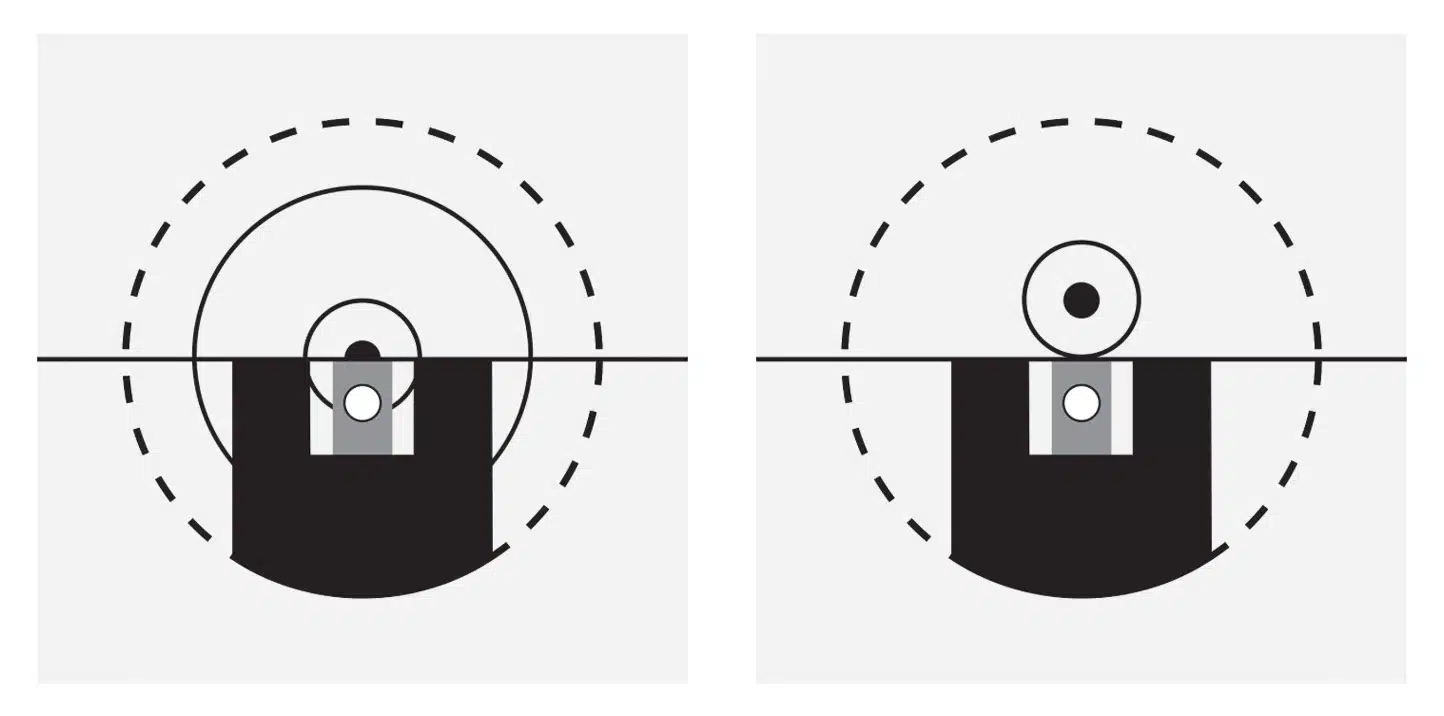
Sight picture and point of impact are dependent on the ammunition used. Try shooting center of mass at a specific distance and see where the bullet impacts. You may need to adjust your sight picture depending on where the bullet hits when using fixed sights; with adjustable sights, you will be able to dial in the hits to your sight picture as needed.
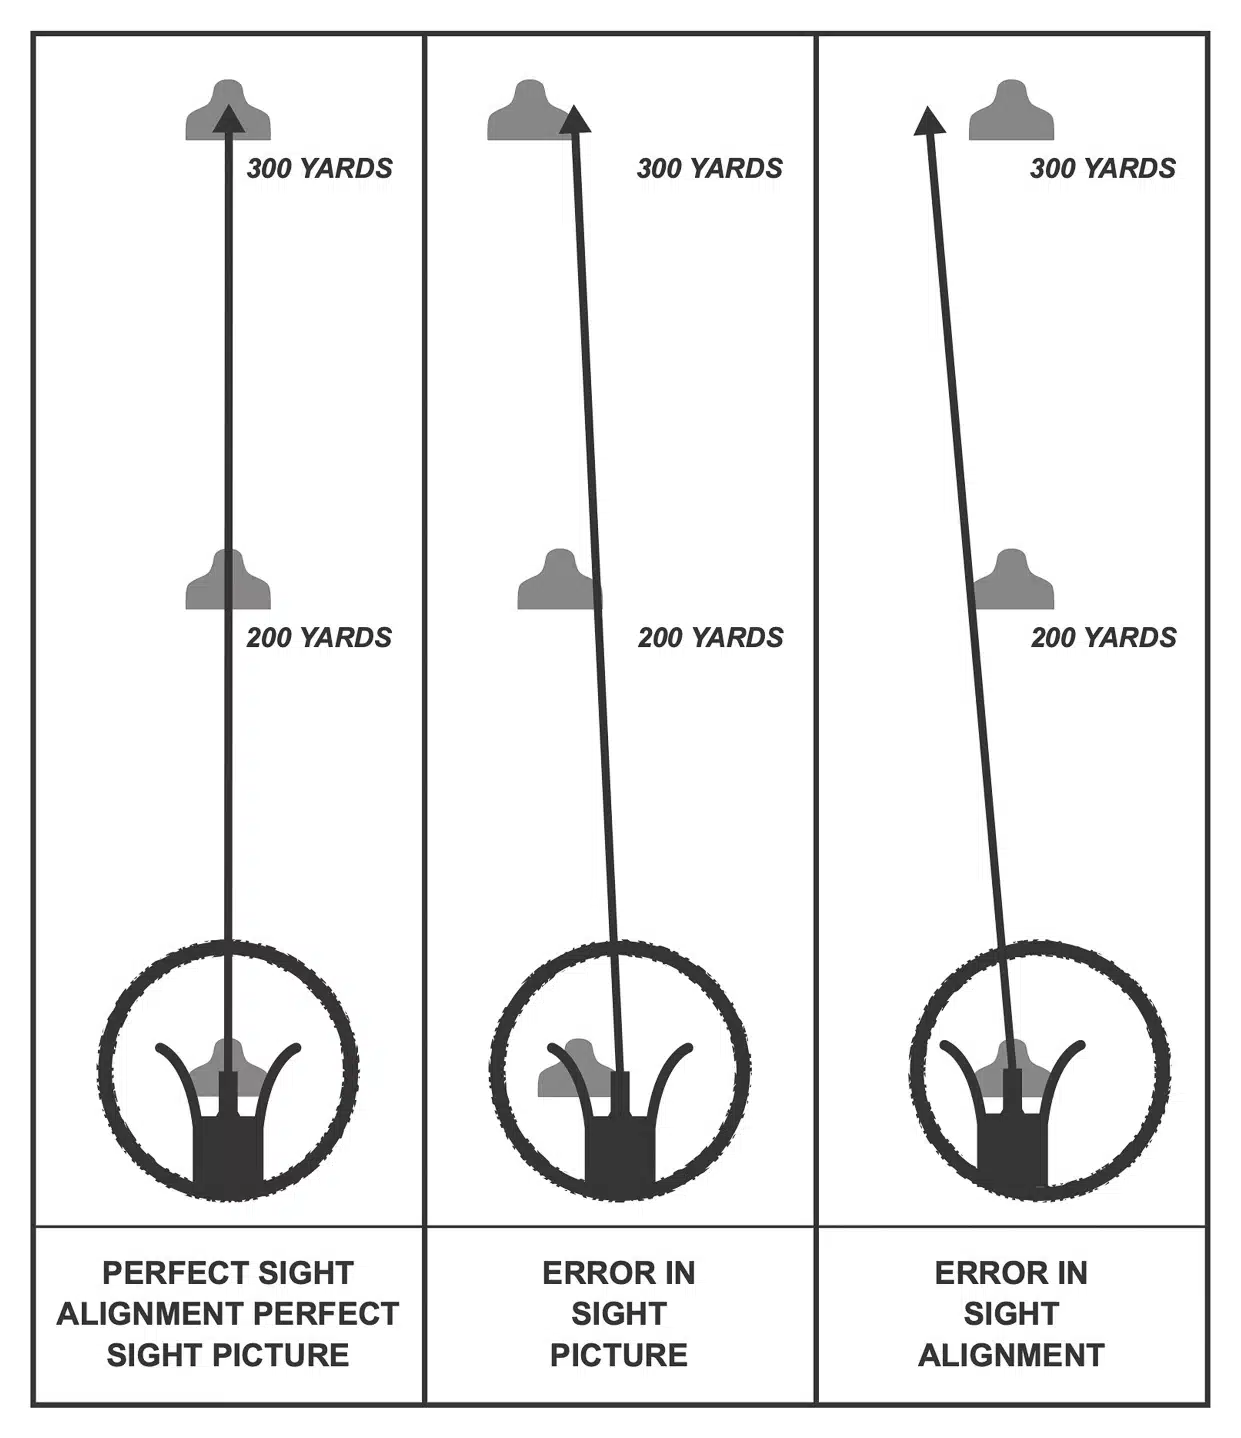
Sight alignment is crucial. At close distances like 10 yards, sights that are not perfectly aligned will have minimal effect on point of impact. At longer distances, as with rifle shots at hundreds of yards, a small error in alignment will cause the shot to miss dramatically.
Why Shoot with Open Sights
In today’s age of optics, a red dot on a handgun or a scope on a rifle are so common that you might ask if it’s even worth practicing with open sights. Here’s why — batteries die, lenses crack, and optics can come loose. When it comes to a defensive firearm, it’s simply sound reasoning to have a back-up in case your technology fails. In that case, open sights can save the day.
Categories