
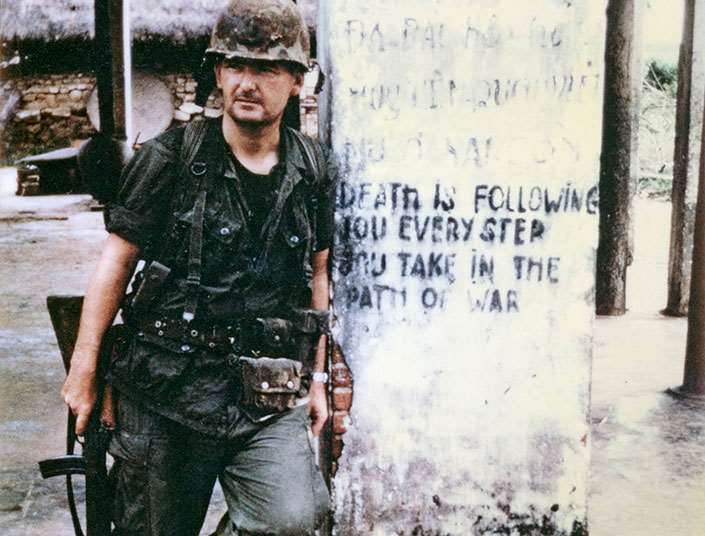
A Remington-Rand M1911A1 was on the author’s hip when this photo was taken on the North bank of the TraBong River during the summer of 1966. The gun started out as a standard M1911A1 (top), but he swapped out the plastic stocks with double-diamond wood. He also replaced the 1911A1’s short trigger with the longer one of the M1911 and switched the arched mainspring housing with the earlier, flat M1911 component.
I really hope that something good happened to that particular piece of equipment, because it was a constant and treasured companion during a rough period of time. That time began in the spring of 1965 at Camp Pendleton, Calif. I first saw it when Cpl. Anthony Catarella knocked on my office door and asked for a brief moment of my time. “Cat” was the company supply NCO, and had come to tell me that our outfit had been issued a number of new replacement M1911 .45s.
One of them was the pistol he held—my new gun. The company was Company K, 3rd Batallion, 7th Marine Regiment, and we were poised to ship out for Vietnam. As we were doing so, the supply system began to cough up all kinds of new equipment and a few .45s were part of it.
The .45s were not new, but rather freshly rebuilt and refinished from the arsenal. Made sometime during World War II, my new gun was a Remington-Rand M1911A1 that had been through the refurbishing process at least a couple of times.
It had a brand-new coat of Parkerizing and was completely up to G.I. specs. Knowing my personal preference for a long trigger and flat mainspring housing, Catarella had moved them from my original pistol and installed them on the new one.
Before we left the country, I installed an old set of walnut stocks with the original double diamond checkering pattern. My modifications to the pistol did not detract from its utility, but rather enhanced its performance in my hands.
I was aware that things would have to be really bad before I would be doing much shooting with a pistol, but I was happy with my new gun. For all practical purposes, my issued M1911A1 pistol was pretty much the standard gun as used for decades by all American servicemen.
My unit sailed to Okinawa on the U.S.S. Valley Forge, went ashore there for brief training and moved to the U.S.S. Iwo Jima. This latter vessel was one of the new helicopter carriers, capable of carrying a battalion landing team and a full squadron of H-34 helicopters.
Our assignment was to go on station off the coast of Vietnam, landing whenever and wherever needed. After a couple of false starts, we finally went for real—at Qui Nonh on July 1, 1965.
Since available records told me nothing about my pistol’s war record, I never knew where it had been. It’s entirely possible the old .45 rode ashore in one or more of the Pacific Island campaigns of World War II. It might even have been a veteran of Korea as well as World War II. I was not.
It may have been a veteran gun, but it was an inexperienced Marine that carried it aboard the helicopter and ashore. The first step out the door brought us hard up against the reality of life in Vietnam. We (man and gun) stepped into a rice paddy.
Actually, this turned out to be a recurring experience for the time I spent in Vietnam. Sometimes I flew into rice paddies, sometimes I walked into them and sometimes, I must confess, I made a frantic headfirst dive. It gave you an appreciation of Southeast Asian horticultural practices, particularly as it applies to fertilization. But every time I went into a paddy, the .45 also went—it was attached to my person by means of that old familiar flapped G.I. holster. And every time we went into a paddy, the gun went into the contents of that paddy.
Now, I was familiar with the procedures for fieldstripping the M1911A1 pistol for cleaning. But when a firearm is immersed in rice paddy mud, it has to be disassembled down to every last part—you simply can’t properly clean it without doing so. I knew how to do it, but preferred not to do it so often.
And I discovered another thing about the grand old gun and its less-than-grand old holster. As much as you grew accustomed to the comforting weight of the pistol, you became aware that an inch or more of butt is sticking out of the holster. And as time went by, we all started standing with the right hand on the top of the holster. This brings the hand into contact with the pistol, where the always-present perspiration rusted the daylights out of the steel.
Just as I came to treasure the gun as a companion, I dreaded the amount of maintenance required to keep it going. Most of the time, my practice was to tend to the pistol before I ate my evening C-ration. Usually, that was ham and lima beans. I still wonder why I got so many cans of this meal.

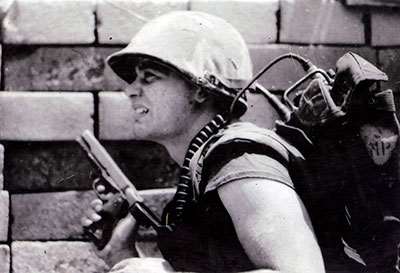
M1911A1 pistols—the last of which were made in 1945—were issued to officers, machine gunners and others during the Vietnam War, but they were also used by “tunnel rats” such as Sgt. Robert A. Payne.
The point was simply that you paid for the comfort of having on your hip a specimen of the best battle pistol ever devised by man. The troops had it a whole lot worse—they had an M14 rifle to worry about.
In the fall of that first year in country, I was transferred over to H&S Company when I became a member of the battalion staff.
I had my pistol properly transferred to that unit’s property logs, since I had grown downright fond of that particular gun. In this new role, I spent a lot of time around the battalion command post.
I even tried one of those sexy shoulder rigs to carry my old .45. Don’t try it, that strap cuts into your neck something awful. While the wear on the gun was lessened by being under cover a little more, I still checked it daily.
Then in mid-’66, I caught a break and went back to another rifle company. I had to go rather suddenly, but took the gun and transferred the title to Company I.
Out in the field again (more rice paddies) the aging .45 continued the cycle of immersion in questionable liquids (even salt water several times), cleaning and more wear.
I discovered that sand and dust, propelled by sweeping helicopter blades, accelerated the wear and sometimes almost sandblasted the gun. But it continued to work just like Colt engineers, Army Ordnance officers and old John Browning designed it to in 1910-1911.
By now, I am guessing you are waiting for the pithy little battle tale about the time the clean-but-worn M1911A1 .45 saved my ass. It never happened. But it came along on many patrols, sweeps, skirmishes and even a few genuine battles.
In that time, the gun was so worn that it no longer had that green Parkerizing color, but was a dull silver/gray. Campaigning in the winter in the DMZ was hard on the gun, and, some mornings, I’d wake up to find the .45 had grown a coat of red hair.
It could only be removed with steel wool, and I didn’t have any of the fine stuff. But the gun soldiered on—it always worked. I could only hope that I was up to the task. I knew the gun was.
At the end of my tour, I was pleased to be going home and leaving the company in the capable hands of Reed Clark. He got the gun, too. Several days later, I was home at my parents’ place in California. As we got ready to go out for a big welcome home dinner at a favorite restaurant, I found myself missing the familiar weight of my constant companion.


Categories
Every German Aircraft Used in WWII
 Nothing in life is perfect — and this is especially true with a sight picture with iron sights. For centuries, iron sights — also called open sights — have been the de facto device for aiming both rifles and handguns. If you take one thing away from this how-to on irons sights, it should be this: focus on the front sight. If done correctly, the rear sight and the target will both be fuzzy — and that’s okay. Like I said; nothing in life is perfect.
What Are Iron Sights?
Let’s discuss handgun sights first. While there’s a wide variety of iron sights, all have the same primary features: a rear sight with a notch in it, and a front post that’s aligned in that notch to aim the pistol.
The rear notch can range from a square notch to a V- or U-shaped notch. On a handgun, in many cases there is a dot — either painted white or luminescent — on either side of this notch. The dots help the shooter more quickly locate the rear notch (and align the front sight).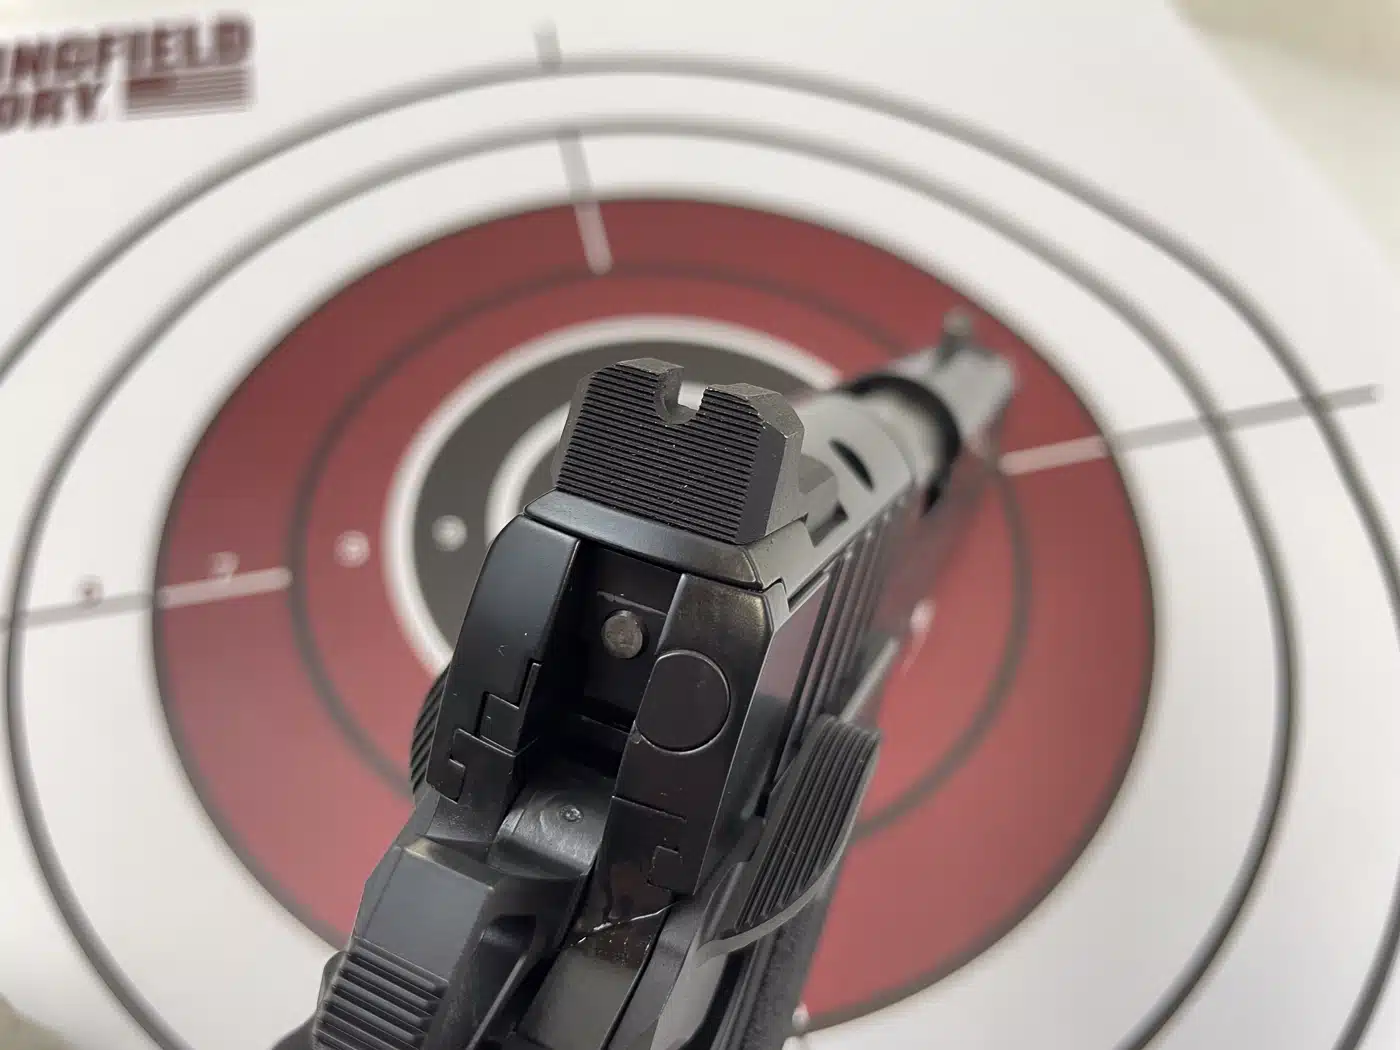
Rear sights on handguns can be fixed or adjustable. Adjustable sights are usually found on target handguns and allow the user to adjust windage (left or right) and elevation (up and down) via a turn of a screw.
Fixed sights are just that fixed. Most can be drifted left or right to adjust windage (unless it is machined directly into the slide of the pistol), but most come from the factory adjusted to hit anywhere from 10 to 25 yards depending on the size, caliber, and type of pistol. The front sight post can be plain, or have a dot or a bead.
Rifle sights are similar, but different. The rear sight on an AR-15 and M1A is typically an aperture sight, also called a peep sight. This is a disc with a hole in the center. Usually, the rear sight can be adjusted for both windage and elevation.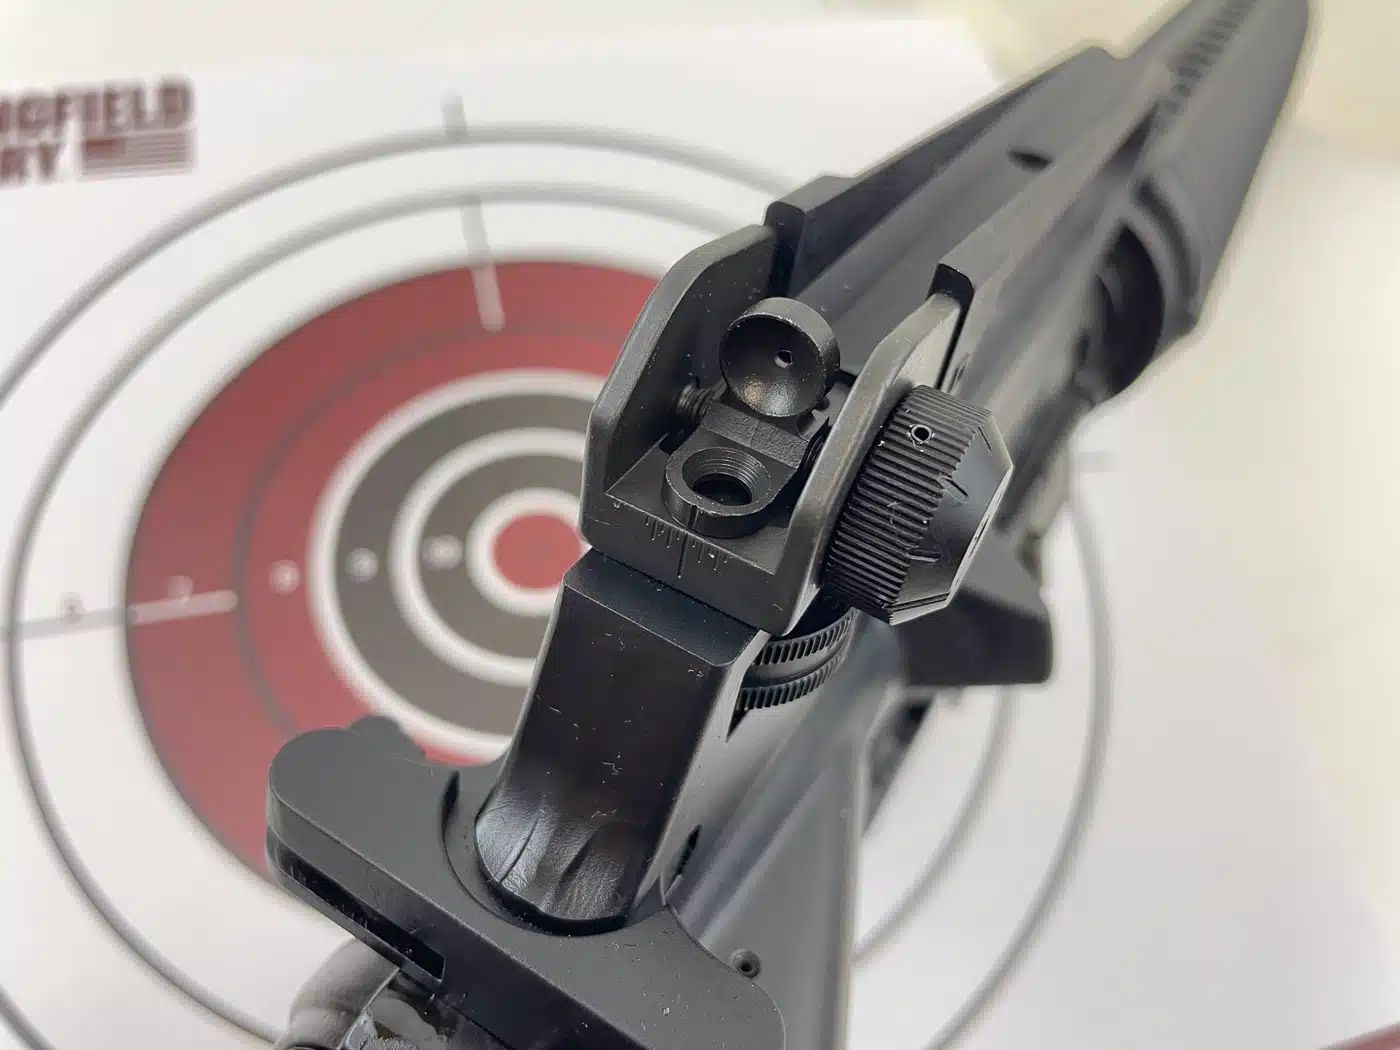
On some AR-15 rifles, there are two rear aperture sights; one with a small hole and one with a larger hole. The small hole rear aperture sight is used for normal shooting while the large aperture rear sight is used for close quarters when fast target acquisition and a larger field of view is needed. The front sight is typically a post.
On rifles like the M1A and AR-15, there are protective wings on either side of the front post to protect it in the event the rifle is dropped. The wings ensure the post is unscathed during an accidental drop. On an AR-15, the front sight can typically be adjusted for elevation.
Now that you know a front sight from a rear sight, let’s discuss the sight alignment process.
Step 1: Equal Height, Equal Light
The key to aligning open sights on a handgun is to align the front post in the notch of the rear sight. The top of the front sight should be flush with the top of the rear sight. That’s where the “equal height” part comes in.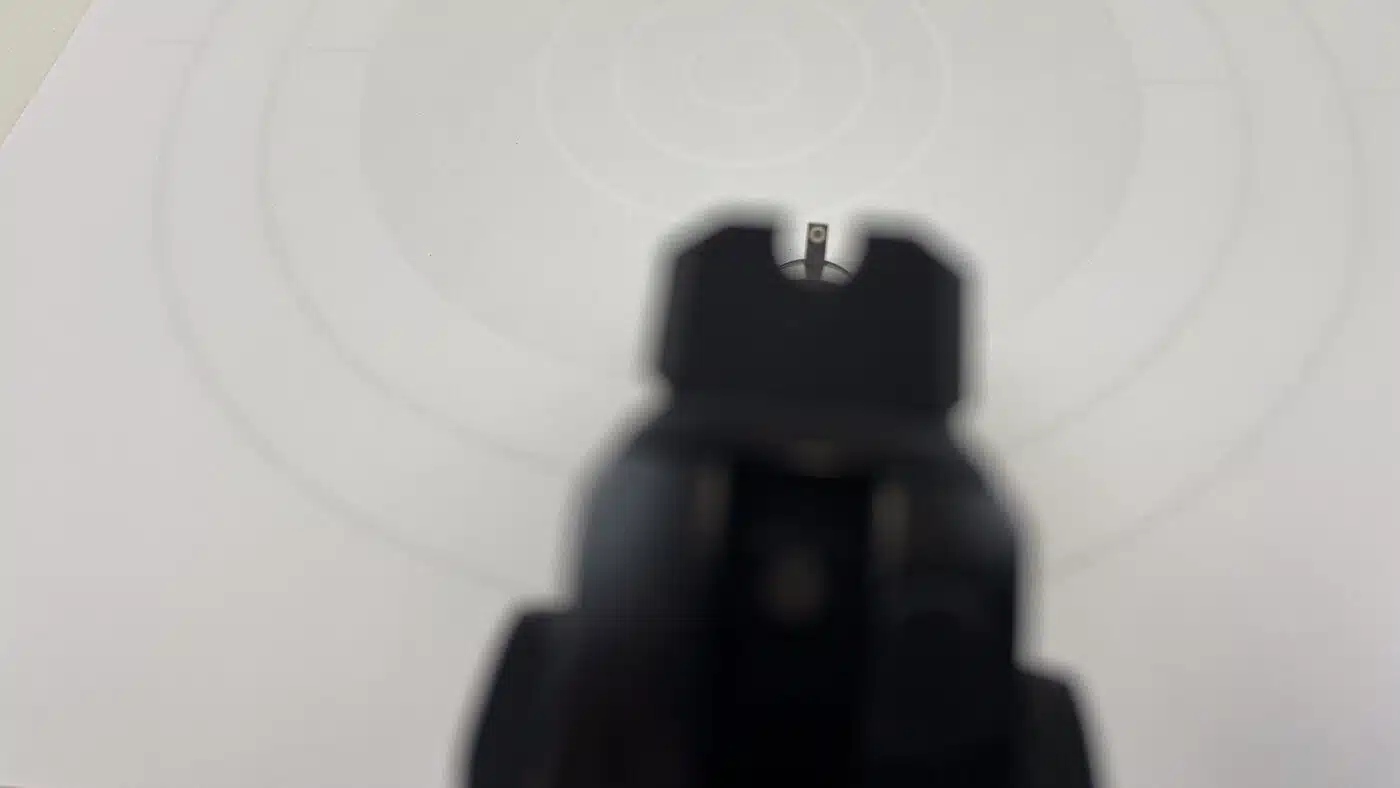
Next is to ensure the front sight post is positioned in the center of the notch. The “equal light” phrase means there should be the same amount of space or light on each side of the front sight post when it is aligned in the notch.
I know this may sound complicated, but once you understand the concept, sight alignment happens ultra-fast. In a rifle, the process is basically the same. The shooter looks through the rear sight aperture and centers the top of the front sight post in the center of the aperture.
Now that you know how to align handgun and rifle open sights, let’s talk sight picture.
Step 2: Sight Picture
What does “sight picture” mean? Sight picture is when the shooter aligns the sights while focusing on the front sight and placing the front sight on the target. This is the “imperfect” part I mentioned since, while the front sight is in clear focus, the rear sight and target are fuzzy or even blurry.
Don’t be bothered by the fuzzy rear sight and target. Our eye can only focus on one thing at a time when aiming a gun, and when aiming with open sights there are three planes our eye is using: one at the rear sight, the second at the front sight, and the third is the target. Remember to focus on the front sight.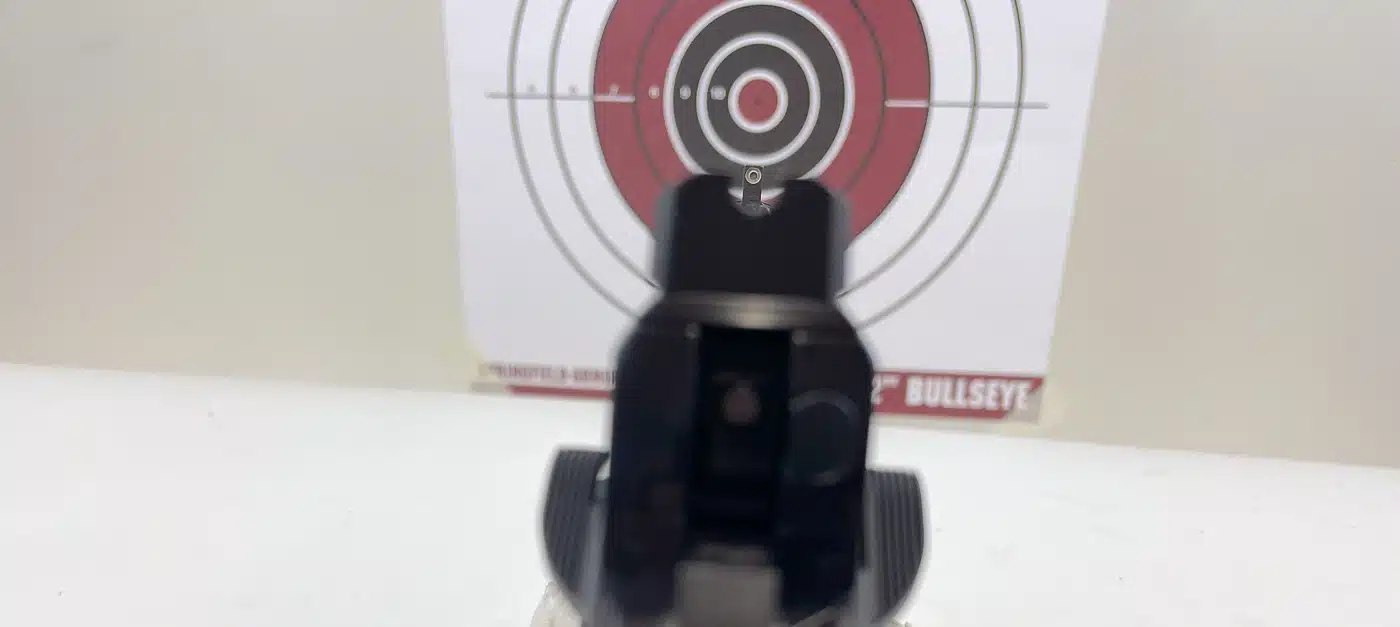
There are different types of sight picture depending on the spot where you place the front sight. For instance, a center-of-mass sight picture is when the front sight is placed on the target so the bullet strikes the exact point of aim.
Aim at the middle of the target, and (if you do your part) the bullet will hit the middle of the target. Center-of-mass sight pictures are typically used in defense and combat shooting, and generally speaking most fixed sight handguns will shoot center of mass.
A six o’clock hold is when the front sight is placed just below the desired point of impact, and the bullet’s point of impact is the center of the bullseye. A six o’clock sight picture is usually used by target shooters who have adjustable sights on their firearm and can adjust the point of impact to be slightly above the aiming point.
This approach allows you to see the desired targeting point more clearly (rather than obscuring it behind the sights). In my opinion, if you conceal carry for defense, the center of mass method should be used.
Step 3: Firing the Shot
Now that the sights are aligned and you have a sight picture, you are ready to fire the shot. This is the tricky part. With a firm grip on the handgun, press the trigger back while keeping the sights aligned and holding the sight picture. Assuming there are no jerks or flinching, the shot should hit according to your sight picture.
Sight picture and point of impact are dependent on the ammunition used. Try shooting center of mass at a specific distance and see where the bullet impacts. You may need to adjust your sight picture depending on where the bullet hits when using fixed sights; with adjustable sights, you will be able to dial in the hits to your sight picture as needed.
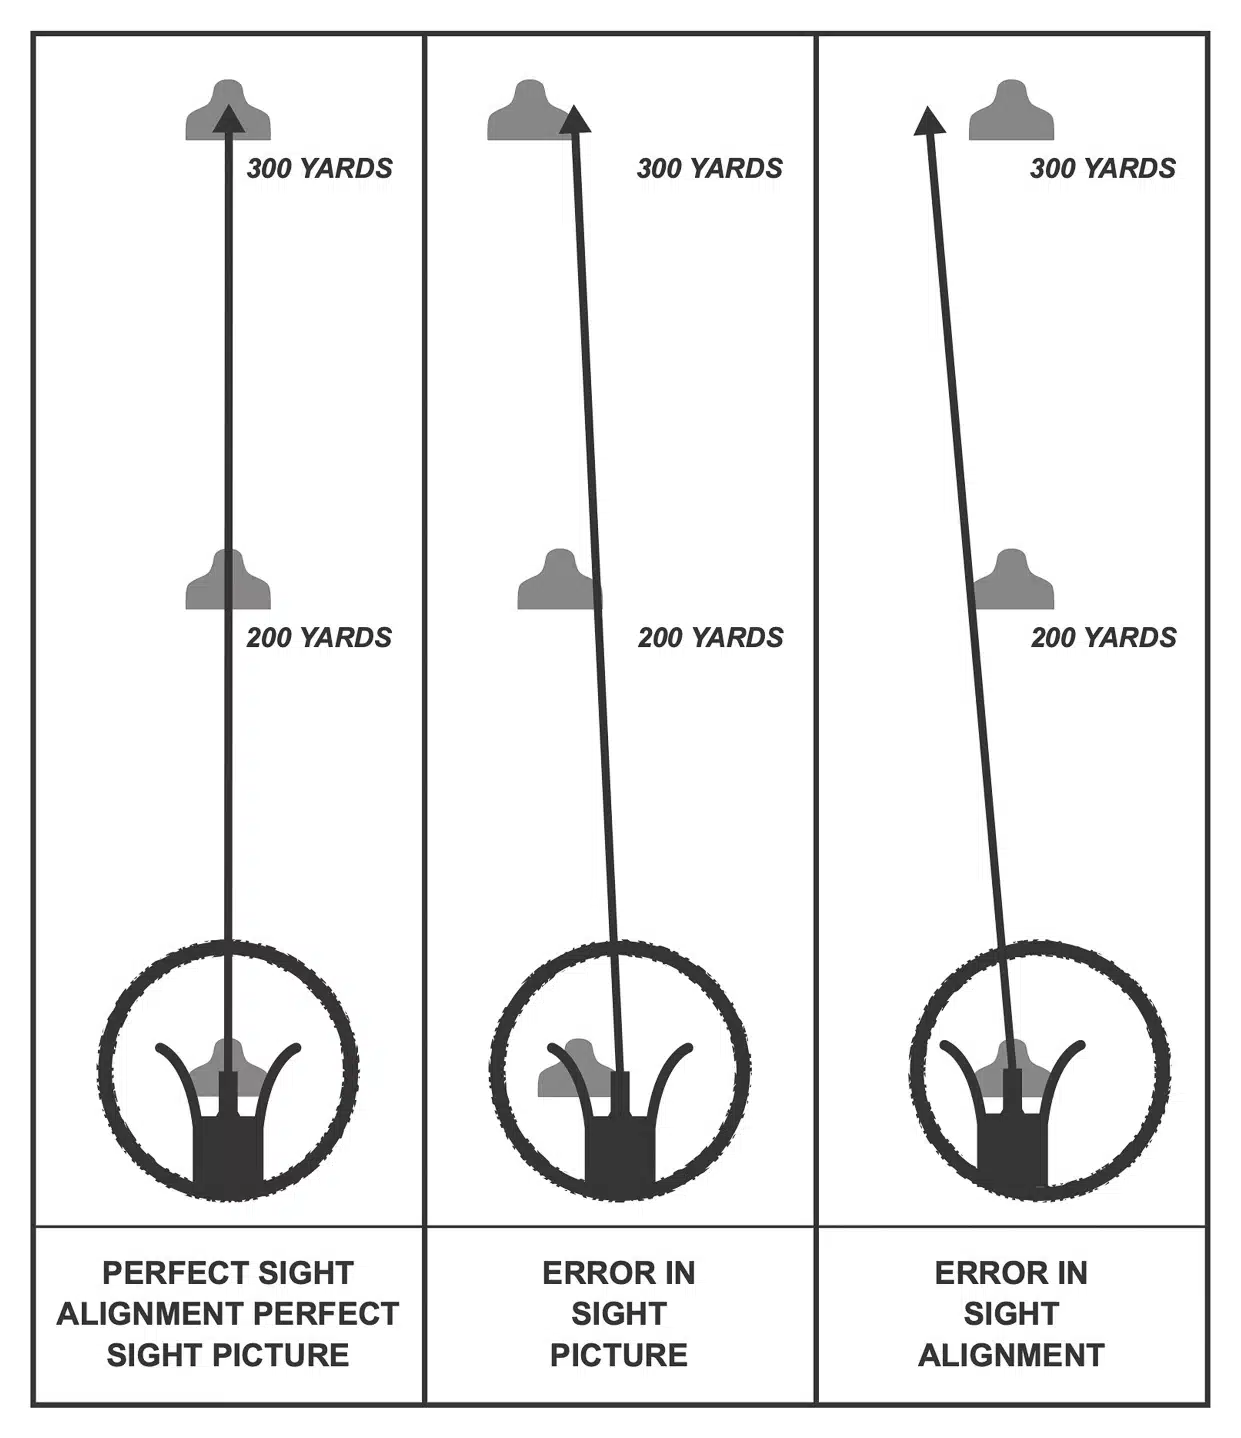
Sight alignment is crucial. At close distances like 10 yards, sights that are not perfectly aligned will have minimal effect on point of impact. At longer distances, as with rifle shots at hundreds of yards, a small error in alignment will cause the shot to miss dramatically.
Why Shoot with Open Sights
In today’s age of optics, a red dot on a handgun or a scope on a rifle are so common that you might ask if it’s even worth practicing with open sights. Here’s why — batteries die, lenses crack, and optics can come loose. When it comes to a defensive firearm, it’s simply sound reasoning to have a back-up in case your technology fails. In that case, open sights can save the day.