Categories
Interesting stuff Manly Stuff Soldiering This great Nation & Its People War

Gunner Hulbert: ‘A Real Old Corps Marine’ A well-known Marine Corps historian tells the true story of a legend. By Lieutenant Colonel Merrill L. Bartlett, U.S. Marine Corps (Retired)

In his popular 1925 book, Fix Bayonets and Other Stories, John W. Thomason described a fictional character strikingly similar to a real Old Corps Marine. In “Special Cases,” Thomason provides a snapshot of a group of officers on the eve of the assault on Blanc Mont in October 1918, characterizing “Edward Hawkes” as far more educated and polished than most of his contemporaries. A veteran of service in the ranks, Hawkes is rumored to have served in Great Britain’s Brigade of Guards; perhaps he even held the Queen’s Commission. Some believed dark secrets shrouded the past of this fine old Leatherneck.

Thomason notes that he drinks only the best wines from his personal crystal goblet; to Hawkes’ dismay, his fellow officers drink vin ordinaire from metal canteen cups. He has earned a reputation as a popular and kindly mentor to the young officers who flocked to the colors when America declared war on Germany.

During the course of the gathering, Hawkes discloses misgivings about his chances for survival when the 5th Marines assault the chalky massif the following morning. He digs a bandana out of his musette bag and unwraps it to reveal three decorations: Medal of Honor, Distinguished Service Cross, and Croix de Guerre. He then wraps them for mailing. To the surprise of his drinking companions, Hawkes asks that the parcel be sent to his wife should he fail to survive the next day’s assault.

Hawkes Is Hulbert

Any officer of the World War I era would immediately recognize the fictional Hawkes as the legendary Gunner Hulbert. Even though the young officers of the 4th Brigade (Marine), American Expeditionary Forces (AEF) knew him best as an officer, most Old Corps Marines (pre-1917) likely remembered Hulbert as one of the few sergeants major on the muster rolls.

Henry Lewis Hulbert looked every bit the fighting man. He stood well over six feet tall and, after almost two decades as a soldier of the sea, weighed scarcely more than when he enlisted. At age 51 on the eve of the Blanc Mont attack, he had a face darkened by years of tropical suns and fierce winds from duty at sea. His white mustache and eyebrows seemed to have been pasted on the bronzed face. While his fellow officers appeared wont to let their personal appearance slip while in the field, Hulbert kept his leather shined and brass polished.

Over his multi-faceted career, Hulbert held every enlisted rank from private to sergeant major, with a Good Conduct Medal and a promotion earned during each enlistment. He advanced rapidly from gunner to second lieutenant to first lieutenant, and his prowess on the battlefields of France resulted in a recommendation for promotion to captain. Not unlike many Old Corps Marines, Hulbert had found a new home and a new life as a Leatherneck following disastrous and disappointing missteps as a young man.

Many enlistees who answered the call to the colors after the Civil War were recent immigrants with a limited education; some could speak little or no English. But unlike most of them, Hulbert was British and better educated than even the majority of officers. Born on 12 February 1867 in Kingston-Upon-Hull to a wealthy Yorkshire family, he matriculated from the posh Felsted School in 1884. He entered the British colonial service with an assignment in Malaya as a clerk and storekeeper in the state of Perak.

Early Troubles

His superior performance soon garnered the attention of Robert Douglas Hewett, the state auditor for Perak; as a bonus, Hulbert also caught the eye of Hewett’s sister. Marriage, fatherhood, and promotions followed in rapid succession. Sadly, however, he allowed his good sense to slip below his beltline.

Hulbert began a romantic attachment with his wife’s younger sister, and the two were caught in flagrante delicto. His life crumbled with lightning speed: dismissal from the colonial service, a discrete divorce, and the auction of his property. Banished from Malaya, he booked passage to Skagway on the Alaska Territory panhandle to seek his fortune in the Klondike gold fields, but failed to find it. Just before the Spanish-American War, Hulbert turned up in San Francisco. Down at the heels, perhaps worrying about the source of his next meal and bed, he enlisted for five years on 28 March 1898.

Recruit training for the 31-year-old private followed at nearby Mare Island, then orders to the Marine guard in the USS Philadelphia. The protected cruiser steamed to Hawaii to show the flag at ceremonies for the annexation of the islands to the United States.

Then, in March 1899, she deployed south in a hurried response to the growing confrontation in Samoa. In the harbor of Apia, the Philadelphia joined three British warships and a lone German corvette. During the previous two decades, Great Britain, Germany, and the United States had come to loggerheads over the sovereignty of the these remote islands. The Berlin Treaty granted the right to supervise the government of Samoa to all three foreign powers.

Heroics in Samoa

The senior British captain and the admiral commanding the American Pacific Squadron met on 6 March; they agreed to demand that the warring Samoan factions abide by the Berlin Treaty and to use force, if necessary, to enforce their ultimatum. Long considered a catalyst for the Samoans’ disruptive political behavior, the Germans were left out of any discussions.

On 13 March, a landing party of 50 American Leathernecks and Bluejackets deployed ashore and bivouacked in the jungle for the night. But no one slept; loud war chants and drums sounded until dawn. A British force established a fortified position between the beach and Apia, while the Americans continued to hike inland to protect the U.S. consulate. A day later, Bluejacket reinforcements arrived from the Philadelphia. The combined force took up positions around the consulate.

By then, the American consul had decided to evacuate with his family. Part of the landing force retired with them, plus several anxious American and British citizens, to the Philadelphia. The remainder of the landing force, consisting of a Bluejacket contingent and First Lieutenant Constantine M. Perkins’ Marines, remained as a rear guard.

On 15 March, the British and American ships shelled the jungle behind Apia, believing it to conceal most of the Samoan insurgents. In response, Samoan dissidents struck the British outpost, killing three sailors. Beginning the next night, disgruntled Samoans probed the defenses around the consulate for more than a week; Perkins sent volunteers out to ambush any Samoan snipers foolish enough to approach the consulate.

On 1 April, the entire American landing party deployed to capture or kill the hostile natives and bring the confrontation to an end. Three American Navy officers and Perkins led a force of 20 Marines and 36 Bluejackets east to Faglii, then onto a German plantation. A large force of fierce Samoan warriors attacked, brandishing huge war clubs and long knives as they charged the defenders. A bullet killed one of the American Navy officers instantly, while the other two appeared to suffer serious wounds.

Hulbert hacked his way to the wounded officers to determine if either was still alive, but both were dead. Perkins took charge of the landing force and led the evacuation to the beach with the survivors. Private Hulbert, along with Sergeants Michael J. McNally and Bruno A. Forsterer, volunteered to man a rearguard position with the landing force’s lone machine gun.

When the gun jammed, the men used their rifles and bayonets to keep the Samoans at bay. With each of them suffering wounds by then, Hulbert held off the Samoans while Forsterer and McNally joined the remainder of the force behind a hastily constructed defensive position at the water’s edge.

Medal of Honor

During the mêlée two American Navy officers had died, and the Samoans beheaded their corpses. The Samoans cut the ears off the seven dead Sailors and the lone Marine casualty. Hulbert, along with Forsterer and McNally, earned the Medal of Honor for their heroism that day.

The Philadelphia joined the three British ships in shelling the island and then left the area on 21 May. Hulbert received orders terminating his tour at sea near the end of February 1902. He had earned the stripes of both corporal and sergeant during his first enlistment, a feat remarkable in an era of stingy promotions.

Major General Commandant Charles Heywood ordered Hulbert to the barracks at Mare Island but soon detached him to join the Marine guard in the USS Concord. The patrol boat steamed south that fall in response to political unrest in Colombia’s troublesome province of Panama.

Although only a sergeant at the time, Hulbert served as the small detachment’s first sergeant. The Marines deployed ashore at Panama City and departed only when the disputing parties agreed to respect American lives and property. In September, Hulbert reported back to Mare Island, where he served as a drill instructor at the basic training facility. He returned to sea again in the protected cruiser USS Boston, however, when the Panamanian rebels declared their independence from Colombia late in the fall of 1902.

On 28 February 1903, Hulbert took up new duties as the Mare Island brig warden coincident with his re-enlistment a month later. That fall, he reported to the Marine guard in the USS Wisconsin. By then he had earned the stripes of a first sergeant. During the more than two years he served in the battleship, the Wisconsin steamed with the Asiatic Fleet and carried the fleet commander’s flag.

At the conclusion of Hulbert’s perfunctory tour of duty at sea, Major General Commandant George F. Elliott ordered him to the barracks at Annapolis, Maryland, and the School of Application as acting sergeant major; his permanent promotion to that rank followed on 19 May 1908.

In 1910, Hulbert received orders to the Marine Corps’ largest barracks, at the Philadelphia Navy Yard. While there, he married the daughter of Lithuanian immigrants, Victoria Cecelia Akelitys, with whom he had a daughter. During that tour, Hulbert enjoyed the confidence and admiration of the barracks commander, Colonel George Barnett, and deployed with him to Cuba in 1911 as the sergeant major of the 1st Provisional Marine Brigade. Hulbert re-enlisted for another four years after returning to Philadelphia. He deployed again to Cuba with a brigade in 1912.

In an unusual gesture, Hulbert requested a reduction in rank to gunnery sergeant to qualify as an English instructor for foreign-born recruits at the barracks in Washington for a year. But on 1 May 1914, he reported for duty on the personal staff of Major General Commandant George Barnett; restoration of his old sergeant major rank followed quickly, and Hulbert re-enlisted for another four years. Two years later, Congress passed the Naval Act of 1916, authorizing appointments to the rank of warrant officer.

Hulbert the Gunner

Brigadier General John A. Lejeune, assistant to the major general commandant and chairman of the warrant officer selection board, recommended the elderly non-commissioned officer with enthusiasm. Hulbert passed a written test with perfect marks in every area. On 29 January 1917, he received his discharge in anticipation of an appointment as the Marine Corps’ first gunner (warrant officers to serve in one of the combat arms). For some unexplained reason, his appointment was dated 24 March 1917, while all of the other appointments to gunner or to warrant officer for quartermaster and adjutant duties did not take effect until 19 October the same year.

With the U.S. declaration of war against Germany, Hulbert began to badger the major general commandant for an assignment to a unit deploying to France. At first, Barnett rebuffed the request because he had already passed age 50. But the major general commandant’s Naval Academy classmate, Colonel Charles A. Doyen, had reached age 58, and Barnett selected him, despite a history of alcohol abuse, to command the first regiment of Marines to deploy to France.

Hulbert continued to press his case, and Barnett finally relented. The old war horse received orders to the 66th Company, 1st Battalion, 5th Marines, just before the regiment organized at the Philadelphia Navy Yard for embarkation. On 14 June 1917, the regiment sailed for Europe.

By mid-summer of 1917, the 5th Marines were under canvas in France. Using his engineering skills, Hulbert supervised construction of billets and a rifle range for his battalion. Later in 1917, when the 6th Marines and the 6th Machinegun Battalion arrived, all of the Marines became part of the 4th Brigade, 2nd Division, AEF.

Doyen pleaded with General John J. Pershing, commander-in-chief of the AEF, for a name that reflected the brigade’s lineage; thus, the 4th Brigade (Marine), AEF became its official nom de guerre. Its baptism of fire came with the third of the German spring offensives in 1918. All too quickly the Germans advanced through the ranks of the French pouilu, mostly hors de combat by 1918.

By the end of May, enemy infantry had crossed the Marne and stood poised to capture Paris. Pershing loaned three American divisions to the French to help stem the onslaught, and they deployed to Chateau Thierry. In an obscure piece of tended forest, the Marine brigade halted the enemy drive in its sector and then moved into Belleau Wood to eject the Germans.

Hulbert earned a Distinguished Service Cross during the intense combat that followed. On 6 June, he suffered two wounds and was subsequently gassed. Evacuated from the battlefield, he returned from a field hospital to his company ten days later. Over half of the brigade incurred wounds or made the ultimate sacrifice by the time the most costly engagement in the Marine Corps’ colorful history ended on 26 June 1918.

A Swim across the Marne

Legend purports that Hulbert learned too late of his required attendance at an awards ceremony at division headquarters, at which no less a luminary than General Pershing would preside. Failing to secure motorized transport, Hulbert borrowed a horse and took off at a gallop. As he gazed across the Marne, he could see elements of the division already drawn up for the ceremony. The closest bridge was too far away, so, the legend goes, he simply dismounted and swam across the river. Supposedly, as he fell into the ranks of heroes, he saluted Pershing and said: “Sir, the order [for the parade] is at 2:30; it is 2:29 and a half.” Pershing pinned a Distinguished Service Cross on the soaking-wet Hulbert’s chest.

Despite the licking endured during the offensives launched in the spring of 1918, the German high command struck again in Champagne. After the Huns again failed in achieving their objective, the Allies deployed to assist the French in cutting the enemy supply line leading from Soissons to Chateau Thierry.

The 4th Brigade (Marine), AEF moved into position just south of Soissons on 18 July. Over the next two days, it suffered almost 2,000 casualties; included in that melancholy number of wounded was Hulbert. He had advanced from gunner to second lieutenant. By late August and the deployment to reduce the St. Mihiel salient, he wore the silver bars of a first lieutenant.

The U.S. First Army, 19 American and 4 French divisions, assembled to reduce the salient that had been held by the Germans since 1914. An intense bombardment began before dawn on 12 September 1918; at first light, the forces of the AEF maneuvered to eliminate the pesky salient. By nightfall on the 13th, the offensive had ended. Because the Germans had already begun evacuation, the attacking force suffered few casualties while capturing a great deal of material and large numbers of prisoners. Nonetheless, commanders reported a total of 132 dead and 574 wounded Marines.

Showdown at Blanc Mont

As the Allies wheeled and maneuvered in preparation for the Meuse-Argonne Offensive to strike the death knell for the German forces, Pershing loaned two American divisions to the French; by then, an advance by the XX Corps had ground to a halt at the Massif du Blanc Mont, a formidable hill mass bristling with enemy machine gun emplacements. Three French divisions had failed to surge over the crest of Blanc Mont.

By then, Lejeune had succeeded to command of the 2nd Division, AEF with his promotion to major general. He promised the commander of the 4th French Army that the 2nd Division, AEF, could seize Blanc Mont; as Lejeune and his staff revealed the attack plans to seize the contested terrain, Hulbert should have had every reason to feel uneasy about his chances for survival. The division staff had devised a daring but complicated plan of attack that proved costly. The 4th brigade would strike up the left side of the masiff, while the 3rd brigade attacked simultaneously in an oblique thrust from the right side.

The Leathernecks of the 4th Brigade and the Doughboys of the 3rd Brigade began the assault on 3 October behind a rolling barrage of artillery that began at dawn. Both brigades bypassed the Bois de la Vipère, a heavily fortified triangular-shaped German strongpoint situated between them.

The next day, as the Marines on the left flank continued to fight their way up the masiff, the French division assigned to advance with it on the left failed to keep pace. Worse, the Poilu advanced and retreated repeatedly, resulting in a see-saw effect on the battlefield. Murderous German machine gun fire tore into the exposed ranks of the 5th Marines, inflicting heavy casualties.

In his fictional account of the battle, Thomason recounts walking with Hawkes (Hulbert) that morning toward their respective company jumping-off points and then being taken under fire by a German machine gun.

Both hugged the ground, but the nickel-plated slugs found Hulbert and sucked the life out of him. Thomason recalled that the gallant old warrior died with his eyes closed and a pleasant expression on his face. Hulbert earned a posthumous Navy Cross at Blanc Mont to add to his Medal of Honor (Samoa), Distinguished Service Cross (Belleau Wood), and four awards of the Croix de Guerre (Chateau Thierry, Soissons, St. Mihiel, Blanc Mont).

Initially interred in the American cemetery at Argonne, Hulbert’s remains were re-interred at Arlington National Cemetery. The Department of the Navy christened the destroyer USS Hulbert (DD-342) in his honor in 1920. The ship’s bell and Hulbert’s personal decorations are displayed today on the quarterdeck of Mitchell Hall at the Marine Corps Infantry Officers’ School, Quantico, Virginia.

Categories
Soldiering War

10 More of History’s Most Unfair Battles

Categories
Hard Nosed Folks Both Good & Bad Soldiering War

History’s Most Notorious Knights

Categories
All About Guns War

A Million Rounds in Half a Day: The Remarkable British Vickers Machinegun by WILL DABBS

Change is invariably hard. Whether it is entering a new school or fielding a radical new weapon, such transitions are typically rocky.

Periods of transition are inevitably awkward. Matriculating from Kindergarten into First Grade is reliably trying. Marriage, divorce, graduation, and retirement can all be challenging for their own unique reasons as well. Periods of transition in military history, however, are invariably bloody.

The major combatant nations entered WW1 with substantial numbers of horse cavalry. These mounted soldiers did not fare well on the modern 20th-century battlefield.

For all of its unique capabilities and extraordinary toys, the military mind can be extraordinarily inflexible. Billy Mitchell sacrificed his career to birth airpower, and the equine cavalry was not retired until their horses were mowed down by the hundreds on the industrial battlefield. The absorption of the machinegun into martial doctrine represented another convulsive evolution in military tactics.

The British leadership adapted their organization to maximize the effectiveness of new belt-fed machineguns during WW1.

It really all comes down to turf. Whoever runs the Army will invariably be reticent to embrace new technologies that might threaten their position as apex predators in the military hierarchy. In 1915, however, English military planners leapt outside their comfort zones to fold the revolutionary capabilities of the belt-fed, water-cooled, sustained-fire machinegun into the British order of battle.

An Entirely New Beastie

The British Machinegun Corps was a radical new military formation. Their insignia prominently featured the water-cooled Vickers machinegun.

When the First World War kicked off in July of 1914 British military planners satisfied themselves with a single two-gun machinegun section per infantry battalion or cavalry regiment. Untold thousands of Limey corpses later the English formed the Machinegun Corps (MGC). The MGC was envisioned as being its own branch of the British military on par with the infantry, cavalry, and artillery. The first machinegun training center was established at Belton Park in Grantham, Lincolnshire, England. A forward machinegun depot operated at Camiers, France.

Posting to the MGC was an exceptionally hazardous duty. The chattering belt-fed machineguns inevitably drew enemy fire.

The MGC saw service from France to Palestine in all major theaters of the war. The newfound capabilities of the belt-fed machinegun were tested and refined throughout. Along the way British Tommies assigned to the MGC showed remarkable grit. Of the 170,500 troops that served in the MGC during WW1 more than 62,000 became casualties. Almost 12,500 were killed. Early on the MGC was known as “The Suicide Club.”

Exploring the Science

There is a definite art to the long-range employment of sustained-fire machineguns. The British in WW1 were acknowledged masters.

Machine gunnery in the British Army during the First World War bore little similarity to what we might consider the employment of machineguns today. The tactics and tools of the MGC seemed more akin to tube artillery than to infantry fire and maneuver. Relatively immobile sustained-fire guns were employed en mass as well as over and across terrain features in an indirect fire role. The results were utterly devastating.

Belt-fed machineguns are capable of much more than just hosing down a nearby target. This Vickers gun is employed in an antiaircraft role.

The maximum effective range of the British Vickers gun was considered to be 4,500 yards. At these extreme ranges, the guns employed plunging fire wherein rounds were discharged at a high arc to drop onto a target from a sharp angle. Such devastating fires could be pre-registered and unleashed remotely day or night in any weather. The downrange saturation effects of such a sustained treatment would be difficult for the modern mind to comprehend.

The Mission

This shot of a Vickers gun in action was taken during the Battle of the Somme in 1916. That sure looks miserable.

These new and untried tactics received their ultimate test on the 24th of August, 1916, at a place called High Wood during the Battle of the Somme. A single company of the MGC fielded ten tripod-mounted Vickers guns based in the Savoy Trench. British infantry organized for an attack. Realizing that a German counterattack would have to be canalized through a certain area, commanders unlimbered all ten of the 100th Company Vickers guns upon a target some 2,000 yards distant.

Massed infantry attacks characterized the bitter fighting during WW1. Artillery, armor, and machinegun support frequently spelled the difference between success and failure.

The specific mission during this engagement was to disrupt the inevitable German counterattack that would ensue once the Tommies went over the top. At a coordinated moment these ten Vickers guns opened up and then kept right on firing for a full twelve hours. So long as the British maintained this prodigious volume of fire the Germans were helpless to reinforce their beleaguered troops. The end result was an unprecedented feat of arms.

Simply Breathtaking Numbers

The Vickers machinegun, shown here in action with Australian troops in Korea, was capable of some simply breathtaking sustained fire performance.

This single sustained machinegun barrage focused on the known approaches to the battle area. These ten machineguns burned through fully one hundred new barrels. Every drop of water available to the company was consumed in the cooling jackets of these ten guns.

The metal box connected to the barrel jacket received the efflux from the condenser hose that kept the barrels cool during extended firing. This shot was taken during WW2.

The MGC troops emptied their canteens and then used up all of their available drinking water. The latrine buckets were transferred into the smoking barrel jackets, and everybody who was able urinated into these reservoirs. All of this liquid both vile and otherwise was burned off as steam to keep the barrels in these ten guns from catastrophically overheating.

The .303 British round features an exposed rim and is fairly archaic by today’s standards. Through the rugged Vickers gun, however, it was undeniably effective.

This steady and unrelenting volume of fire went on for a full half day. During the course of this single engagement, the 100th Company consumed 999,750 rounds of belted .303 British ammunition. A single gun commanded by a SGT Dean fired 120,000 rounds. According to the after action report, these ten guns did not have a single noteworthy stoppage. Captured German prisoners described being on the receiving end as “annihilating.” This deep into the Information Age modern belt-fed guns could not nearly rival such a feat. The key was the extraordinary Vickers gun.

The Weapon

The Vickers gun served as the backbone of the WW1-era Machinegun Corps.

The Vickers machinegun was first introduced in 1912 and soldiered on through 1968. Massively heavy at 51 pounds with its substantial tripod and traverse and elevation gear, the Vickers owed its parentage to one Hiram Stevens Maxim.

Hiram Maxim, shown on the left, was the father of the belt-fed machinegun.

Maxim was born in America but lived in Britain as an Englishman. His remarkable gas-boosted recoil action drove the belt-fed guns of both the Germans and the Russians during WW1. The British Vickers Company bought the Maxim Company outright in 1896 and subsequently gained access to the associated intellectual property.

The basic Maxim action drove all the major belt-fed machineguns used during WW1.

Using the Maxim design as a starting point Vickers engineers inverted the mechanism and lightened the overall system through the use of advanced alloys and a simplified action. Serving alongside the more portable Lewis machinegun, the Vickers was the scourge of no-man’s land for the Boche. Firing at a cyclic rate of 450 to 500 rounds per minute, the Vickers gun fed from 250-round canvas belts. The gun was typically serviced and supported by a six to eight-man machinegun team.

The Vickers gun was designed to be serviced by a team. This Vickers is shown in action during the 1916 Battle of the Somme.

One soldier served as the gunner, while another kept the ammunition flowing smoothly. The rest of the team was tasked with humping the gun, ammunition, support gear, and spare parts. British machinegun troops were legendarily well trained and effective.

Most all British combat aircraft of WW1 employed the Vickers gun. This example is shown mounted on a Bristol scout.

Vickers guns saw widespread use on early combat aircraft as well as rudimentary British tanks.

Quad Vickers mounts like this one provided antiaircraft defense for English naval vessels.

Fitted in massive quad mounts Vickers guns filled an antiaircraft role on Royal Navy combat vessels.

The British Long Range Desert Group operated throughout the North African deserts in support of units like the British SAS during WW2. Vickers guns onboard their vehicles provided reliable sustained firepower.

Vickers guns saw widespread use with the early SAS and the Long Range Desert Group in North Africa during WW2. The last operational use of the Vickers by the British was in the Radfan Hills in Yemen during the Aden Emergency.

The Rest of the Story

The Vickers gun saw action in a variety of roles during the First World War. This example is mounted on a WW1-era motorcycle sidecar.

The employment of the 100th Company of the MGC during the attack on High Wood was an intense but small part of the overall Battle of the Somme. During the High Wood fight, there were more than 13,000 British casualties as well as another 9,500 among the defending Germans. The overall casualties for the Battle of the Somme numbered more than 1.7 million killed and wounded on both sides over the course of this horrible four-and-one-half-month battle.

Military technology advanced convulsively during WW1. This British Mk I Male tank was armed with cannon. The same vehicle armed with machineguns was called the Female.

Much changed about warfare during the course of World War 1. Combatant nations began the war with horse cavalry and balloons and ended the conflict with tanks and combat aircraft. Around 18 million people perished.

The British Vickers gun was one of the most influential weapons of the war.

During the course of the war, the British formed the Machinegun Corps and later folded the tank arm into the MGC. Tanks ultimately got their own branch titled the Tank Corps, while the MGC was formally disbanded in 1922, four years after the armistice. Along the way, the belt-fed Vickers gun exacted a simply breathtaking butcher’s bill across the Western Front.

Modern armies are dirty with machineguns nowadays. Back in early WW1, however, these were radical unproven weapon systems.

Sustained fire machineguns were used in WW1 as strategic assets against such vital targets as enemy crossroads, assembly areas, and trench systems. Such coordinated fires were carefully planned and meticulously executed. Nowadays, by contrast, every infantry soldier carries a handheld automatic weapon, and air-cooled, belt-fed guns sprout from the top of almost every combat vehicle.

Modern militaries rightfully expect their machineguns to move right along with the typical infantry squad.

Advances in metallurgy, engineering, and materials science have produced belt-fed machineguns sufficiently light and rugged to travel along with the infantry squad on the move. Such tools afford ground commanders the luxury of on-demand fire support that is critical for both offensive and defensive combat operations on the modern non-linear battlefield.

Modern machineguns all hearken from such contrivances as the 19th century Gatling gun.

Heavy machineguns capable of providing sustained fire from fixed positions themselves evolved from the multi-barrel Gatling guns of the 19th century.

Water-cooled, belt-fed machineguns like this German MG08 Maxim configured on a sled mount dominated combat during WW1.

While it took some time and a lot of blood for tactics to catch up to these remarkable new tools, the automatic machinegun was ultimately the most influential weapon on the WW1 battlefield. Whether it was mounted in the nose of an SE5A fighter, in a barbette on an Mk IV Female tank, or on the deck of a British destroyer, the Vickers gun served as the strong long arm of the British Empire.

The Vickers gun, shown here in action during WW2, was radically advanced for its day.
The Vickers was a formidable sustained fire platform.
Categories
All About Guns War

Can You Guess the Unusual Last Aerial Victory of the RAF?

Categories
Soldiering War

Horses & Machine Guns: British Empire Cavalry on the Western Front of The Great War

Categories
All About Guns War

OV-10 Bronco – Machine Guns, Rockets, and 3-Tons of Ammunition – Vietnam War

Categories
Hard Nosed Folks Both Good & Bad Soldiering War

The Blue Division: The Eastern Front’s Feared Spanish Soldiers

https://youtu.be/zTD_aRDJVGo

This was a pretty smart move on Franco’s part. In that he kept out of WWII, made Hitler happy, sent folks who were either folks who just love to fight or some of his local enemies. And as an added plus he would be fighting Stalin.

Another follow evil bastard, who had supported the losing /opposing side in the just ended Spanish Civil War. If anything the man never drew a stupid breath! Grumpy

PS here is a bit more about these guys!

Division Azul Patch Division Azul
The Spanish Blue Division

By William Sariego

History
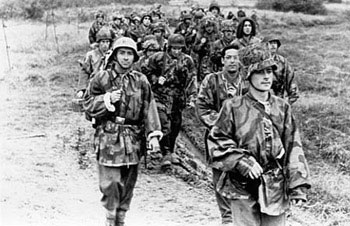
General Franco owed his position as dictator to Benito Mussolini and Adolph Hitler due to their support for the Nationalists during the Spanish Civil War (1936-1939). During that same conflict, the Union of Soviet Socialist Republics had supported his Republican enemies.

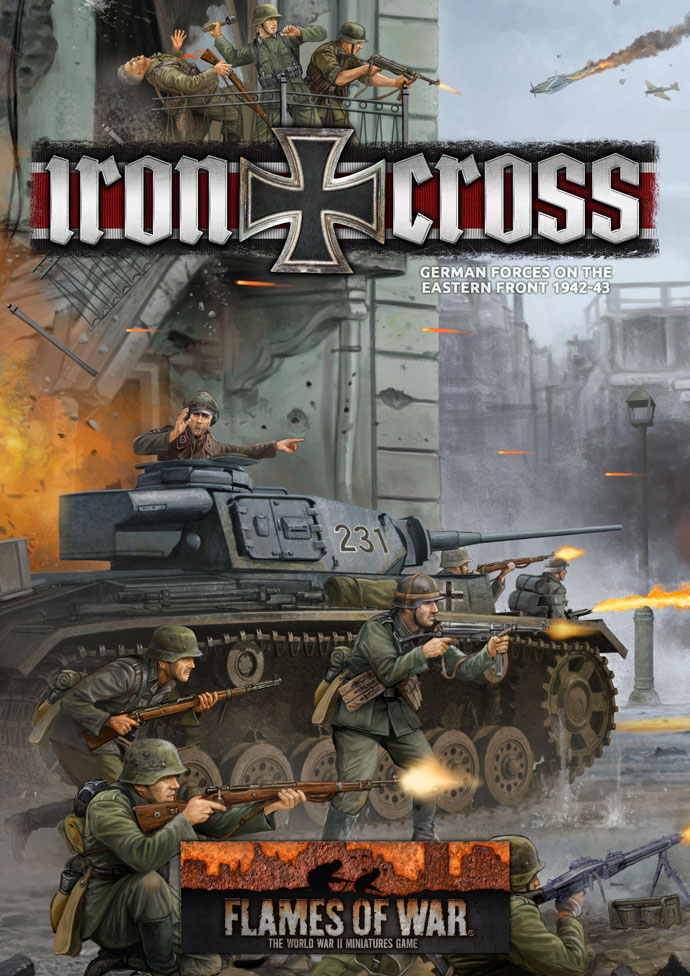
Iron Cross

Hitler had previously attempted to entice Spain into the war after the fall of France. The Generalissimo was unimpressed, and Hitler said he would rather have a tooth pulled than meet with Franco again! However, some Falangists in the Spanish government and military wanted to participate in “Crusade against Bolshevism“, having no love for the USSR. The idea of a volunteer division was a compromise solution.

When the volunteers first mustered, the men wore the blue uniforms of the Falangist Militia, hence nickname of the “Blue” division. General Munoz Grandes, a hero of the Civil War and an officer known for his pro-Axis sympathies, was chosen as commander.

Arriving in Germany during July 1941, for training, problems began to develop. Some were quite basic such as the different dietary preferences of the Spanish soldiers and their German hosts. Others were cultural, reflecting the Germans disdain for what was seen as ill discipline in the Spanish troops. The latter resented the methodical German approach to combat. Fraternization with local females was also an issue.

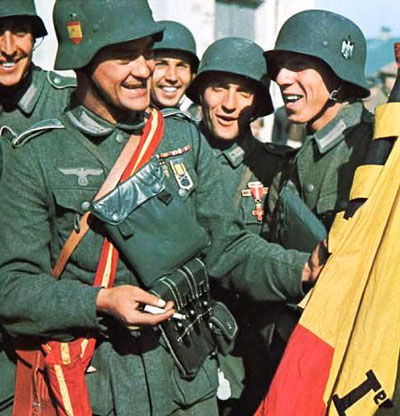
Spanish troops with unit standard
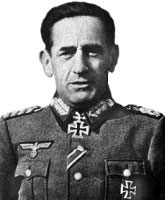
General Munoz Grandes

After a month of training the division entered the German army as the 250th Infantry Division and began its long march to the front, where it was to be assigned to Kluge’s 4th Army in Army Group Center. Problems with discipline continued, and the division was often paraded and marched pointlessly to get them used to the German way of doing things, which of course included not fraternizing with local women.

Forced to undergo such a parade in Grodno, an entire company marched with condoms stretched across their rifle muzzles. On the road to Minsk the Germans had enough. While still en route the division refused to yield right of way to some members of von Kluge’s staff. He refused the Spanish unit, after which they were forced to march north to join the 16th Army in Army Group North.

Attached to the 39th Corps, in October and November the unit participated in successful attacks on Soviet positions, impressing General Busch (CO 16th Army) who once observed them in combat. On January 13, 1942, the Soviets counterattacked and routed some units of the 39th, yet the Spanish held onto their hedgehog around Novgorod for over two months without retreating until the Soviet attacks ceased. The division held its defensive positions until August, when it was pulled out of line to re-equip and join von Manstein’s 11th Army for an assault on Leningrad.

During the see-saw battles over the next few months the Blue division gave a fine account of itself, often out performing German units stationed on its flank. In December, the division was dealt a blow as Grandes was recalled to Spain. Franco feared his popularity with the Germans and did not want risk Spain being dragged further into the conflict. His replacement, Esteban Infantes, was not liked by the Germans, but proved a capable leader, even if not up to Grandes ability.

The Soviets had finally relieved the siege of Leningrad at the end of January 1943. In an effort to expand its slender lifeline, amounting to a five mile corridor, the Soviets attacked on February 10, hitting the Spanish at a town known as Krasni Bor. This would be the Blue Division’s finest hour, and its death knell. Attacked by three Soviet divisions (43rd Rifle, 72nd rifle, and 63rd Guards), supported by nearly 400 artillery and 60 tanks, the Spanish were threatened with encirclement and destruction.

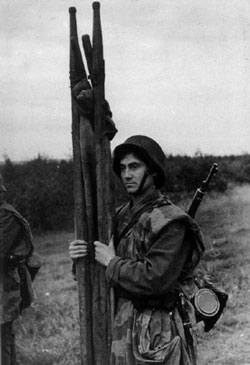
Stretcher bearer
Spanish march to the front

The battle raged all day and night, with requested German reinforcements not arriving until the waning hours after midnight. The battle was brutal, fought at close quarters, more reminiscent of the Great War than WWII. As dawn rose on the morning of the 11th, fighting continued sporadically as both sides were too battered to continue. Sources on Soviet losses vary, but place the number between 7,000 and 11,000. The Spanish casualties were less than 2,500. The Soviets had gained a devastated ghost town and a few kilometers of trenches.

For the balance of 1943 the mission of the unit became increasingly questioned in Madrid. The war was clearly turning against the Axis and Franco did not want to risk alienating the United States.

The division continued to fight and hold the line, but morale was starting to suffer, as most of the original line officers were dead and replacements were not up to par. On October 1st, Francisco Franco officially announced Spanish neutrality and the division prepared to withdraw.

Still wanting to appease Hitler, as the Blue Division was being repatriated, a “Spanish Legion” was being formed in Madrid. With an initial strength of 1,500, this unit was back in the line in December. Quality was poor, with some former Socialists and other left-wingers volunteering only to desert once in the Soviet Union. In May 1944, this rump unit was withdrawn under political pressure. Some diehard anti-Communists stayed on, joining the SS. They would be present during the final fighting for Berlin.

Spanish Artillery
Spanish helmet 1941

Divisional General Staff (General Munoz Grandes) (189 men) 

262 Infantry Regiment (Col. Miguel Rodrigo Martinez) (3012 men)
263 Infantry Regiment (Col. Pedro Pimentel Zayas) (3012 men)
269 Infantry Regiment (Col. José Vierna Trábega) (3012 men)

250 Anti-tank Battalion (574 men)
Motorised 3.7cm PaK 36 guns

250 Artillery Regiment (Col. José Martínez Esparza) (2793 men)
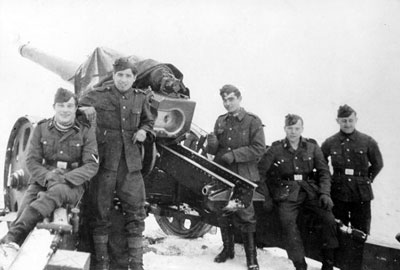
9 Batteries of 10.5cm leFH 18 Howitzers, 3 Batteries of 15cm sFH 18 Howitzers)

250 Reconnaissance Battalion (531)
250 Reserve Battalion (601 men)
250 Signals Battalion (511 men)
250 Pioneer Battalion (712 men)

Divisional Troops
Transport service (1034 men)
Administrative services (257 men)
Medical service (518 men)
Veterinary service (237 men)
Military police (33 men)
Military post office (18 men)

Spanish Machine-gunner
Parade September 1943

Divisional General Staff (General Esteban Infantes)

262 Grenadier Regiment
263 Grenadier Regiment
269 Grenadier Regiment
250 Anti-tank Battalion
Motorised 7.5cm PaK 40, 5cm, PaK 38 and 3.7cm PaK 36 guns

250 Artillery Begiment
9 Batteries of 10.5cm leFH 18 Howitzers, 2 Batteries of 21cm French Howitzers, 1 Battery of 15.5cm French Howitzers
250 Reconnaissance Battalion
250 Signals Battalion
250 Pioneer Battalion
Divisional Troops
Supply, transport and administration.

Using the Blue Division in Flames of War

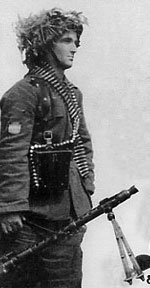
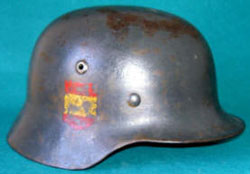
The Spanish troops used German uniforms and equipment, thus the Blue division is adequately represented by Mid-war German Grenadier model range. The only visible difference being their yellow and red national shield worn on the helmet right and the right upper arm.

To Field them use the Grenadier Company from Iron Cross. The Spanish troops of Division Azul were all volunteers with a strong will to fight communism, as such they have the same strong ratings as the German Grenadiers. Though, if you would like to give them a bit more go forward you might like the use the Iron Cross Croatian Rifle Company command card to represent them, giving them Counterattack 3+.

Review of Osprey’s Blue Division Soldier 1941-45, Spanish Volunteers on the Eastern Front:

Blue Division Soldier 1941-45, Spanish Volunteers on the Eastern Front….

Categories
All About Guns War

Charge (warfare)

From Wikipedia, the free encyclopedia

Charge
Carga de O'Higgins.jpg

Romanticized painting of O’Higgins‘ charge at the Battle of Rancagua during the Chilean War of Independence
Era Prehistoric – Modern
Battlespace Land
Weapons Lances, Pikes, Swords, Bayonets, Rifles, Knives
Type Maneuver warfare, Offensive warfare
Strategy Offensive

A charge is a maneuver in battle in which combatants advance towards their enemy at their best speed in an attempt to engage in close combat. The charge is the dominant shock attack and has been the key tactic and decisive moment of many battles throughout history. Modern charges usually involve small groups against individual positions (such as a bunker) instead of large groups of combatants charging another group or a fortifiedline.

Infantry charges[edit]

Ancient charges[edit]

It may be assumed that the charge was practiced in prehistoric warfare, but clear evidence only comes with later literate societies. The tactics of the classical Greek phalanx included an ordered approach march, with a final charge to contact.[1]

Highland charge[edit]

In response to the introduction of firearms, Irish and Scottish troops at the end of the 16th century developed a tactic that combined a volley of musketry with a rapid close to close combat using swords. Initially successful, it was countered by effective discipline and the development of defensive bayonet tactics.[2]

Bayonet charge[edit]

Greek infantry charge with the bayonet during the Greco-Turkish War of 1897

The development of the bayonet in the late 17th century led to the bayonet charge becoming the main infantry charge tactic through the 19th century and into the 20th. As early as the 19th century, tactical scholars were already noting that most bayonet charges did not result in close combat. Instead, one side usually fled before actual bayonet fighting ensued. The act of fixing bayonets has been held to be primarily connected to morale, the making of a clear signal to friend and foe of a willingness to kill at close quarters.[3]

Cavalry charges[edit]

The shock value of a charge attack has been especially exploited in cavalry tactics, both of armored knights and lighter mounted troops of both earlier and later eras. Historians such as John Keeganhave shown that when correctly prepared against (such as by improvising fortifications) and, especially, by standing firm in face of the onslaught, cavalry charges often failed against infantry, with horses refusing to gallop into the dense mass of enemies,[4] or the charging unit itself breaking up. However, when cavalry charges succeeded, it was usually due to the defending formation breaking up (often in fear) and scattering, to be hunted down by the enemy.[5] It must be noted, though, that while it was not recommended for a cavalry charge to continue against unbroken infantry, charges were still a viable danger to heavy infantry. Parthian lancers were noted to require significantly dense formations of Roman legionaries to stop, and Frankish knights were reported to be even harder to stop, if the writing of Anna Komnene is to be believed. However, only highly trained horses would voluntarily charge dense, unbroken enemy formations directly, and in order to be effective, a strong formation would have to be kept – such strong formations being the result of efficient training. Heavy cavalry lacking even a single part of this combination – composed of high morale, excellent training, quality equipment, individual prowess, and collective discipline of both the warrior and the mount – would suffer in a charge against unbroken heavy infantry, and only the very best heavy cavalrymen (e.g., knights and cataphracts) throughout history would own these in regards to their era and terrain.

European Middle Ages[edit]

The cavalry charge was a significant tactic in the Middle Ages. Although cavalry had charged before, a combination of the adoption of a frame saddle secured in place by a breast-band, stirrups and the technique of couching the lance under the arm delivered a hitherto unachievable ability to utilise the momentum of the horse and rider. These developments began in the 7th century but were not combined to full effect until the 11th century.[6] The Battle of Dyrrhachium (1081) was an early instance of the familiar medieval cavalry charge; recorded to have a devastating effect by both Norman and Byzantine chroniclers. By the time of the First Crusade in the 1090s, the cavalry charge was being employed widely by European armies.[7]
However, from the dawn of the Hundred Years’ War onward, the use of professional pikemen and longbowmen with high morale and functional tactics meant that a knight would have to be cautious in a cavalry charge. Men wielding either pikeor halberd in formation, with high morale, could stave off all but the best cavalry charges, whilst English longbowmen could unleash a torrent of arrows capable of wreaking havoc, though not necessarily a massacre, upon the heads of heavy infantry and cavalry in unsuitable terrain. It became increasingly common for knights to dismount and fight as elite heavy infantry, although some continued to stay mounted throughout combat. The use of cavalry for flanking manoeuvres became more useful, although some interpretations of the knightly ideal often led to reckless, undisciplined charges.
Cavalry could still charge dense heavy infantry formations head-on if the cavalrymen had a combination of certain traits. They had a high chance of success if they were in a formation, collectively disciplined, highly skilled, and equipped with the best arms and armour, as well as mounted upon horses trained to endure the physical and mental stresses of such charges. However, the majority of cavalry personnel lacked at least one of these traits, particularly discipline, formations, and horses trained for head-on charges. Thus, the use of the head-on cavalry charge declined, although the fierce Polish hussars, French Cuirassiers, and Spanish and Portuguese conquistadores were still capable of succeeding in such charges, often due to their possession of the previously mentioned combination of the traits required for success in such endeavours.

Twentieth century[edit]

In the twentieth century, the cavalry charge was seldom used, though it enjoyed sporadic and occasional success.
In what was called the “last true cavalry charge“, elements of the 7th Cavalry Regiment of the United States attacked Villista forces in the Battle of Guerrero on 29 March 1916. The battle was a victory for the Americans, occurring in desert terrain, at the Mexican town of Vicente Guerrero, Chihuahua.[8][9][10][11]
One of the most successful offensive cavalry charges of the 20th century was not conducted by cavalry at all, but rather by mounted infantry, when on 31 October 1917, the Australian 4th Light Horse Brigade charged across two miles of open terrain in the face of Ottoman artillery and machine gun fire to successfully capture Beersheba in what would come to be known as the Battle of Beersheba.
On 16 May 1919, during the Third Anglo-Afghan War, the 1st King’s Dragoon Guards made the last recorded charge by a British horsed cavalry regiment[12] at Dakka, a village in Afghan territory, north west of the Khyber Pass.[13]
During the Spanish Civil War, there was a massive cavalry charge by the Fascist’s division during the Battle of Alfambraon 5 February 1938, the last great mounted charge in Western Europe.[14]
Several attempted charges were made in World War II. The Polish cavalry, in spite of being primarily trained to operate as rapid infantry and being better armed than regular Polish infantry (more anti—tank weapons and armored vehicles per capita) did execute up to 15 cavalry charges during the Invasion of Poland. Majority of the charges were successful and none was meant as a charge against armored vehicles. Some of the charges were mutual charges by the Polish and German cavalry such as Battle of Krasnobród (1939) and one time, the German cavalry scouts from 4th Light Division (Germany) charge against Polish infantry from 10th Motorized Cavalry Brigade (Poland) was countered by Polish tankettes moving from concealed positions at Zakliczyn. On Nov. 17, 1941, during the Battle of Moscow, the Soviet 44th ‘Mongolian’ Cavalry Division charged the German lines near Musino, west of the capital. The mounted Soviets were ravaged by German artillery, then by machine guns. The charge failed, and the Germans said they killed 2,000 cavalrymen without a single loss to themselves.[15] On 24 August 1942, the defensive charge of the Savoia Cavalleria at Izbushensky against Russian lines near the Don River was successful. British and American cavalry units also made similar cavalry charges during World War II. (See 26th Cavalry Regiment). The last successful cavalry charge, during World War II, was executed during the Battle of Schoenfeld. The Polish cavalry, fighting on the Soviet side, overwhelmed the German artillery position and allowed for infantry and tanks to charge into the city. The cavalry suffered only 7 dead, while 26 Polish tankmen and 124 infantrymen as well as around 500 German soldiers ended up dead.[16][17][18])
After World War II, the cavalry charge was clearly outdated and was no longer employed[citation needed]; this, however, did not stop modern troops from utilising horses for transport, and in countries with mounted police, similar (albeit unarmed) techniques to the cavalry charge are sometimes employed to fend off rioters and large crowds.

Impact of firearms[edit]

In the firearms age, the basic parameters are speed of advance against rate (or effectiveness) of fire. If the attackers advance at a more rapid rate than the defenders can kill or disable them then the attackers will reach the defenders (though not necessarily without being greatly weakened in numbers). There are many modifiers to this simple comparison – timing, covering fire, organization, formation and terrain, among others. A failed charge may leave the would-be attackers vulnerable to a counter-charge.
There has been a constant rise in an army’s rate of fire for the last 700 years or so, but while massed charges have been successfully broken they have also been victorious. It is only since the late 19th century that straight charges have become less successful, especially since the introduction of the machine gun and breech-loading artillery. They are often still useful on a far smaller scale in confined areas where the enemy’s firepower cannot be brought to bear.

Notable charges[edit]

Charge of the Light Brigade, Painting by Richard Caton Woodville

  • Battle of Gaugamela (October 1, 331 BC) 1,800 Greco-Macedonian Companion cavalry, led by Alexander the Great himself and supported by brigades of hypaspists and part of his phalanx, charged and broke through the center of a huge Achaemenid army of more than 50,000 warriors led by Darius III, the emperor.
  • Battle of Hastings (October 14, 1066): 2000 Norman heavy cavalry repeatedly charged uphill at several times their number in Anglo-Saxon infantry, who had formed a shield wall. All charges were repulsed until the Saxon infantry, thinking the Normans were retreating, broke their formation to follow them and were routed by the Norman cavalry.
  • Battle of Dyrrhachium (October 18, 1081): 1,300 Norman cavalry under Robert Guiscard, Duke of Apulia, were initially repulsed by the Varangian Guard. The Varangian Guard were in turn routed by a counterattack to their flanks by Norman infantry, fled to the sanctuary of a nearby church which the Norman forces burnt down. The Norman knights then charged the Byzantine line again, and caused a widespread rout. First recorded instance of a successful and decisive ‘shock’ cavalry charge.
  • Battle of Falkirk (July 22, 1298) The English cavalry without orders from the king charged and though able to break Scottish archers and cavalry, was unable to break the tight formation of Scottish pikemen deployed in schiltrons. King Edward I withdrew his knights back and used his longbowmen to weaken and break up the Scottish lines. The English knights rejoined the battle under cover of the arrow fire and routed the Scottish infantry with heavy losses.
  • Battle of the Golden Spurs (July 11, 1302): The French cavalry, consisting of many nobles was defeated in battle by heavily armed Flemish militiamen on foot. The cavalry charge was cited to be rash and premature with the battlefield’s many ditches and marshes blamed for the loss, and at a few points on the Flemish line the French horsemen did manage to break through before being surrounded and annihilated. However it also demonstrated that well-disciplined and heavily armed infantry could defeat cavalry charges, ending the perception that heavy cavalry was practically invincible against infantry.

Together with the Battle of Bannockburn (below), the battle contributed to the end of the perception of cavalry supremacy in warfare.

  • Battle of Bannockburn (23–24 June 1314) The mounted English knights under Edward II charged the Scottish lines without covering arrow fire were slaughtered by the Scottish pikemen. Also in the same battle, the Scottish cavalry charged and routed the English-Welsh archers.
  • Battle of Crécy (August 26, 1346): 29,000 French and allied troops charged 16,000 English soldiers on a gentle slope. Under heavy longbow fire, the charge was a total disaster, with the French army losing over 1500 knights, many of them from important noble families.
  • Battle of Poitiers (19 September 1356): Unlike the other major battles of the Hundred Years’ War, the French knights and men-at-arms attacked the English lines on foot in fear of what happened in Crecy. However, instead this led up to the English knights and men-at-arms to mount up and charge. The combined attack of longbowmen and cavalry charge defeated the French army.
  • Battle of Agincourt (October 25, 1415): Dismounted French knights become bogged down in a charge against the outnumbered English forces. The charge was slowed and stalled by the thick mud of the Agincourt field, allowing the light English infantry to kill and capture many French knights and prominent French nobles.
  • Battle of Patay (June 18, 1429): French heavy cavalry managed to catch a retreating English army by surprise, and for the first time succeeded in defeating the English longbowmen in a direct confrontation, marking a turning point in the Hundred Years’ War.
  • Battle of Nagashino (1575) – Charge of Takeda clan cavalry against massed arquebusiers behind stockades and supported by other infantry fails with heavy losses.
  • Battle of Gembloux (January 31, 1578): 1,200 Spanish cavalry led by Alexander Farnese, charged into a Protestant army 25,000 men strong. After the first clash with the enemy cavalry, the Spanish cavalrymen assaulted the infantry, resulting in 6,000 killed and the total destruction of the Protestant army.
  • Battle of Kircholm (September 27, 1605) – Polish cavalry 2,600 men supported with 1,000 infantry defeated 11,000 Swedes. Polish-Lithuanian winged hussars charged and completely defeated advancing Swedes.
  • Battle of Klushino (4 July 1610) – Polish forces numbering about 4,000 men (of which about 80 percent were the famous ‘winged’ Polish hussars[19] under Hetman Stanisław Żółkiewski defeated a numerically superior force of about 35,000–40,000 Russians under Dmitry Shuisky, Andrew Golitsyn and Danilo Mezetski. In battle many formations of hussar units charged 8 – 10 times.
  • Battle of Vienna (September 11–12, 1683): 20,000 Polish, Austrian and German cavalry led by the Polish king Jan III Sobieski and spearheaded by 3000 heavily armed Polish hussars charged the Ottoman lines. This is the largest cavalry charge in history[citation needed].
  • Battle of Eylau (February 8, 1807): 11,000 French cavalry under Joachim Murat charge the centre of the Russian army to save the French army of Napoleon.
  • Battle of Somosierra (November 30, 1808): During the Peninsular WarNapoleon overwhelmed the Spanish positions in a combined arms attack, charging the Polish uhlans or Chevau-légers of the Imperial Guard at the Spanish guns while French infantry advanced up the slopes. The victory removed the last obstacle barring the road to Madrid, which fell several days later.
  • Battle of Salamanca (July 22, 1812) Described as probably the most destructive charge made by a single brigade of cavalry in the whole Napoleonic period, Major General John Le Marchant‘s heavy cavalry brigade (5th Dragoon Guards, 3rd and 4th Dragoons) destroyed battalion after battalion of French infantry.
  • Battle of Borodino (September 7, 1812) Three cavalry corps containing French, German and Polish regiments struck the enemy’s centre. The Russian cavalry counter charged and this led to a general cavalry battle.
  • Battle of Dresden (August 27, 1813) French cavalry under Marshal Murat succeeded in cutting off and annihilating the Allies’ left wing. Several Austrian infantry divisions were caught in the open with inoperable muskets (due to heavy rains) by the French combination of cavalry and horse artillery and thus suffered heavy casualties, many soldiers surrendering. Napoleon’s forces achieved a great victory.
  • Battle of Waterloo (June 18, 1815): Two brigades (about 2,000 men) of the British heavy cavalry charged and annihilated the advancing French infantry (14,000 men) on the left flank of the Allied army. Later during the battle, the French cavalry mounted an attack with 9,000 men on the Allied infantry positions in the centre, but were unable to break the infantry’s squares.
  • Charge of the Light Brigade (October 25, 1854) at the Battle of Balaclava in the Crimean War. Due to faulty orders a tiny force of 670 British light cavalrymen charged an enemy force many times their size. They succeeded in breaking through as well as disengaging, but suffered extremely heavy casualties and achieved no important objectives.
  • Battle of Gettysburg (July 2, 1863) After running out of ammunition, Col. Joshua Chamberlain ordered the 20th Maine Volunteer Infantry Regiment to fix bayonets and charge down the hill at the 15th Regiment Alabama Infantry. Shocked by the movement, the Confederates ran down the hill. After the charge, the 20th Maine had captured most of the 15th Alabama. 262 soldiers of the 1st Minnesota Volunteer Infantry regiment charged a Confederate infantry unit in order to gain five minutes of time for the army of the Potomac. During the charge the regiment suffered 82 percent casualties. After the charge only 40 men were left, making it the worst single loss of any unit in the American Civil War.
  • Pickett’s Charge (July 3, 1863) at the Battle of Gettysburg in the American Civil War. Mass infantry assault on the Union lines but was bloodily repulsed by Union forces.
  • Third Battle of Winchester (September 19, 1864): the largest cavalry charge of the American Civil War.
  • Battle of Franklin (1864) (November 30, 1864): the largest infantry charge of the American Civil War.
  • Battle of the Little Bighorn (June 25–26, 1876) General George Armstrong Custer leads at least 268 men of the 7th Cavalry Regiment against 900 – 1800 Lakota and was annihilated
  • Battle of Wörth (August 6, 1870): French heavy cavalry brigade, with two squadrons of light cavalry, charges Prussian infantry in the village of Morsbronn, lost 800 men and the battle.
  • Battle of Mars-la-Tour (August 16, 1870): “Von Bredow’s Death Ride”. Prussian heavy cavalry brigade overrun French infantry and artillery to reinforce left flank of Prussian Army, at cost of half the brigade. One of the few notable examples of successful cavalry charges after the introduction of modern firearms.
  • Charge of the 21st Lancers in the Battle of Omdurman, September 2, 1898: 400 British cavalry charge 2,500 Mahdistinfantry. This was also one of the first battles Winston Churchill engaged in, and was accurately described in his first book, The River War.
  • Relief of Kimberley (13 February 1900): Major-General John French led a charge of 7500 cavalry through Boer lines to lift the Siege of Kimberley during the Second Boer War.

Charge of the Australian 4th Light Horse Brigade at the Battle of Beersheba.

  • Prunaru Charge (November 28, 1916):
  • Charge of the 4th Light Horse in the Battle of Beersheba (October 31, 1917): two regiments of Australian Light Horse charge an unknown number of entrenched Turkish infantry and Austrian artillery.
  • Charge of the 7th Dragoon Guards, November 11, 1918: British cavalry make an opportunistic charge on German infantry to capture Lessinesand the Dender crossings in Belgium. The last cavalry charge of World War I, with the action completed as the clocks were striking 11 o’clock to mark the end of hostilities.[20][21]

Charge of Polish hussars at the Battle of Klushino 1610

  • Battle of Komarów (August 31, 1920): a vital and decisive battle of the Polish–Soviet War. It was the largest and last great cavalry battle of significance in which cavalry was used as such and not as mounted infantry.
  • The last British army’s cavalry charge by a complete regiment was executed in Turkey during the 1920 Chanak Crisis, when the 20th Hussars successfully charged a body of Turkish infantry.[22]
  • Charge at Krojanty (September 1, 1939): a cavalry charge that gave birth to the myth of Polish cavalry charging German tanks. In fact, Polish cavalry charged a regiment of German soldiers and were surprised by the arrival of a group of armored cars and retreated.
  • Battle of Krasnobród September 23, 1939: last cavalry battle in Europe fought between Polish and German cavalry units (Polish victory; a German general is taken as prisoner of war)
  • Battle of Bataan (January 16, 1942): the 26th Cavalry Regiment of the United States makes a mounted pistol charge against Japanese positions, the last mounted charge in battle by conventional United States troops.
  • Charge of the Savoia Cavalleria at Isbuscenskij, (August 24, 1942): the last cavalry charge of Italian history against a regular enemy formation. It was mounted against a Soviet artillery position along the River Don by 700 men of the 3rd Cavalry Division Eugenio di Savoia. This is often reported as “the last successful cavalry charge in history”.[23]
  • Battle of Poloj (October 17, 1942): The last charge of an Italian horse regiment during WWII. It was executed in Yugoslavia by the 14th Light Cavalry Regiment “Cavalleggeri di Alessandria” versus Communist partisans.
  • Battle of Schoenfeld was the last charge of the Polish 1st Cavalry Brigade just before the end of WWII. On March 1, 1945, it attacked the German lines in support of Soviet forces. The charge was successful.[24]
  • Korean War (February 7, 1951): A company of soldiers from the U.S. Army’s 27th Infantry Regiment launched an infantry charge that successfully defeated an enemy machine gun position.
  • Battle of Mount Tumbledown (June 13–14, 1982): British infantry charge Argentine positions in the Falklands War. The last successful British bayonet charge until 2004.[25]
  • Battle of Vrbanja Bridge (May 27, 1995): the French Commandos Marine launched a bayonet charge to retake a sangar held by the Army of Republika Srpska at Suada and Olga bridge (formerly called “Vrbanja bridge”) in Sarajevo, during the Bosnian War. It was the first bayonet charge for the French since the Korean War.[26]

See also[edit]

Categories
All About Guns War

HMS Hood vs Bismarck | Why did the Royal Navy Lose?

https://youtu.be/iWKqotLGTvE