Category: Gear & Stuff


Categories
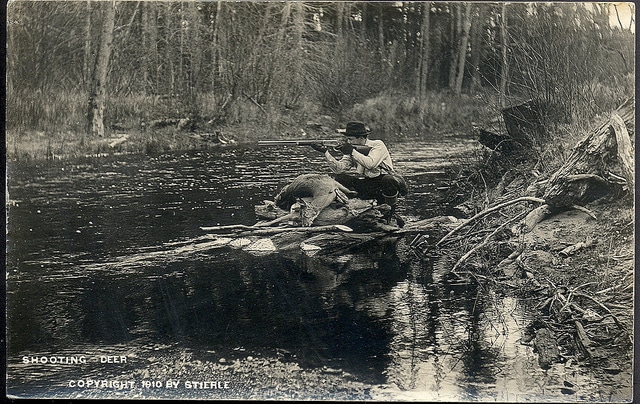
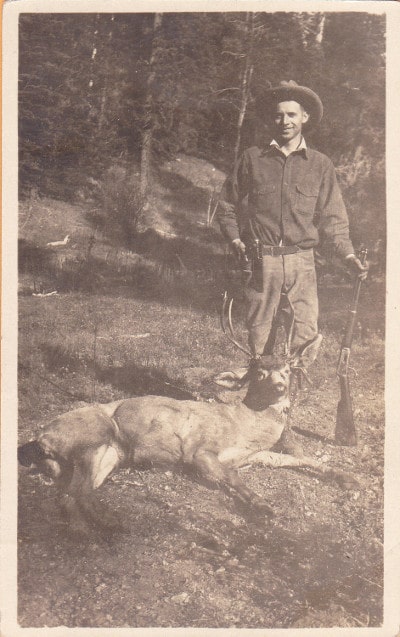
A Primer On Deer Hunting
| November 4, 2014
Editor’s note: This is a guest post from Josh Cantrell and Kevin King.
The hunting of various species of wild deer has been a national passion and tradition for countless generations. Many Native American stories and accounts are riddled with the hunting and harvesting of whitetails. The Pilgrims of Plymouth Plantation, in addition to numerous waterfowl and turkeys, harvested deer or “venison,” as was documented by William Bradford in his journals. Many early explorers of the West found whitetail and mule deer to be a bountiful, necessary food source for themselves and their families. Unfortunately, the 20th century saw a sharp decline in the harvesting of deer due to overhunting and a decreasing population of whitetail throughout the United States. However, due to the diligent efforts of state conservation departments and responsible hunters, many states now boast close to 200,000 or more harvested deer each year. In fact, in many states deer are overpopulated and are threatening forest growth and farms and may also increase the risk of lyme disease in humans in areas where their numbers are particularly high. Responsible hunters play an important role in managing deer populations so the herds don’t stress ecosystems.
Your may have found yourself considering deer hunting at one time or another but never really knew where to start. The advantages of deer hunting are numerous:
- Fresh, organic, lean meat
- Time spent in nature
- Cultivated survival/outdoorsman skills
- Personal growth as a man/provider
- Character development
- Marksmanship
- Tradition
With this primer on deer hunting, and some practice and mentoring from experienced hunters, you should be able to take to the woods with confidence in pursuit of your first in a long and happy series of deer.
Choose Your Weapon
The first place to start with deer hunting is to decide your method. Do you want to be a rifle hunter or do you want to be an alternative methods hunter (bow, atlatl, pistol, etc.)? Many of us began as rifle hunters because it is the most accessible place to start. Since this is a beginner’s primer on deer hunting, we would recommend starting with a rifle and then branching out as your interests dictate.
When choosing a deer rifle, one must take budget and fit into account. When I recently spoke to Ken Jorgensen at Ruger Firearms he recommended that a hunter finds a rifle that:
- Completes the task effectively (in this case, kill a deer quickly)
- Fits the shooter
- Can be shot well
It is worth your time and efforts to go to a gun store and “try out” potential rifles. Pick up the guns, shoulder them, manipulate the actions, sight-in an object on the floor or ceiling, and just see how you like them. A few models of guns to look into as a budget-friendly starting point are:
- Winchester Model 70
- Savage Trophy Hunter XP
- Weatherby Vanguard
- Remington Model 700
- Ruger American Rifle
To complete the task effectively in deer hunting requires a cartridge with a little punch. However, if you are unfamiliar with gun calibers, choosing the best caliber for yourself is like choosing some random battery off the shelf and hoping that it will work in your TV remote. You need the proper amount of power combined with your ability to manage recoil. A few common calibers for deer hunting are as follows:
- .270 Winchester
- .308 Winchester
- .30-30 Winchester
- .30-06 Springfield
- 7mm Remington Magnum
All of these calibers are favorites amongst deer hunters and outdoorsmen. If you can, try to shoot these calibers before you buy one to see which you like; each cartridge almost seems to have its own personality. If you cannot shoot before committing to a rifle, read and watch as many reviews as possible to educate yourself on their uses. If you choose an adequate caliber and the gun fits you well, you have won 2/3 of the battle. All you have to do now is practice.
A great place to start when practicing is to shoot from a bench towards a stationary target, placed at 25 yards. You want to work on placing groups on the target that are all striking near the same position. Then, as you get more familiar with the gun, move your target out to 100 yards and work on the same thing. A 100-yard shot is a good place to begin as a first-time hunter. As you get more familiar with the gun, you will be able to work out to farther shot placements. However, for your first, 100 yards is a respectable distance.
Hunter’s Safety Course
Once you have acquired the gun and skills required to hunt efficiently, there is one final step of the process: becoming certified and licensed by your state conservation department. Regulations on becoming licensed vary from state to state. Most states require anyone who wishes to legally hunt with a firearm to take a hunter’s safety course. The requirements of the course, including the age at which one must be licensed, varies from state to state. The best source for this information would be your state conservation department website or a nearby conservation office.
Most hunter safety courses include a 4-hour course and a written exam. You can study for the exam online or with an instruction booklet provided by your conservation department. Then, once you have prepared for the class, simply register for your 4-hour certification course online or in person. Most of these classes are free of charge. Once you have passed your test and received certification, you are now able to purchase your permits for your hunt.
If you are not sure yet if deer hunting is for you, you might look into a short-term alternative to acquire your hunter permits. In many states, there are hunter apprentice programs that allow you to take to the field alongside another certified hunter that has completed their hunter’s safety course. This allows you to buy permits and hunt in this manner for a brief time before you take a hunter’s safety course for yourself. That way, you can decide if it is a good fit for you.
Before taking to the field, it is important to read your state’s hunting regulations thoroughly each and every year that you hunt. These regulations, due to management needs, can change annually.
Dressing for the Field
The next step is to outfit yourself with hunting gear. This is where a hunter can really lose themselves in the influx of scents, camos, and various other products that supposedly offer unlimited success. Here are the bare-bones necessities when you head into the woods on your hunt:
- Your gun
- Blaze orange hat and vest (wear this 100% of the time – it can save your life)
- A box of ammunition (unless you shoot and miss a lot, this should suffice)
- A good, sharp knife (for field dressing your deer)
- Tall rubber gloves (for field dressing your deer)
- A flashlight (for tracking your deer)
- Warm gloves, hat, and jacket (for those cold November hunts)
- Your permits (the most essential item)
- A ziplock bag, zip tie, and a pen (depending on your state laws for tagging your game)
Finding a Place to Hunt
Once you have procured all of your essentials and are now a proficient marksman, the next step is finding a place to hunt. If you are a landowner with enough land to hunt, you are in luck. If not, you need to either find some public hunting land in your area or become friends with some of your local farmers and landowners. Never hunt somewhere that you have not obtained permission to hunt. Build a good relationship with those kind enough to let you hunt and, if you are blessed with a harvest, share a portion of it with your host.
When you find land, either choose a location in a wooded area that allows for deer and other animals to pass by, or choose to hunt the edge of an open field. This is where pre-season scouting becomes very important. When hunting for the first time, we recommend hunting from ground level, but if you prefer a stand, make sure you choose one that is stable and easy to climb into with a rifle and your gear. These types of stands are called tripod stands and can be found at your local outdoor stores. These stands increase the cost of your hunt dramatically, so decide whether a stand is necessary before making the investment. The advantage to hunting out of a stand is that you are not eye level with the deer so it is harder for them to see you.
You want to make sure that your stand or ground location is along a path that deer travel frequently. Another thing that you should consider when picking your stand or hunting spot is your comfort level. If you are not able to consistently make long shots, an open field is not the place for you. You should try setting up in some hardwoods where the only shot that you can take is a close one. Make sure you arrive to your hunting location before sunrise or a few hours before sunset, so as to minimize your presence. Then, patiently wait for your game to arrive.
One way to increase the odds in your favor is to put out a salt lick, a food plot, or other attractants near your hunting spot before the season opens. These attract deer, as well as other wildlife, and make your hunting location part of their regular routine. One thing to consider when doing this, however, is the potential requirement to discontinue your attractants before the season (normally 10 days prior). Otherwise, you may be dealing with a baiting violation and a huge fine. If you take this step, be aware of all of the responsibilities involved and take the necessary precautions to ensure an ethical, legal hunt. Every state is different, so check your state’s laws about food plots and baiting. When trying to decide what would work best for you, think through your hunting situation and commitment level. It takes time, land, and discipline to plant and maintain a plot. Make sure that you are ready to make that commitment of both time and resources.
Taking the Shot
When taking a shot, you always need to wait for a deer to stand broadside, which means that they are standing perpendicular to your rifle barrel. When you can see from nose to tail, bring your sights onto the deer just behind the front shoulder, as you want to hit the lungs and/or heart. Quietly take the gun off safety, take a big breath and let it out, and evenly squeeze the trigger until the gun fires. Immediately, rack the bolt and chamber a live shell.
If you have hit your mark, watch where the deer takes off. Wait anywhere between 15 and 30 minutes before tracking and pursuing. This will give the deer plenty of time to lie down and expire. If you try to chase the deer as soon as it is shot, you are going to place unneeded stress on the animal. This will also cause more adrenaline to be produced by the deer, which will make it travel farther. The additional surge of hormones and chemicals can potentially result in your venison developing a strong “gamey” or undesirable flavor. If the deer has crossed a property line, make sure that you have permission to be on that property before pursuing. It is still considered trespassing if you are chasing a wounded animal. Make sure you know who owns all of the land around you and how to get in touch with them. It’s your responsibility to make every effort to recover any deer you shoot.
Following the Trail
To track your deer, go to the location where you think your shot connected with the animal. When you reach that location, look for the tell-tale signs of a wounded animal: ground severely torn by hooves, tufts of hair, bone fragments, and most of all, blood. At this point, many hunters put down an object, such as a hat, next to the first hint of a trail. Do your best to look for a trail of any of these materials on the ground and follow it to find your deer. If the blood becomes more plentiful, you are on the right track. If, at any time, you lose the trail, go back to the last point where you had a clear trail and track it again. Taking a buddy or a group of other hunters to help track a difficult trail can be the difference between an animal harvested and an animal wasted. (You might also consider hunting with a canine companion.)
When you come upon your deer, do so with a loaded gun, ready to put your game down if it is not yet expired. Once you have determined that your animal is down, take a moment to pat yourself on the back and breathe a sigh of successful relief. After that, it’s time to get to work.
After the Shot
Before dressing your game, make sure you first tag your deer. Follow the methods of tagging your game that are required by your conservation department, to the letter. Some states have you attach the permit to an antler, others have you place it in a plastic bag around the leg, and others have you tag the animal via smartphone. Make sure you are familiar with and prepared for the tagging procedures before you are out in the field.
Methods for field dressing a whitetail are varied and everyone thinks that their way is the right way. Therefore, while there are a few “essentials” when dressing a deer, to get a more specific how-to, I recommend looking at videos online or reading the literature given out by state conservation organizations.
The standard way to field dress a whitetail begins with a long incision (blade facing up) between the pelvis and the sternum, making sure not to nick the internal organs. Remove exterior genitalia and discard before cutting in a circular motion around the anus. With a short length of string, tie off the lower intestines and bladder inside the body cavity before rolling the deer over on its side to empty the contents. Some cutting will be needed to free the organs from the back. Then, cut through the diaphragm (some people split the rib cage here, as well), remove the lungs, heart, and the windpipe as high as you can reach. Then, turn your deer over one more time to drain any remaining blood left in the cavity.
At this point, you can take your deer to a meat processor and they will work up the deer for a fee. However, if you want to work it up yourself, get the deer someplace where it can be hung upside down and drained out for a few hours before quartering and butchering it, much like you would a cow. If you are doing the self-butchering method, we also recommend getting a grinder, a group of people to help, and a lot of food-saver vacuum bags. Lastly, make sure you clear out a nice big spot in the freezer for all of the great meat you are going to enjoy for months to come.
Ethics in the Woods
When going out in the woods in search of deer it is important that you maintain a high ethical standard of behavior. One of the best ways to do this is to practice with your weapon of choice. The more confident you are with your weapon, the more humane you will be to the deer.
Treat all the land with respect. Anything you pack in, make sure you pack it out. Unfortunately, there are hunters out there that are not interested in cleaning up after themselves. If you come upon trash (shell casings, food wrappers, discarded scents, etc.), pack out that trash as well, even though it is not your own. The more we all work to take care of our natural resources, the longer it will be there to enjoy. Make sure that safety is always at the forefront of your thinking when hunting, even if you are hunting alone. Accidents can happen when you are by yourself, so always be overly cautious and ensure that safety rules are being followed.
Lastly, don’t allow yourself to get too caught up in the technical aspects of the hunt that you forget to enjoy the experience. Deer hunting is a fun, challenging, exciting, and character-building way for you to feed your family while maintaining a tradition that spans far beyond the history of this nation and its inhabitants.
___________________________
Josh Cantrell and Kevin King are avid outdoorsmen, fishermen, hunters, and teachers in southwest Missouri.
- Wash your hands and then use
- the water for your next flush.

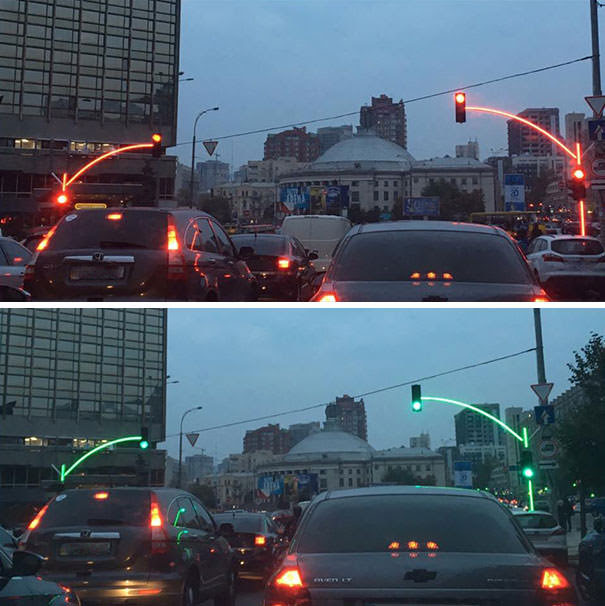
- Traffic lights in
- Ukraine
- This water fountain allows the water
- to flow down so dogs can
- drink too.

- An accessibility mat on the beach
- for strollers and wheelchairs.

- This pill bottle lid tells you when
- it was last opened.

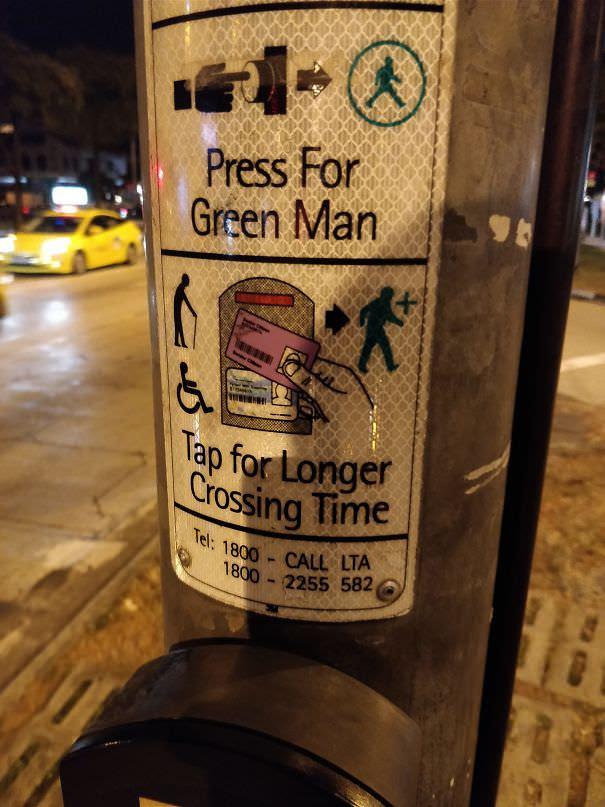
- Seniors and handicapped people can
- extend cross time for this 8
- lane highway.
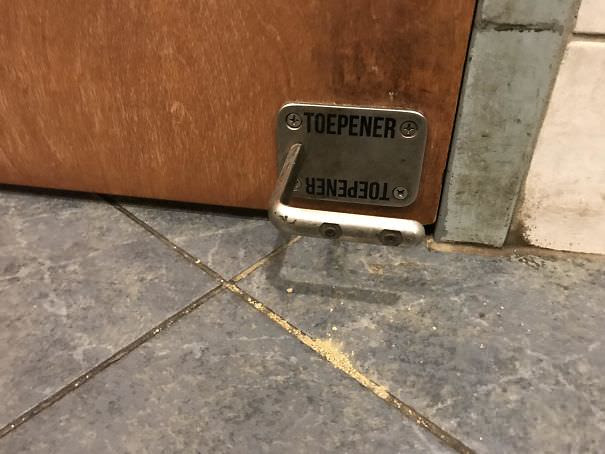
- This restaurant has a toe opener for
- those who want to avoid
- germs on the doorknob.
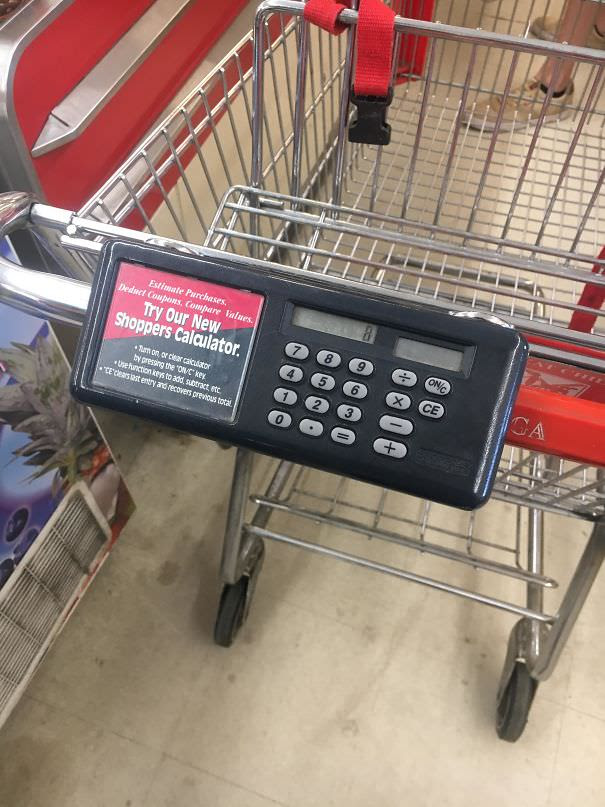
- This shopping cart has a calculator
- so you know how much you’re
- spending.
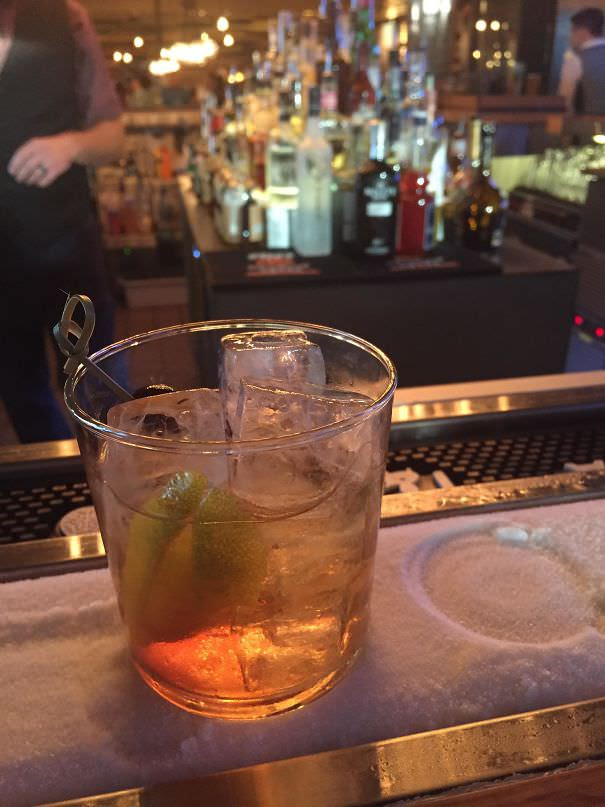
- This bar has a frost strip so you can
- keep your drink cold.
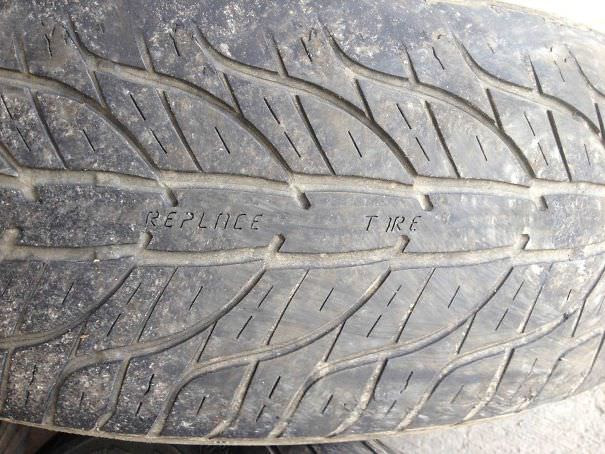
- This tire tells you when it’s time to change it.
- This mirror has a heated part
- so it doesn’t steam up after a shower.

- These tiny model tents give you a
- look at what you’re buying .

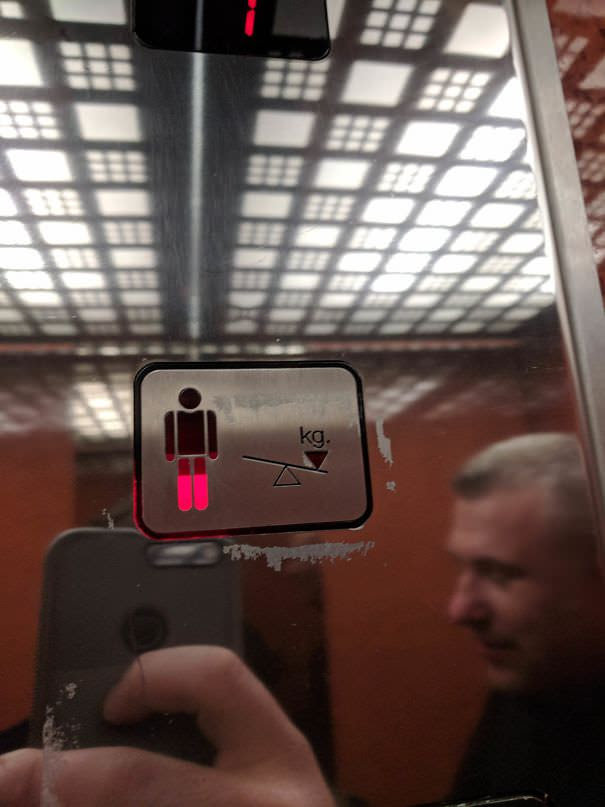
- This elevator shows how close
- to capacity it is based on the
- weight of the riders.
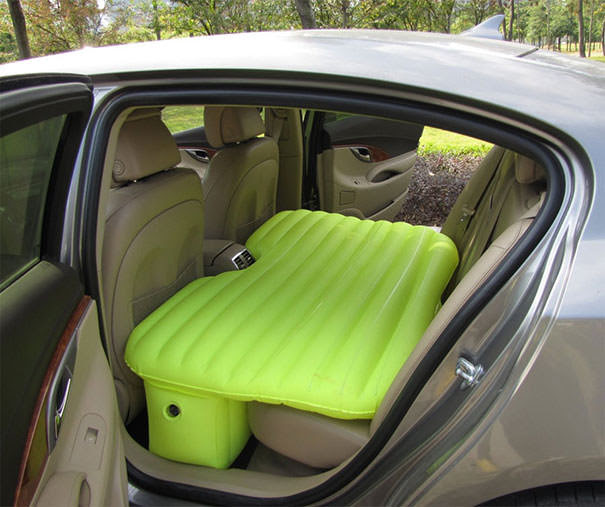
- This inflatable mattress turns
- the back of your car into a bed .
- ï Trash cans in Copenhagen
- are angled so that cyclists can
- throw their trash while cycling.

- Analytical Approach to Life. . .


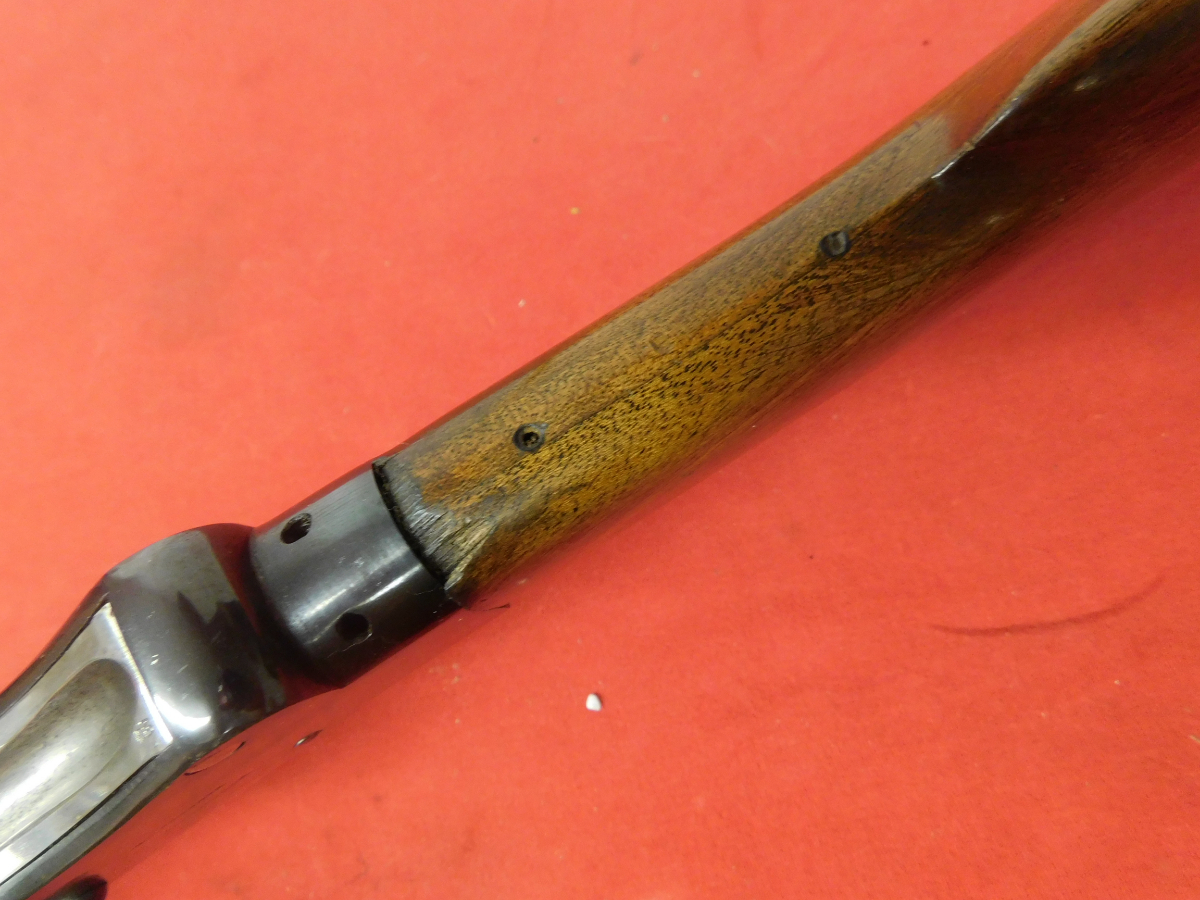
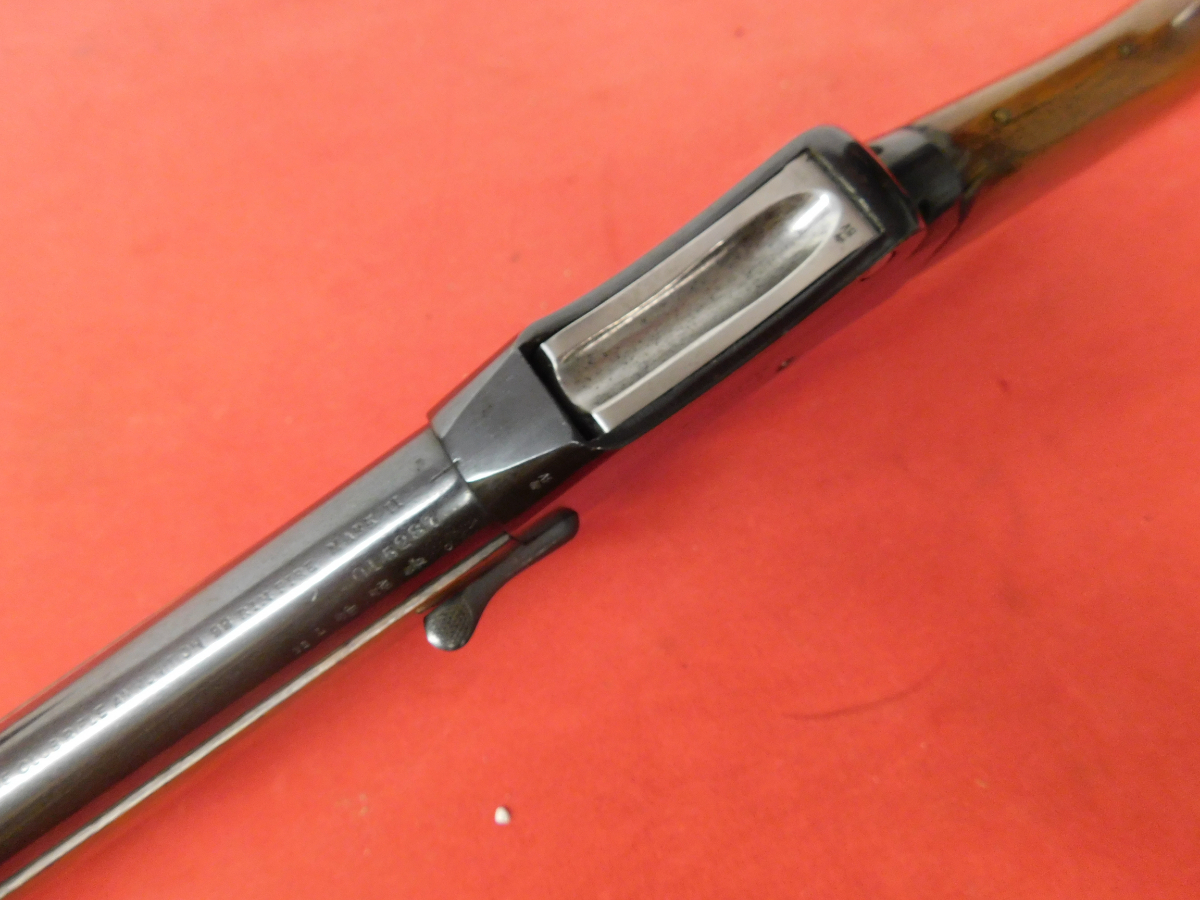
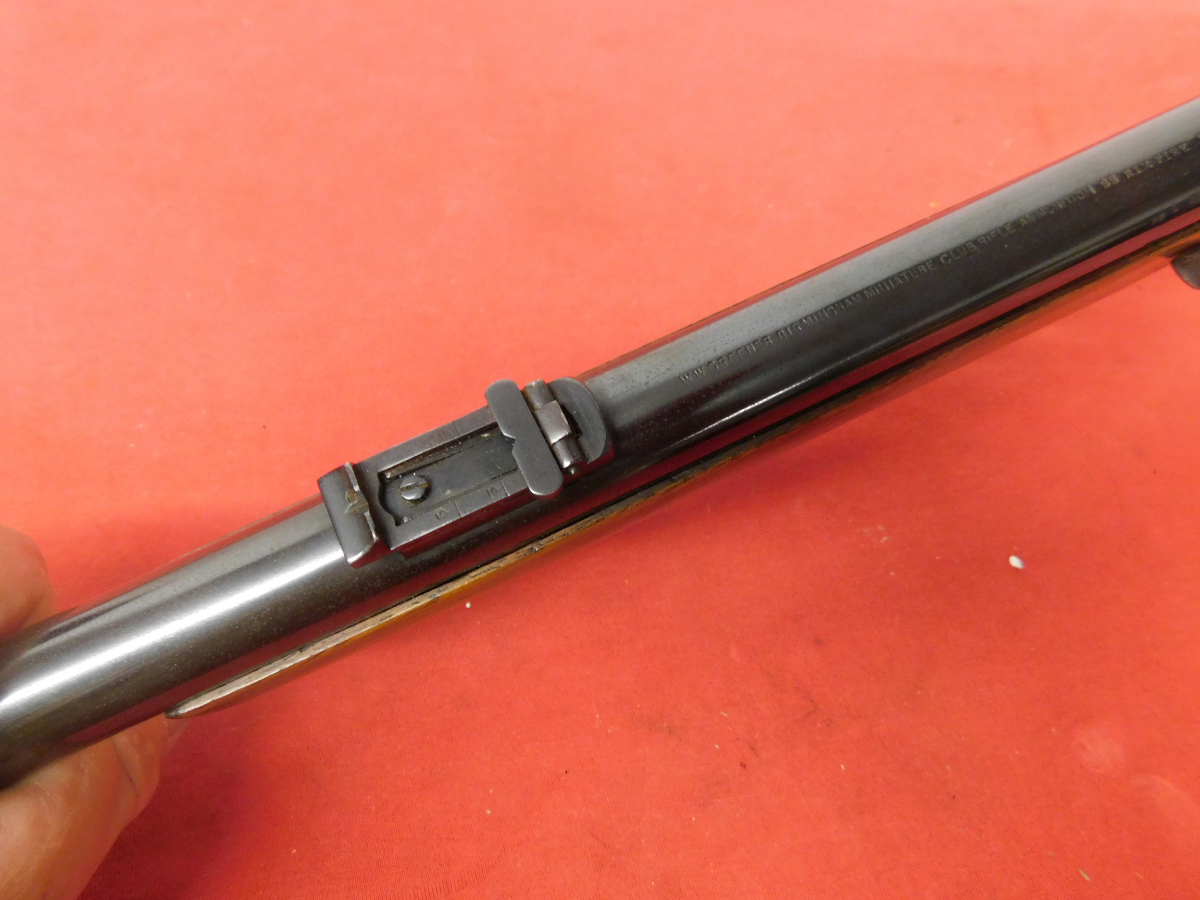
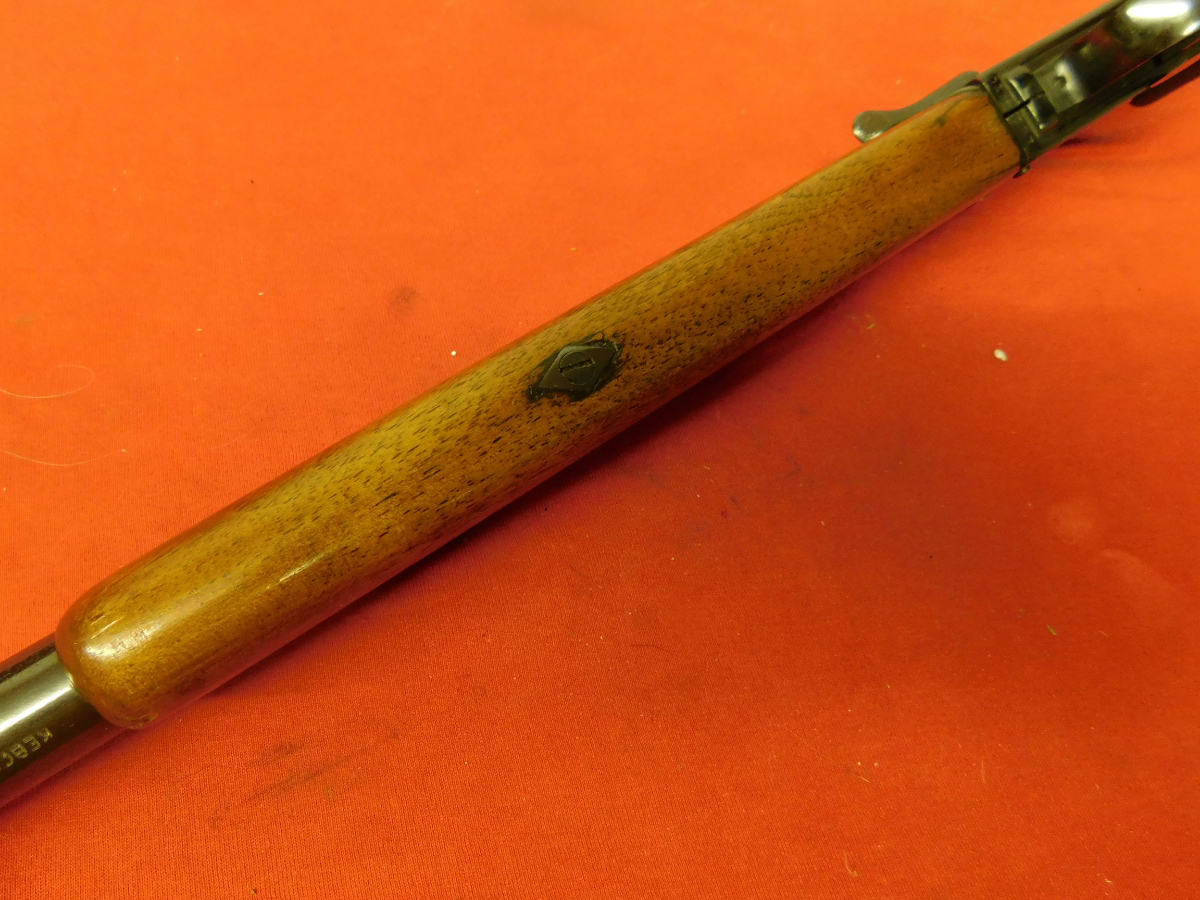
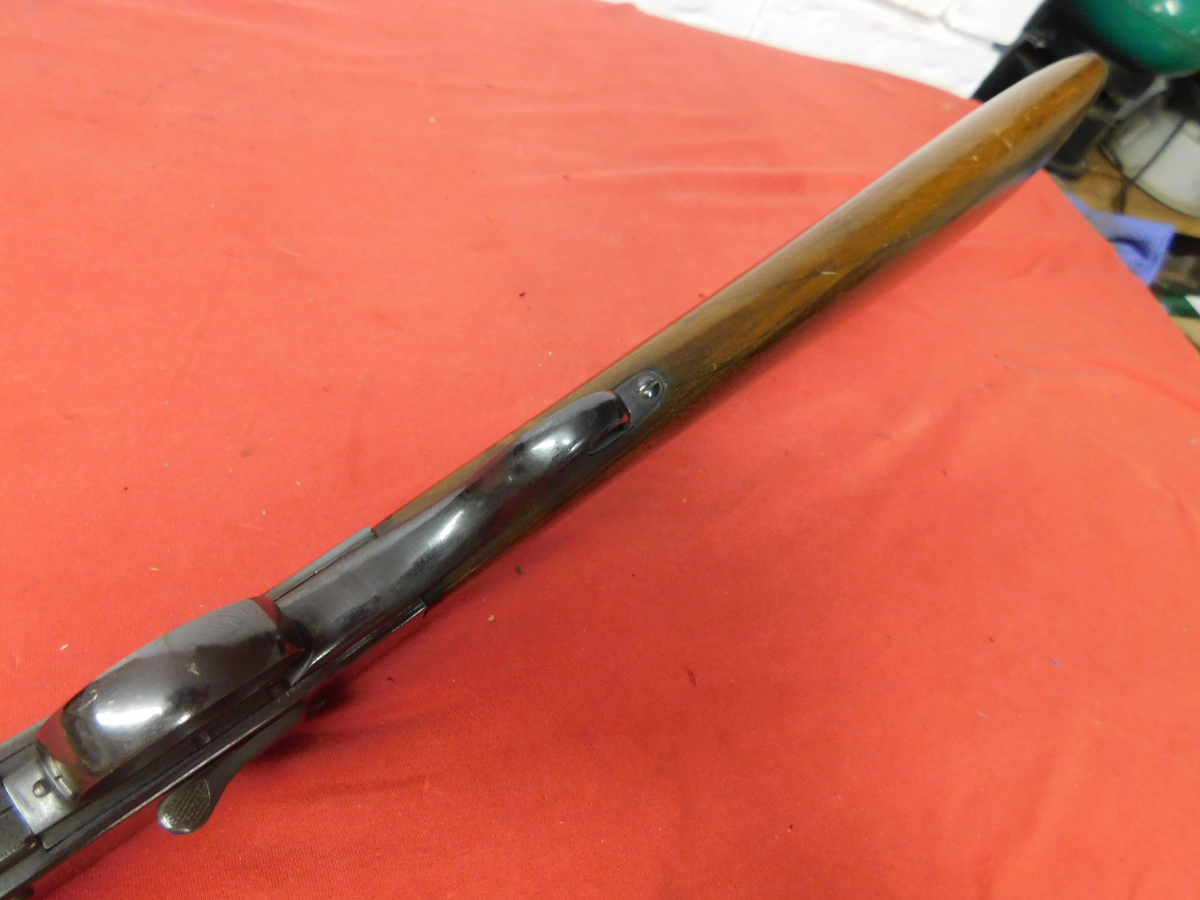
What I think would make for a great rifle to have in the field. As one could break it down and then put in your rucksack. To then act as a have around as a “keep out of sight camp rifle”.
Which could be used as a way to fill the pot with fresh meat. Or if need be, to be a really nasty surprise. To those who mean you harm in the field.
Grumpy


It is strange to see an article about prepping in Wired. The Science Behind Home Disaster Preparedness Kits Is a Disaster.
Wired is a Left-leaning publication, so they are all upset that “You might be telling people that they have to rely on themselves and their neighbors and not the government.”
Everybody from the Feds on down agrees you need to be prepared. But not many are.
Wired is a Left-leaning publication, so they are all upset that “You might be telling people that they have to rely on themselves and their neighbors and not the government.”
Everybody from the Feds on down agrees you need to be prepared. But not many are.
Government agencies don’t have the money to send a fire truck to every house after an earthquake or hurricane. People have to be able to help themselves.
But what to put in the kits, how many days to plan for varies widely.
A couple of years ago things got even more complicated.
In 2016 the Washington Military Department, essentially that state’s National Guard, ran an exercise called Cascadia Rising.
The idea was to simulate a response to an earthquake and subsequent tsunami emanating from the Cascadia Subduction Zone off the Pacific Northwest, subject of a much-read New Yorker article from the previous year. “Cascadia Rising was a massive eye-opener,” says Karina Shagren, spokesperson for the Washington Military Department.
“We realized there would be pockets of communities that won’t receive help for several days, if not several weeks.”
Washington’s coastal communities would lose the bridges that connect them to the rest of the world. They’d have to wait for help by air or sea.
Washington State now recommends that you are prepared to be on your own for 14 days. The Federal .gov is still saying “more than 3 days.” Most people aren’t even prepared for that.
Wired gets wound up in Social Justice, worried that poor people can’t afford to prepare. But canned food, if you rotate through things you like doesn’t have to cost any extra.
You don’t need to buy expensive dehydrated food. Yes, if you need to evacuate, cans are heavy, but do your kids have a wagon? Do you have a non-electric can-opener? Do you already own some sturdy walking shoes? A backpack?
The article even makes some valid observations.
Is there stuff you should probably definitely have access to in your home?
Sure. Copies of personal identification documents. Prescription medications. A good whistle. Lightsticks.
Water purification tech. A crowbar. (The time you need a crowbar is the time you really, really need a crowbar.)
Water purification is key. You can survive quite a while without food, if you aren’t trying to march 20 miles a day. But you need water.
One of my choices is the Lifestraw. But then I have both a cistern and a pond on my property. So I have quite a bit of water. It just needs to be purified before I can drink it. (I also have other filtration systems, but this is one I like, since if I need to evacuate, I can take it with me.)
One life straw will filter 4000 liters of water. It isn’t a perfect solution, but it is better than what most people have. The Big Berkey System is on my list of things to buy. (But that list is actually quite long right now.)
I think it actually does a better job removing parasites, but I would have to redo some research. If you live in an area where you can expect rain, you can catch quite a bit of water with a clean tarp, you just need containers to put it in.
Also I’m willing to bet most people can’t start a fire, since no one smokes anymore, no one carries matches. (Flint and steel. Fire piston. Waterproof matches. Lighters.)
From –
The idle musings of a former military man, former computer geek, medically retired pastor and now full-time writer. Contents guaranteed to offend the politically correct and anal-retentive from time to time. My approach to life is that it should be taken with a large helping of laughter, and sufficient firepower to keep it tamed!
Defensive ammunition when you can’t use hollowpoints
I’ve had an interesting series of exchanges with a correspondent in New Jersey concerning the best handgun for self-defense there. Since many of my readers live in states with firearms laws that are as restrictive as NJ’s (and in some places, such as New York and Connecticut, show signs of getting even worse), I thought the subject might be of more general interest.The first point is that in New Jersey, it’s virtually impossible to get a carry permit unless you have outstandingly good political connections.
The ‘system’ there is designed to issue as few permits as possible. Furthermore, there are severe restrictions on the carrying and use of hollow-point or expanding ammunition in one’s handgun.
(That restriction doesn’t apply to law enforcement personnel, of course . . . yet another reason for resentment. If it’s good enough for cops, why shouldn’t it be good enough for honest citizens whose taxes pay those cops and buy their ammunition?)
These restrictions upset the normal calculation about what cartridge or round New Jersey gun-owners (and others suffering under similar restrictions) should use for self-defense.
These restrictions upset the normal calculation about what cartridge or round New Jersey gun-owners (and others suffering under similar restrictions) should use for self-defense.
Modern bullet technology has brought many common defensive handgun cartridges to a much higher level of performance.
However, if that technology can’t be used, cartridge effectiveness must be assessed in terms of older measurements. I’m obliged to the anonymous editor of the Firearms History blog for his very useful articles on the following systems of measurement:
- Kinetic energy
- Momentum
- Taylor KO Factor
- Thorniley Stopping Power Formula
- Hatcher Formula
- Optimum Game Weight Formula
Follow each link for more information about the formula in question. Not all are useful in a defensive context, but they’re all informative. (We’ve discussed some of them in articles here.
As an old Africa hand, I’m partial to the Taylor KO measurement as an indication of the effectiveness of solid [i.e. non-expanding] bullets.
It squares with my experience of shooting in Africa, be the target an animal or an enemy. In particular, I agree with its bias towards larger-diameter bullets when dealing with solids.)
To get back to the self-defense situation, if gun-owners are restricted in their use of expanding handgun ammunition, they have to choose the most effective cartridge available under those restrictions.
To get back to the self-defense situation, if gun-owners are restricted in their use of expanding handgun ammunition, they have to choose the most effective cartridge available under those restrictions.
That immediately argues against most smaller calibers, because (according to most of the above formulas, and also on the basis of hard-earned experience) they’re less effective than larger ones in a defensive role.
Furthermore, one of the primary advantages of smaller cartridges is that one can fit more of them into a handgun of a given size compared to larger cartridges.
However, if (thanks to restrictions on bullet technology) each cartridge is rendered less effective, more of them will be needed to neutralize an opponent than larger ones; and if magazine capacity is also legally restricted, that means that a greater percentage of your rounds will be needed per opponent than if you used larger ones.
Example: if it takes 4-5 9mm. Parabellum ball rounds to stop an assailant, and you only have 10 of them in your gun, you’ll use up to 50% of your ’rounds on board’ to stop each opponent.
If it takes 2-3 .45 ACP ball rounds to do the same thing, and you have 10 of them in your gun, you’ll be able to deal with twice the number of attackers for the same expenditure of ammunition.
Despite modern attempts to reinterpret historical data, it’s clear that throughout the blackpowder era, bigger, heavier bullets did a better job of stopping a fight in a hurry than smaller, lighter ones.
Despite modern attempts to reinterpret historical data, it’s clear that throughout the blackpowder era, bigger, heavier bullets did a better job of stopping a fight in a hurry than smaller, lighter ones.
That’s why the most widely used handgun cartridges up until the invention of smokeless powder were over .40″ in caliber; for example, the US .44-40, .44 American, .44 Russian, .44 Bull Dog, .45 Colt and .45 Schofield, and the British .450 Adams, .442 Webley, .476 Enfield and .455 Webley.
Although smokeless powder allowed the introduction of newer, smaller cartridges with similar (or improved) effectiveness compared to their blackpowder predecessors, this was not always the case.
Bigger, heavier cartridges still tended to do better than smaller ones at ending an attack, as the infamous Moro rebellion demonstrated.
It was the experience of that conflict that prompted the US Army to replace its newly-issued Colt M1892 revolvers chambered in .38 Long Colt. As General Leonard Wood reported in 1904:
“Instances have repeatedly been reported during the past year where natives have been shot through and through several times with a .38 caliber revolver, and have come on, usually cutting up the unfortunate individual armed with it. The .45 caliber revolver stops a man in his tracks, usually knocking him down.”
This led initially to the reissue of older Colt Single Action Army revolvers (the famous ‘Peacemaker’ of the so-called ‘Wild West’), and ultimately to the adoption of the renowned M1911 pistol and its .45 ACP cartridge.
It remained the US Army’s standard sidearm until the adoption of the Beretta Model 92 in 1985, and is still issued by specialist units. As late as the 1980’s, during investigations following the notorious ‘Miami Massacre‘ that sent shock-waves through US law enforcement, it’s reported that “the FBI rated the .45 ACP twice as effective as the 9 mm“.
That certainly correlates with my experience of handgun use in Southern Africa during that period.
Please note that I’m not by any means opposed to the use of smaller cartridges, provided that modern bullet technology is used.
Please note that I’m not by any means opposed to the use of smaller cartridges, provided that modern bullet technology is used.
My daily carry pistols are chambered for the 9mm. Parabellum cartridge, for reasons outlined here. I load them with either Winchester Ranger T-series 127gr. JHP +P+ or the more recent Hornady Critical Duty 135gr. JHP +P rounds, and trust both to do a good job in defense of my life if necessary.
The latter round in particular is attracting serious interest due to its performance under all likely circumstances, as outlined in this video from Hornady. It’s reported to be the only range of handgun ammo to pass every FBI test criterion with flying colors.
However, if for some reason I couldn’t carry expanding ammunition, my instant response response would be to revert to handguns chambered in .45 ACP or .40 S&W[respectively my first and second choices], loaded with the best-quality ball rounds I could find.
That’s why I keep firearms in my safe chambered for both cartridges. Furthermore, as Jim Higginbotham points out, it’s hard to make a .45 ACP bullet perform badly!
The late, great Jeff Cooper used to opine that an adequate defensive bullet in a handgun, irrespective of bullet type, shape, etc., should be at least .40″ in diameter, weigh at least 200 grains, and exit the muzzle at a velocity of at least 1,000 feet per second.
The late, great Jeff Cooper used to opine that an adequate defensive bullet in a handgun, irrespective of bullet type, shape, etc., should be at least .40″ in diameter, weigh at least 200 grains, and exit the muzzle at a velocity of at least 1,000 feet per second.
Multiplying those factors together, we arrive at a total of 80,000. If we use those factors and that total to assess the effectiveness of the most common semi-auto pistol cartridges, using ball ammunition, we can see how they stack up against each other:
- .45 ACP: .451″ x 230 grains x 830 fps (US Army standard ball) = 86,096
- .40 S&W: .401″ x 180 grains x 1,020 fps (Winchester Q4238) = 73,624
- 9mm Parabellum: .355″ x 115 grains x 1,190 fps (Winchester Q4172) = 48,582
Those values are pretty much in line with what the older measurements (referred to above) give us in terms of bullet effectiveness, and in line with extensive experience ‘on the street’.
They also bear out the FBI’s finding during the 1980’s that the .45 ACP round was about twice as effective as 9mm. Parabellum. The more modern ‘intermediate’ .40 S&W round (introduced in 1990) falls between them in performance according to Cooper’s scale.
I’m confident enough in either .40 S&W or .45 ACP ball to use them for defensive purposes if necessary. As long as I put enough of them in the right place(s), they’ll get the job done.
Of course, one can never rely on a single bullet being sufficient to stop an attacker. I’ve covered this extensively in three articles dealing with ‘The myth of handgun “Stopping Power”.’
Of course, one can never rely on a single bullet being sufficient to stop an attacker. I’ve covered this extensively in three articles dealing with ‘The myth of handgun “Stopping Power”.’
For that reason, the most effective cartridge/bullet combination should be chosen, and enough of them should be delivered to do the job.
If the magazine capacity of one’s pistol is restricted, this means that expending four or five smaller rounds on each attacker can rapidly empty one’s gun, rendering it useless until reloaded.
Far better to have larger, more capable rounds in the gun, each one as effective as possible, so that the same magazine capacity will allow one to deal with more attackers.
What handgun to carry it in? That’s very much a matter of personal preference. Some prefer the ‘old reliable’ 1911 pistol, and I certainly can’t argue as to its effectiveness.
What handgun to carry it in? That’s very much a matter of personal preference. Some prefer the ‘old reliable’ 1911 pistol, and I certainly can’t argue as to its effectiveness.
Some more modern full-size .45 ACP pistols, such as the Glock 21, the Springfield XD or the Taurus 24/7, have improved on the 1911’s limited ammunition supply, and hold 13-14 rounds.
Unfortunately, as far as my hands are concerned, this makes their grips too ‘fat’ for comfort. I prefer a narrower grip that I can grasp more firmly.
My choice is the Ruger SR45. Its magazine holds only 10 rounds, but that allows its grip to be much slimmer, making it easier for me to grasp; and the gun’s slightly greater weight helps me to absorb the cartridge’s recoil during extended practice sessions (don’t forget, I have health limitations, so that’s an important factor for me).
Some other gun writers don’t like the Ruger SR series, but I do. Ed Head, instructor, Rangemaster and former Operations Manager at Gunsite Academy, offered high praise in his review: “If I could go back in time to my Border Patrol days I would take the SR45 with me for a duty pistol. It’s that good.“
Mine have proven reliable in my hands, and it’s easy to disable their magazine safety (a feature I detest on any defensive handgun). I’ve standardized on this model as my full-size .45 ACP pistol.
In .40 S&W, I’ve standardized on the Glock Model 22 and Model 23 (just as, in 9mm. Parabellum, I’ve standardized on other Glock models).
Small .45 ACP pistols tend to be uncomfortable to shoot for extended periods, because they don’t have the heft or the weight to absorb as much recoil as larger weapons. There are many possibilities out there, ranging from the Glock 36, to Springfield’s XD-S, to Kahr’s CW45 (the model I use) and many others.
Small .45 ACP pistols tend to be uncomfortable to shoot for extended periods, because they don’t have the heft or the weight to absorb as much recoil as larger weapons. There are many possibilities out there, ranging from the Glock 36, to Springfield’s XD-S, to Kahr’s CW45 (the model I use) and many others.
I don’t normally carry a small pistol chambered for such a big cartridge, because I find it painful to practice with them for extended periods.
However, if I were denied the ability to carry expanding ammunition and/or a high-capacity magazine, I’d live with the discomfort and switch to my Kahr CW45 in a heartbeat for deep-concealment scenarios (i.e. pocket or ankle carry – I’d rely on my Ruger SR45 for ‘normal’ holster carry). I also have a Glock 27, which would be my ‘go-to’ small pistol in the .40 S&W cartridge.
One final point. Big cartridges such as the .45 ACP are relatively expensive compared to their smaller counterparts, because their manufacture consumes larger quantities of metals, propellants, packaging, etc. (and, being heavier and bulkier, they cost more to ship).
One final point. Big cartridges such as the .45 ACP are relatively expensive compared to their smaller counterparts, because their manufacture consumes larger quantities of metals, propellants, packaging, etc. (and, being heavier and bulkier, they cost more to ship).
That’s one reason why I keep on hand similar handguns chambered for smaller rounds, so that I can train with them at lower cost. For example, a Ruger SR45 can be ‘twinned’ with a Ruger SR9 for training; a Glock 22 with a Glock 17; a Glock 23 with a Glock 19; a Springfield XD-S in .45 ACP with its sibling in 9mm. Parabellum; and so on.
Over time, the savings in ammunition add up; and because the firearms are identical to one another in every important respect, training on the smaller-caliber weapons is directly transferable to their bigger brothers.
All one needs to do is fire the larger cartridge sufficiently to remain familiar with its recoil and trajectory.
Peter
Peter
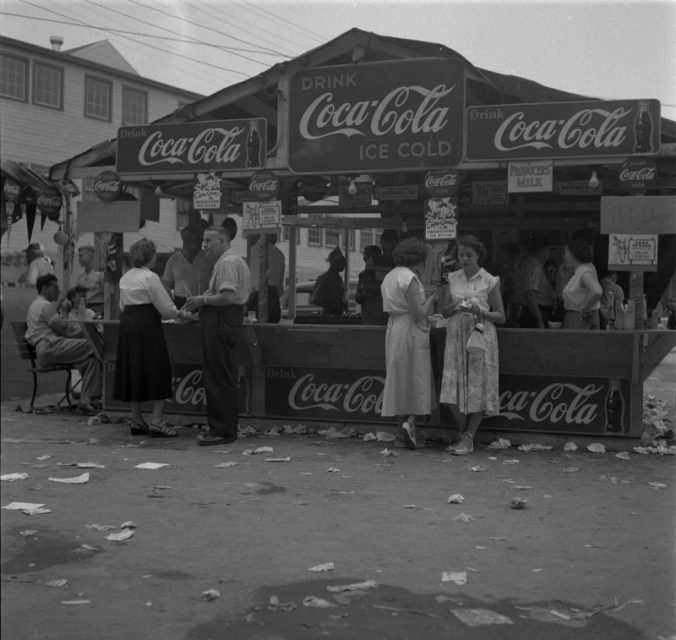
I live in the Atlanta Area, and there are 2 iconic images from Atlanta, one is Delta Airlines, the other is “Coke”, They say that babies are nursed on this stuff and if you don’t drink Coke, then you must be a carpetbagger or some Yankee sympathizer. The locals take their “Coke” seriously, so seriously that every carbonated drink here in the south is called “Coke”.

The Coca-Cola trademark remains one of the most iconic brands in history, and the company behind it remains one of the wealthiest corporations in the world. The secret formula for the original flavor that makes this beverage so distinct is guarded with maximum security, as enthusiasts all over the world try to copy it.
It first started as an alcoholic drink, similar to vermouth, but switched to its non-alcohol taste which we know today in 1886, when John Pemberton, the inventor of the patent, had to step down from alcohol production due to legislative circumstances in Atlanta, where the company was seated.
But how did the brand become so influential?
Well, part of the success of the Coca-Cola company lies in its cunning use of marketing and its even more cunning use of investments. When the U.S. entered the World War II, Coca-Cola made sure to be the official drink of every GI Joe on the field. In 1941, a subsidy for servicemen was introduced, making the price of a coke bottle 5 cents, which was more than affordable at the time.
Also, Coca-Cola briefly turned its investments into weapons manufacture, operating a propellant ammunition loading plant in Talladega, Alabama.
An average of 30 railroad cars of ammunition per day was reportedly produced from their Coosa River Ordnance Plant until closure in August 1945.
The subsidy and the munition production made the company immune to war-time sugar rationing, therefore leaving the production level at its normal rate and even blossom, while their reputation skyrocketed.
The conscripted Coca-Cola employees were also used to operate the 64 newly-formed bottling factories which supplied the military with the beverage. As a result, many of the employees were granted Technical Observer status and were called the Coca-Cola Colonels, never stepping on the battlefield, due to their expertise.
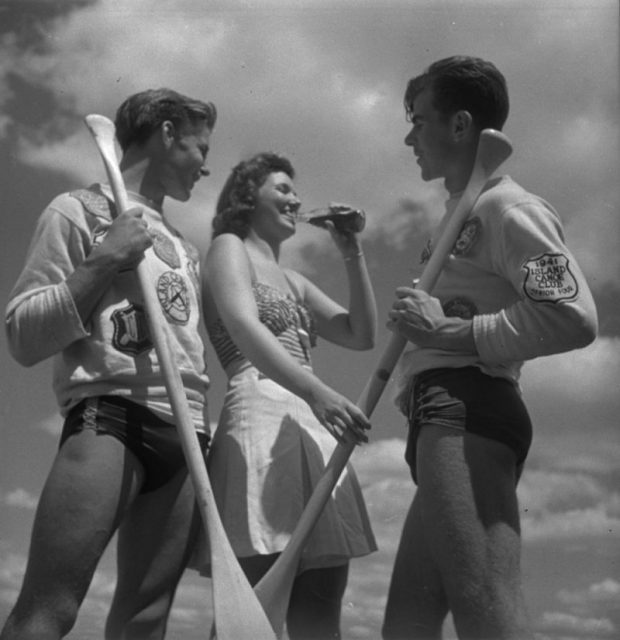
They would go on to produce and distribute 10 billion Coke bottles to Allied military bases and fleets in Europe, Africa, and the Pacific.

Speaking of Africa, while fighting on the North African front, Germans would come across the typical American soft drink. Even though it was forbidden for German soldiers to consume the treat of their enemies, Coca-Cola soon earned its popularity among the members of Wehrmacht, and especially the Luftwaffe.
Allegedly, pilots would wrap Coke bottles in towels while on their sorties and attach them to the underwings of their BF109 fighter planes. This was truly an ingenious cooling method, as the altitude cooled the drink to almost freezing, which was a true refreshment in the desert sun.
A similar method was used by the American pilots in the Pacific Theater of War. They would freeze an ice-cream mixture in mid-air, and upon their return, voila―an excellent icy treat!
As for the Germans, they relied on captured Coca-Cola bottles, which reached an incredible price as contraband goods in the soldier’s black market. The flavor was truly adored by German soldiers, but this was in part due to the fact that Coca-Cola had a factory in Germany prior to the war, and the Germans weren’t all that unfamiliar with the tasty beverage.
For a decade before the war broke out in 1939, the Coca-Cola Company in Germany operated uninterrupted. Once the two countries declared war on each other, the import of the syrup necessary for production was prevented by the embargo. Germany’s new Coca-Cola factory director, Max Keith, then decided to use the potential of the factory and produce a local soft drink that would serve as an equivalent to Coca-Cola.
He gathered the experts to make a combination of fruit pomace and whey―which were ingredients classified as “leftovers”―and thus Fanta was born. The name came from the German word for “fantasy,” as it really took an imaginative effort to make anything tasty from the given ingredients.
The drink was distributed to soldiers, but due to war rationing, its flavor was often used by military and civilians alike to sweeten their food instead of sugar, which was a wartime luxurious commodity.
After the war, Coca-Cola regained its factory in Germany and continued to produce Fanta under its trademark.

During WWII, a trade embargo was established against Nazi Germany – making the import of Coca-Cola syrup difficult. To circumvent this, Max Keith, the head of Coca-Cola Deutschland (Coca-Cola GmbH) decided to create a new product for the German market, using only ingredients available in Germany at the time, including whey and apple pomace—the “leftovers of leftovers”, as Keith later recalled. The name was the result of a brief brainstorming session, which started with Keith’s exhorting his team to “use their imagination” (Fantasie in German), to which one of his salesmen, Joe Knipp, immediately retorted “Fanta!”
The plant was effectively cut off from Coca-Cola headquarters during the war. After the war, The Coca-Cola Company regained control of the plant, formula, and the trademarks to the new Fanta product—as well as the plant profits made during the war.
During the war the Dutch Coca-Cola plant in Amsterdam (N.V. Nederlandsche Coca-Cola Maatschappij) suffered the same difficulties as the German Coca-Cola plant. Max Keith therefore also put the Fanta brand at the disposal of the Dutch Coca-Cola plant, of which he had been appointed the official Verwalter (caretaker). Dutch Fanta had a completely different recipe from German Fanta, elderberries being one of the main ingredients.
Fanta production was discontinued when the German and Dutch Coca-Cola branches were reunited with their parent company. Following the launch of several drinks by the Pepsi corporation in the 1950s, Coca-Cola competed by relaunching Fanta in 1955. The drink was heavily marketed in Europe, Asia, Africa and South America.