Categories
Category: Fieldcraft
Categories
Mozambique drill in Collateral and Heat
Categories
A 22 Hornet scopecam kill
Once upon a time on a faraway world very much like our own, there was a teeny-tiny nation surrounded by bigger, bitter enemies. On one side of it lapped an azure sea, but it otherwise kinda sat there like a chocolate fudge nut brownie on the edge of a ping-pong table. And all the giant Ping- Pongers wanted to smash that brownie an’ sweep it off onto the floor.
The Pingers tried to sweep it off with conventional novelties like tanks, artillery and bombs, but they failed. The Pingers had the numbers and the ordnance, but the Brownies had D&D: Determination and Desperation. See, when the Pingers lost, they could go home, award each other shiny medal, and re-equip. If the Brownies lost, they would be exterminated.
Then the Pongers jumped in, and they were less conventional. They selected some less-than-stellar Pongs not noted for their joie de vive, wrapped ’em on the outside with high explosives, and filled ’em on the inside with painkillers, stimulants and some really toxic stuff called “death-dogma.” Then they’d send these Pong-Bombs out among the Brownies, to their bus stations, grocery stores, schools and movie theaters — even their weddings — to blast as many Brownies as they could.
These Pongs were told to look and act inconspicuous — to move within crowds, and whenever possible, to stick to older, even ancient areas where passageways were narrow and numerous, so they could slip along to their targets like fishies in weedy waters. Then all the Pongs had to do was pull a loop, punch a button or squeeze a little squeezie-thingie, and Bang! — their job was done. Detecting, closing with, and intercepting the Pongs was a really tough job, but there were some really smart, tough nuts in that brownie.

“It’s not enough to shoot a guy until you think he’s dead. You gotta shoot him until he thinks he’s dead.” – The Tao of Connor
The TufNutz had to spot the Pongs by such miniscule clues as head and eye movement, subliminal behaviors, a neck and jaw that wasn’t quite fleshy enough to match a Pong’s waistline, compulsively touching the same place on their clothing and stuff like that. Then they had to move in, locking on their targets like heat-seeking missiles, never losin’ sight of ’em for a second or they might escape — and “escape” wouldn’t mean escape — it would just mean moving a mass murder to another location. Pong-Bombs could not be allowed to get away.
All of this had to be done while moving around obstacles, threading through swirling throngs of people, hustling over cobbly, uneven surfaces, not shooting if it could be avoided at all, absolutely controlling every shot, and — neutralizing a Pong who might be soaked in a painkilling chemical cocktail. Too, as soon as the TufNutz engaged, people would do crazy stuff like freeze, scream, fall down, run the wrong direction and even reach out and grab at the TufNutz, like “Save me!” — makin’ it much harder to save ’em. Easy, huh?
TufNutz were mostly commandos, intelligence wizards and cop-types. But this job wasn’t much like regular soldiering, or regular police work, or even like tactical counterterrorist team operations. It was more like plainclothes execution of high-risk felony fugitive warrants on armed and dangerous psycho druggie-crooks in a metropolitan environment. So, they got some help from cop-friends called “Yanx” in a far-off country who had sorta “been there and done that,” and were combat vets besides.
The TufNutz had to suppress a lot they’d been taught, like fire-and maneuver doctrine and classical shooting positions, and learn things like tuckin’ their weapons, arms and elbows in close and centered, adopting an “agile crab” rapid but stable scuttle, hip-checking an’ stiffarming people outta the way; hearing, seeing, and feeling peripheral dangers and interference without reacting to them unless they threatened loss of focus on that one monstrously dangerous, all-important Pong target — and lots more; too much to tell here. And there was another problem to deal with.
The Shoot-Down Drill
Even if a Pong — especially a “medicated” one — took a solid hit, after a few seconds, he could frequently recover enough control and dexterity to “punch his button.” Two Yanx and some TufNutz had even seen guys take wounds that good sense and medical experts would term fatal, but they remained briefly functional, as though “science says he’s dead, but he didn’t get the message.”
One of the Yanx observed that the TufNutz were shooting tightly controlled single shots and some doubletaps. He had been taught to “shoot ’em where they’re biggest, and do it more than once,” and his own “evolved practice” had become “shoot ’em where they’re biggest lots and lotsa times, until there ain’t no threat anymore.”
Several who had observed this phenomenon agreed a man who is receiving a steady, unrelenting series of impacts, spaced, let’s say, a tad less than a second apart, will be virtually unable to do anything but involuntarily react to those continuing impacts. Man being essentially a big wet sack of electrical connections, the response is like timed low voltage shocks, or mechanically, like a boxer taking a rapid volley of punches: The first couple of blows may only stun and shock him, but he is prevented from coordinated reaction, and the disabling effect only increases and deepens as he is hammered all the way to the canvas and into oblivion.
The TufNutz technique changed: No more single shots; no more double-taps — just absolute focus on timed, continuous, accurate fire; and it wasn’t at all about “shooting to kill,” but about “shooting to zero-threat.” It worked.
The Yanx went home, and one scribbled a new chapter in his little book of “Evolved Practices.” He called it, The Shoot-Down Drill.

When it comes to self-defense, you have many concealed carry options. Who you are, what you carry, what you wear and where you will be can all influence your choices.
In my previous article about the best daily carry gun, I explained that once someone decides to include a firearm in their self-defense plan and be their own “first responder,” they should carry it wherever it is legal to do so. At home, on vacation, at work, when out to dinner with friends and family — even when exercising.
If a person could predict, without a doubt, when and where a criminal attack would occur — the prudent person would just stay home that day or avoid the specific place where the crime is predicted to occur. Law-abiding citizens do not seek out trouble, but also cannot predict when trouble will find them.
Your Choice in Concealed Carry Options
Some citizens who obtain licenses to carry do not expand their training beyond that which is required to obtain the license. In most states, the required training is a “safety class” that is in no way related to carrying a pistol in public. Not building on basic firearms safety training with classes that are appropriate to carrying a gun in public is a huge mistake in my opinion.
The number of “Constitutional Carry States” has grown significantly, and more people than ever are carrying guns — which is a good thing to my mind. However, some are going about their lives without what I consider as much training as they could have, and that is unwise.

Let me state this here — I remain strongly opposed to any type of government-mandated training, permitting or licensing to own or carry a firearm. However, it is my long-held view that responsible gun owners should voluntarily seek out training that is appropriate to their needs.
Citizens who regularly think about personal safety seek to expand their training. Unfortunately, many are often “stuck” with a “one-size-fits-some” program. Most of these programs are built around a strong side belt holster and a mid-sized or even a full-sized pistol. Many trainers are very experienced, come from law enforcement or military backgrounds and teach important skills such as shooting from unconventional positions, shooting while moving, shooting fast and accurately and the proper use of cover and concealment. Some instructors even cover the legal aspects of the use of deadly and non-deadly force as it applies to private citizens.
In my experience, though, few instructors teach people how to carry and draw a gun from a position other than from the dominant side hip. This training may work for males who normally carry on their hip — but what about females?
A New Look — Options for Women Who Carry
In my experience, many women dislike strong-side belt holsters because their hips’ shape makes an inside-the-waistband (IWB) holster uncomfortable. On the other hand, outside-the-waistband (OWB) holsters often “print” through women’s clothing.
The Springfield Armory Alexo Athletica line offers an excellent line of carry-centered clothing for both men and women. Pursuant to our topic here, the women’s products offer many concealment options.
The Alexo Athletica line includes women’s leggings with built-in pouches to carry a small gun such as a Hellcat. Each pair has more than one “gun pouch”, to allow carry in a comfortable and accessible location. When paired with a DeSantis Flextech pocket holster, the trigger is properly protected.
I’m acquainted with a young mother who carries a Springfield Armory Hellcat and have been helping her out with some self-defense training. The Hellcat is small enough to conceal well and packs substantial firepower due to the availability of 11-, 13- and 15-round magazines. The Alexo Athletica line of clothing works well for her because the Hellcat weighs just over a pound and fits neatly in the appendix carry position.
Drawing and presenting the pistol for her came relatively easy: in one day I was able to teach her these lifesaving skills. Reholstering is the same as for other pocket-style holsters. The loaded Hellcat is inserted into the DeSantis Flextech, and then the entire package is placed into the built-in pouch sewn into the Alexio Athletica leggings or pants. This lady is well-prepared; she carries a spare magazine in a NeoMag, clipped to one of the pouches on the opposite side of her body.
Packing It In with Off-Body Carry
Some women prefer to use a “holster purse” because it accommodates a full-size pistol, such as a Springfield 1911 TRP. In my experience, they like pistols like this due to their weight, as is easier for many to shoot well. Now, this type of carry requires the caveat that — unlike a pistol in a holster on your body — you must never release control of that bag since it contains a firearm.

Holster purses have a pocket for a pistol that is accessed separately from the main compartment. Most quality purses intended for carrying a firearm have a strap that sandwiches a piece of metal cable between leather or fiber to prevent the purse from being violently torn away from the owner.
Drawing a pistol from a holster purse is very different than drawing from “on body” carry — including the Alexo Athletica leggings. The purse needs to be carried so that the concealed pistol points in a safe direction and, when needed, repositioned so that it is pointed at the threat. The user must reach inside, get a firing grip on the pistol and then use the support hand to pull the purse away from the pistol after having manipulated the zipper to open the pouch. In this mode of drawing, the purse ends up on the support side of the body and the pistol is pointed at the threat without crossing anyone or anything else.

This technique must be practiced with an unloaded gun — guided by a qualified firearms instructor — until it is reflexive. Once the draw has been perfected, then and only then should the trainee move on to live-fire practice using the holster purse with their preferred carry gun.
As noted, the trade-off of using a Holster Purse is that it can never be put down as long as there is a firearm in it. Not in a shopping cart, not on an empty chair in a restaurant — never. Those who carry a gun should never lose (or give up) control of their firearm, and a firearm should never be left where unauthorized people may be able to grab it.
Final Thoughts on Your Concealed Carry Options
When I work with someone who has requested specialized training, I spend time learning about their lifestyle, daily activities and which types of carry methods they intend to use and why. I also ask about any other training they may have so I can get an idea of what if any, basic pistol handling skills they may have already learned.
Once I have learned as much as I can, I develop an individualized training plan. It is best to always start off with an unloaded pistol and practice drawing without the use of a cover garment. Once the draw stroke has been mastered AND my student can place accurate hits on a silhouette target from three to 15 yards, we incorporate drawing from concealment.
Most carry methods are not hard to master, but in order to properly learn these life-saving skills, gun owners should seek out training from an experienced and well-qualified instructor to learn how to draw and aim a pistol from someplace other than a holster on a belt on the dominant side of the body.
Gun cleaning is an important aspect of gun ownership – don’t let anyone tell you otherwise. Beginning, intermediate, and advanced shooters are all responsible for keeping their guns in peak condition. Clean the gun your life depends on like your life depends on it — anything less is rank laziness and does not befit a firearms enthusiast.
Reason #1 – Cleaning a Gun Prevents Malfunctions
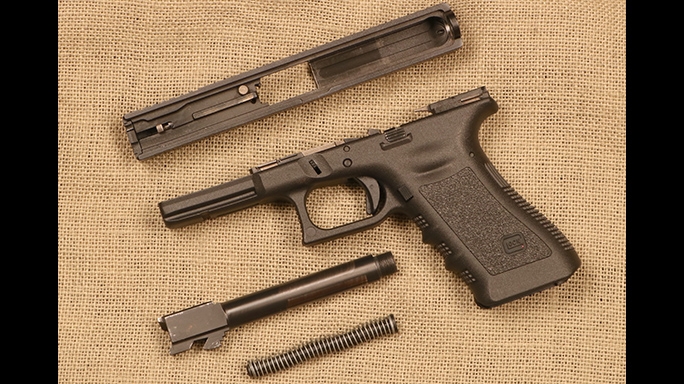
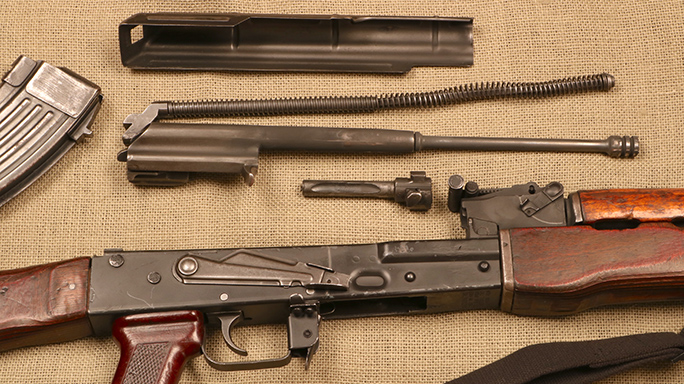
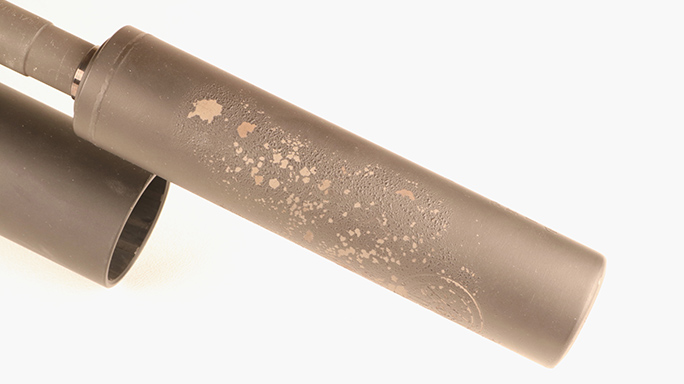
What exactly happens when you fail to clean your weapons? If you are running a Kalashnikov or a Glock, not much, but it still matters to ensure they’re always in proper working order. I have a Glock 22 converted to 9mm I have owned for a decade. I have brutalized that poor pistol, most typically with a sound suppressor hanging from its snout. Sound suppressors look cool and cut down on noise pollution, but they will render your guns invariably filthy. Increasing back pressure forces some of the carbon fouling that might otherwise vent into the atmosphere back into the action. The result is copious gunk and that gunk can lead to firearm malfunctions.
Reason #2 – Your Life Depends on a Clean Personal Carry Gun
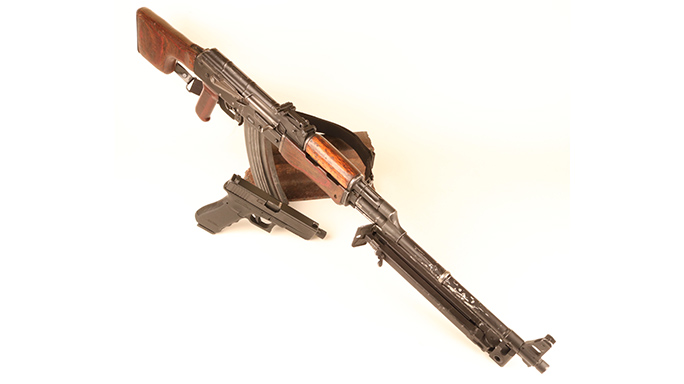
I do actually try to pay attention to my carry guns, but we all suck at this at times. If my RPK chokes while turning ammo into noise, it might elicit some good-natured grumbling. The same thing cannot occur with my Glock 42 while I am standing between some deranged meth addict and my family. Digging into the guts of a well-used pocket gun can be enlightening.
There isn’t a great deal of mechanical energy we are dealing with here, anyway. Let all the lube evaporate out of your favorite slim .380 defensive pistol then pack it to the gunwales with pocket lint and don’t be surprised if it chokes in the clutch. Holstered guns typically fare fairly well over time, but should you be in the practice of carrying a sidearm in your pocket that thing will get gross quick. I have been on occasion gobsmacked by the sheer volume of sundry grunge that will accumulate in a pocket gun over even a short month or two of regular carry.
Reason #3 – You Want the Magazine to Work Properly
The box magazine on a pocket gun sucks up filth like crazy. Slide the floorplate off and tidy up the inside of the magazine whenever you strip the gun.
Shoot your carry guns from time to time, and not just with cheap blasting ammo. It can be illuminating to go to the range and run your ready magazine dry in a high-mileage carry piece. I have had several unexpected stoppages during this exercise. There is one gun I no longer rely upon because of some dismal no-notice range performance. Defensive ammo is expensive, but it is worth the trouble to freshen up your primary magazine every year or two.
Strip it down and tidy it up on the first of each month. It won’t take you five minutes. You would willingly devote more attention to some medical machine if it were keeping you alive. If you are serious about packing a gun for protection, you need to keep it properly maintained.
Reason #4 – Clean Guns Will Function from the Range to a Combat Zone
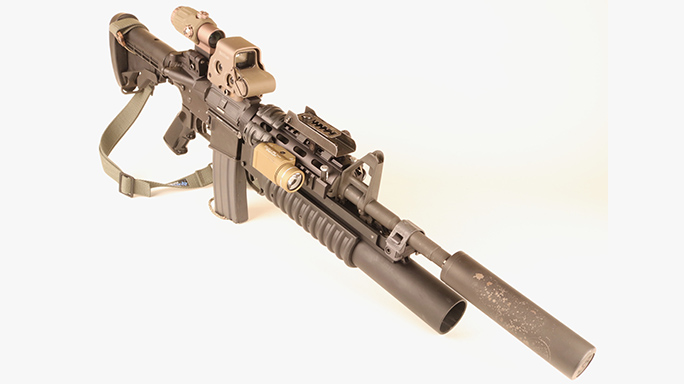
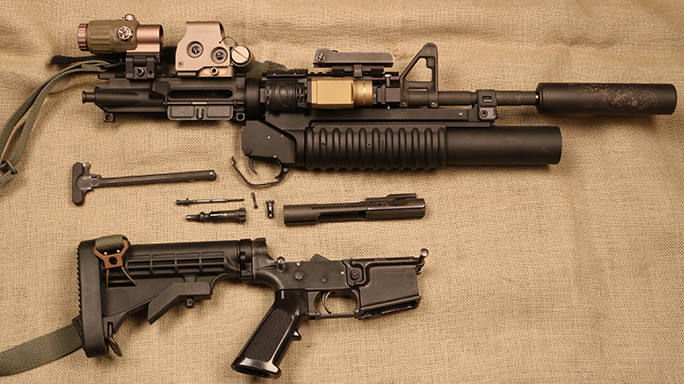
I ran my first M16A1 professionally in 1984. I’ve had every type of stoppage imaginable with this weapon, including blown cases and a failed front sight base. The gun will run and run well, but it needs a little love. The rub is that the direct gas impingement system pumps all of the gun’s sundry funk right back into its entrails.
M16A1 rifles at the Ranger School at Fort Benning back in the 80s had been ridden hard, but meticulously maintained. However, I used one during a competition there that would not run more than three rounds at a sitting despite being spotlessly clean and lightly lubed. Stoner acolytes please forgive me, but this is, especially in its earliest iterations, a remarkably finicky combat weapon.
Let an AR get properly dirty and the results will show. Failures to extract, failures to eject, and bolt over failures pepper the fail-scape. The solution is obviously regular cleaning.
Scrub off the bolt, bolt carrier, bolt carrier key, and sundry small parts. Personally, I use a pocketknife to scrape the carbon fouling off of the tail of the bolt. Whichever way you choose to complete this task, make sure you’re doing so regularly.
Reason #5 – You Don’t Want to Have to Drop Hard-Earned Money on Repairs
An ounce of prevention is worth a pound of cure, an adage that is especially true in the realm of gun cleaning and maintenance. By cleaning a gun after shooting, you can offset the need for costly repairs later on – along with a few sideways glances from an unimpressed gunsmith. You’ve spent enough money on the firearm itself, so why pay extra to repair it due to negligence? Also, while your gun is off getting fixed it’s not in your possession when you may need it the most.

