Category: Fieldcraft

Revolvers soldier on as defensive weapons because they perform certain tasks very well. As deep cover carry guns, small revolvers are arguably superior to semiautos. The revolver’s lack of sharp angles lends itself to concealment and minimizes printing.
Small revolvers tend to function more reliably than small autos when used within grappling distance—e specially when fired one handed with a less than perfect grip. It’s hard to beat a five-shot .38 like a J Frame Smith or Ruger LCR for this application. Selecting the right carry ammo to find the balance between effectiveness and user friendliness takes some thought.
Even with the advancements made with modern ammunition, it’s a challenge to make hollow points expand reliably in a short barreled .38 Special. There’s no JHP out there that will consistently perform “as advertised” from a two-inch barrel in the real world. Low velocities, intermediate barriers, and even some clothing fabrics can take the magic out of bullets designed to expand. Plus P offerings bring more pressure, blast and recoil, but cannot guarantee results.
The humble wadcutter is worth a look for this application. It won’t expand, but it will poke a clean .35 caliber hole and leave a large permanent wound channel. The sharp shoulder delivers deep penetration and is less likely to be deflected by bone than a round nose. The flat nose produces more shock and creates more trauma by crushing tissue.
Round nose or non-expanded hollow point bullets pass through tissue leaving permanent channels that are less than bullet diameter; tissue stretches to allow the bullet to pass but then shrinks back. Even at the modest velocities of factory loads (650-700 fps depending on manufacturer), wadcutters exit short barrels penetrate impressively in ballistic gel—around 16 inches. Wadcutters do this with low recoil and blast.
The fixed sights on most .38’s are regulated for standard velocity 158-grain bullets. Wadcutters thankfully hit to the same point of aim.
There are a few companies out there that recognize the value of this concept and load wadcutters for defensive purposes. Buffalo Bore offers a 150-grain hard cast wadcutter loaded to “heavy standard pressure”. They use powders with flash suppressants to minimize flash while firing.
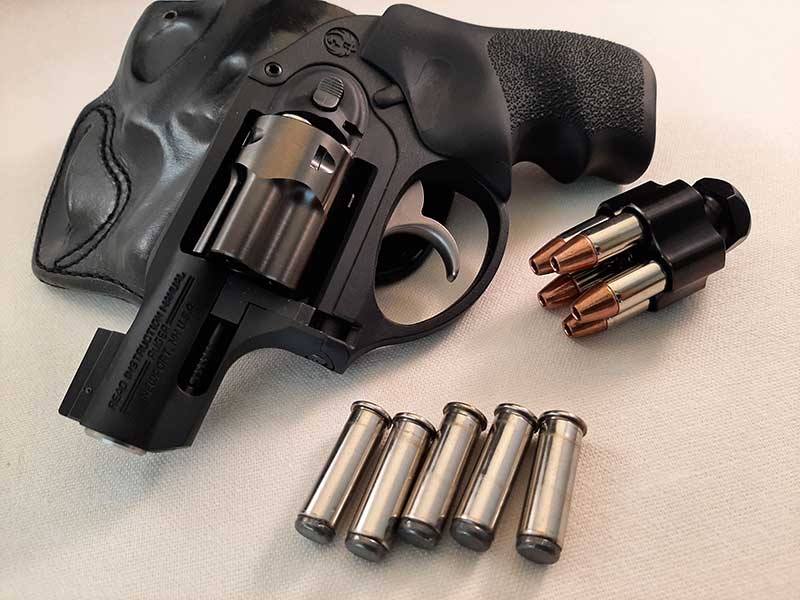
Small .38’s like this Ruger LCR make great deep cover guns. Wadcutters might be a better balance in this 13.5-ounce gun than +P JHP’s.
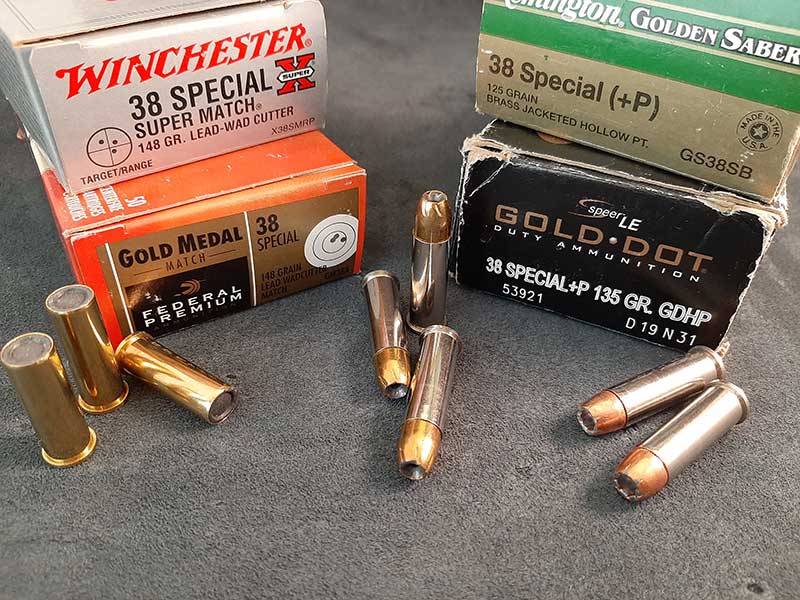
It’s hard to make even modern quality hollow points expand consistently from a two-inch barrel. Wadcutters penetrate well and produce more shock than round nose bullets with minimal blast and recoil.
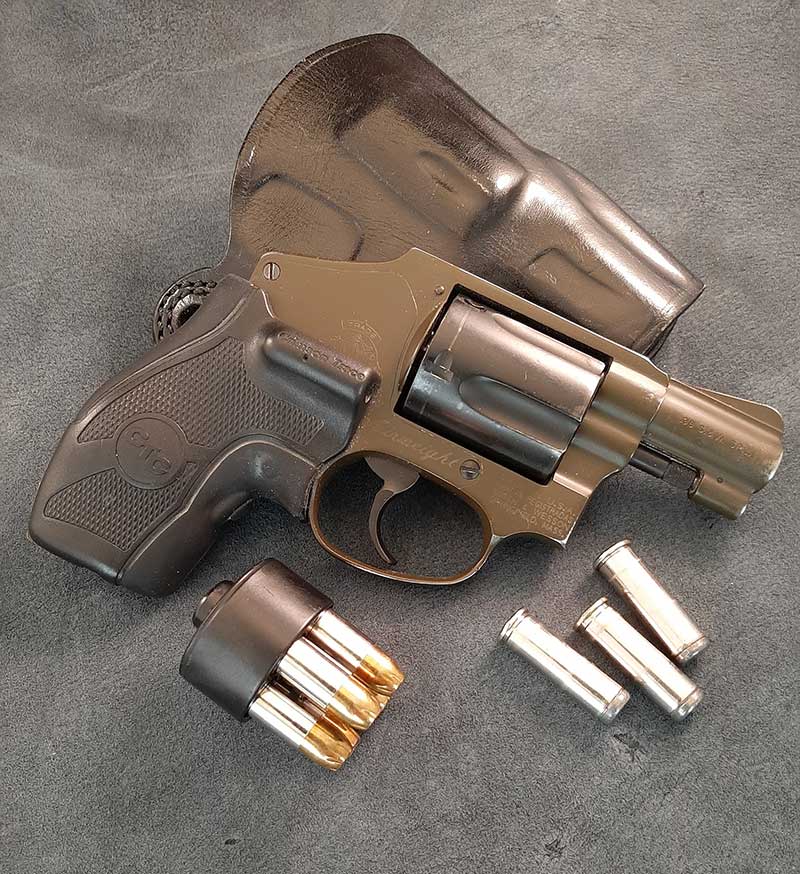
Wadcutters in the gun with round nosed projectiles in the speedloader for an emergency reload.
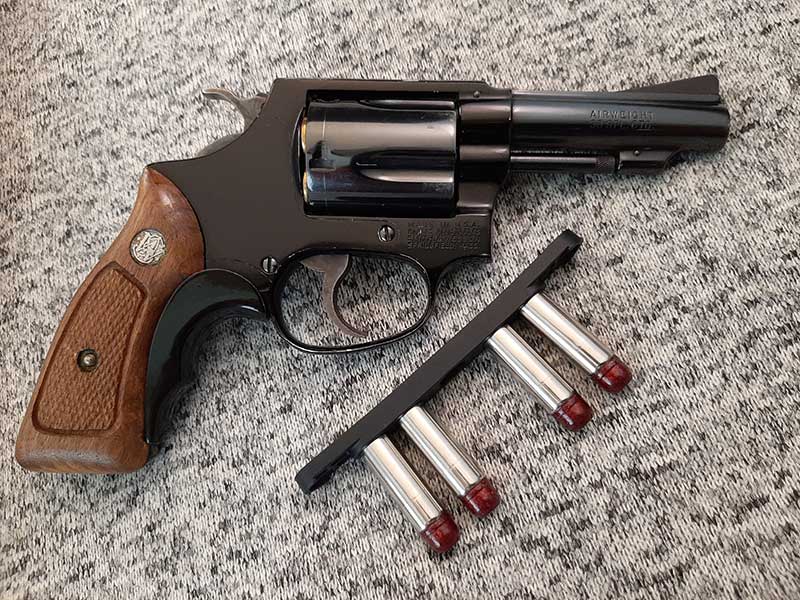
This old J frame Airweight Model 37 loaded with factory wadcutters would make a nice companion for an evening walk in most neighborhoods.
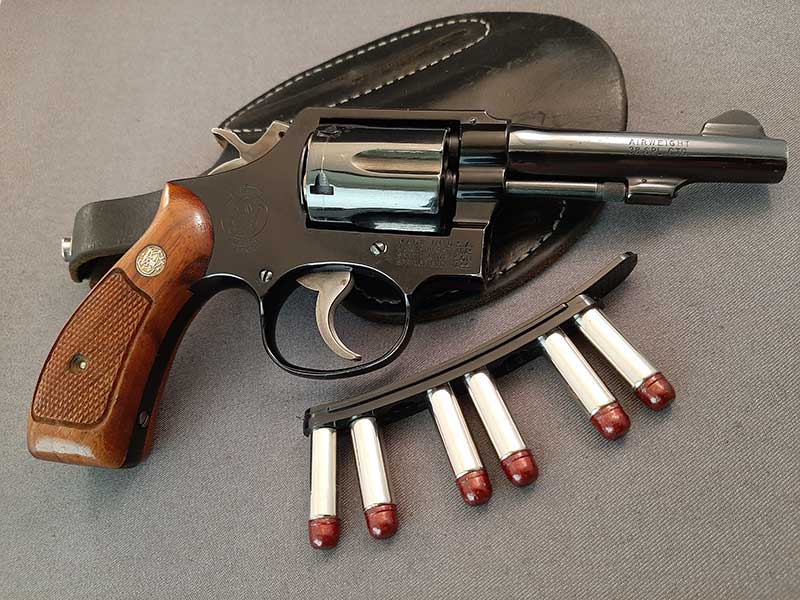
This Model 12 was never rated for +P ammo. Wadcutters hit to the sights and would be a good choice in this old light weight.
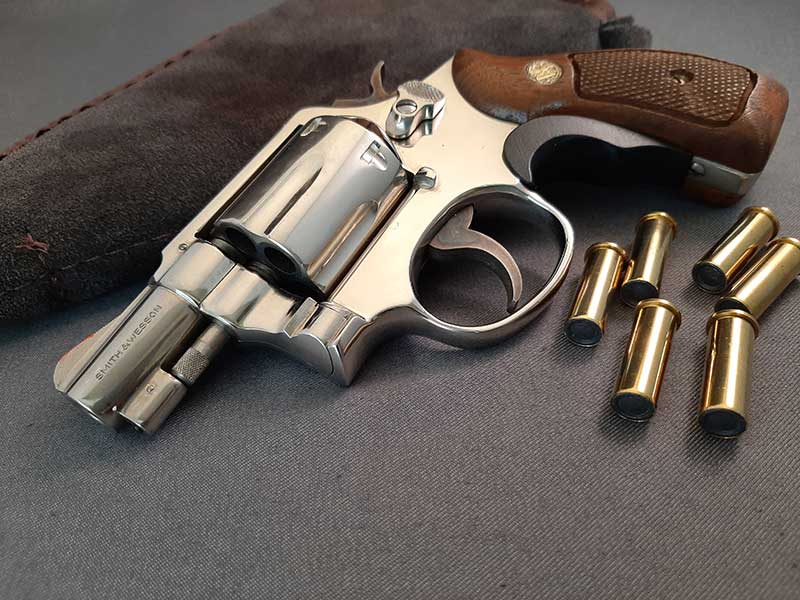
Wadcutters won’t beat up this classic two-inch Nickel Model 12—or the person shooting it.
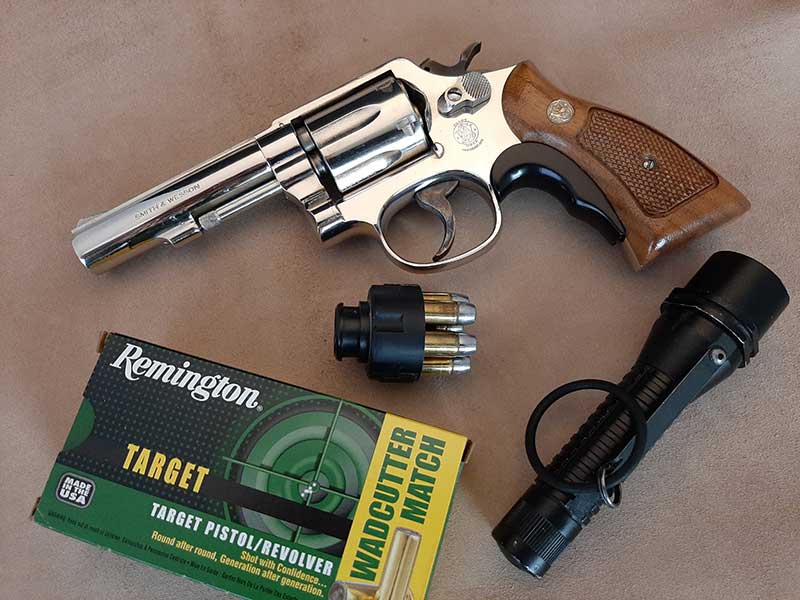
You can bet this old Model 10 will work after being stashed in a drawer for years. The wadcutters would make it easier to deliver good hits than +P JHP’s. Round nose cartridges in the speedloader if a reload is needed.
Buffalo Bore publishes velocities from actual firearms (not vented test barrels) that I have always found to be honest and accurate. BB’s wadcutter averages 868 fps from a two-inch Model 60, 961 fps from a three-inch Ruger SP101, and 1,005 fps from a four-inch S&W.
Underwood Ammunition sells a similar 150-grain hard cast wadcutter in a standard pressure loading. They use a bullet with “Hi-Tek” coating and nickel-plated cases. The polymer coating covers exposed lead with a slick finish, nickel cases stand up to corrosion better than plain brass. The velocity is listed at 1,000 fps. It’s safe to assume that speed will be close to Buffalo Bore’s from a two-inch barrel.
If you train with your five-shot lightweight .38, the benefit of standard pressure ammunition is hard to overstate. The guns may be +P rated, but shooting +P soon pegs your fun meter and moves into “this really sucks” territory for most people.
With wadcutters, you can practice with your carry ammo without getting beat up. This makes most of us much more likely to train with the little guns. Wadcutters are a great option for older guns that were never rated for +P ammo. They enhance the viability of carrying S&W Airweights like the K frame Model 12 and the J frame Model 37.
There are a few negatives with cast wadcutters, both of which can be mitigated. They will foul your gun faster than shooting a diet of solely jacketed bullets. A little more diligence is required during maintenance to keep the revolver functionally clean.
The shape of wadcutters don’t lend themselves to rapid reloads, especially while under stress. It’s a wise practice to carry rounds with a more forgiving profile in speedloaders and/or strips. If you must perform an emergency reload, a bullet with a rounded ogive makes this task much easier.
Another task revolvers perform well is as a home defense handgun that may be used by family members that are less familiar or skilled.
A four-inch Model 10 loaded with wadcutters is a gun that most people can learn to shoot well with minimal training. It can sit it a drawer fully loaded indefinitely with the expectation that it will function reliably if ever called upon.
It’s a good bet that wadcutters will work equally well if that day comes.
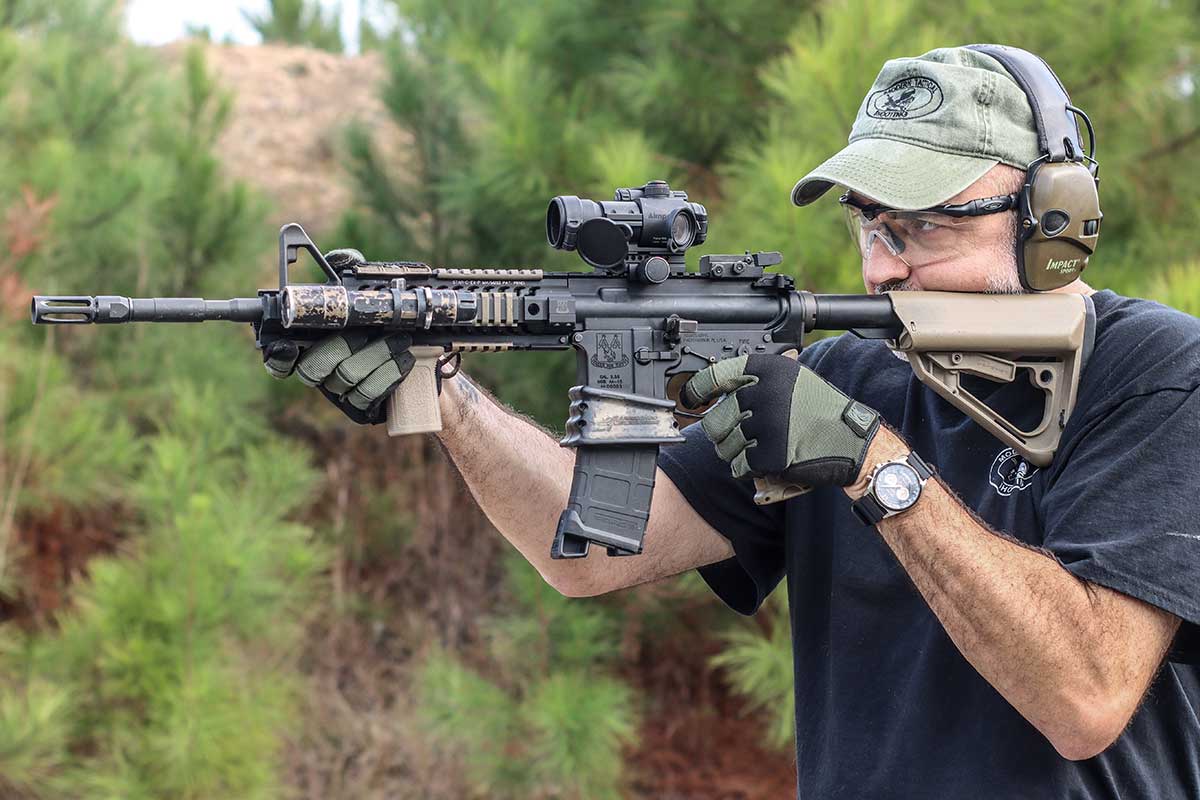
To incapacitate a threat as quickly as possible, many will agree shot placement is a key factor, accomplishing this with the double tap or controlled pair, (two aimed shots) into a vital area being taught spending an extraordinary amount time focusing on super tight accuracy, so one can place the two rounds within a very tight group.
So how is it then, that in many lethal force encounters, instead of a couple of well-aimed, center mass shots taking place to stop a threat we see large numbers of rounds being fired, often peppering all over the target. Is it because the officer did not get enough time or ammo on the range? Lack of emphasis on accuracy? Or maybe too long of time between range training session? What if I were to say, it’s a failure to correctly train to begin with?
I’m not questioning the effectiveness of good shot placement, in fact I have indeed witnessed a few one shot stops during my time serving Afghanistan, with the U.S Army with M855 62-gr. “Green Tip”, known to be a poor performer at close range.
So, what is going on? Why do many lethal force encounters end with high numbers of rounds being fired as opposed to two clean shots into the vitals? I suggest, how we are trained does not pair up with how our bodies natural response to a threat.
FEEDBACK OR LACK THERE OF
When faced with a threat, it’s natural for one’s fight or flight response to kick in, dumping adrenaline into our body, preparing for either decision, (fight or run). When the decision to fight is made, we basically stay in combat mode until there is some sort of stimuli (usually visual) telling us the threat is no more.
A good example of this can be seen when training with simmunitions or even paintball, and airsoft guns. Often those who are engaged in a match and presented with an opposing team member in their sights, they will way lay away on the trigger, peppering the enemy or foe until they see a reaction. Either a hand up to signal they got hit, or siting down, threat dancing around yelling “stop!” or something similar.
The reason for continued shooting is not based on any sort of lack of training, instead they continue shooting until they get positive feedback via visual confirmation, that the threat is no more. In fight mode basically our brain needs visual confirmation that the threat has ceased to exist.
Except for the experienced, it goes against our very nature and programming when faced with a threat to respond in a slow methodical manner. Experience does play a part. The first time I ever engaged a threat in combat I don’t remember seeing the center dot of my EOTech reticle at all, that along with some other novice mistakes. Fast forward multiple combat tours later, to my last one in 2015. I remember precise aiming for the most part, with every shot I took and applying fundamentals while doing so.
Back to natural reaction. This is my beef with controlled pairs and spending a lot of time with slow methodical shot placement. In real life, there is a good chance that one’s ability to take precise aim and place two center rounds one-inch apart into the vitals is going to happen. Instead, it is more likely (especially with a handgun), one is going index the gun center mass and starting shooting, not stopping until the threat shows it’s been affected.

In the time it takes most to do a super tight double tap with a pistol, one can with practice, fire out a fist size, five-shot string within the same time. Not only is this more effective, but also better fits one’s natural response to keep shooting until the threat is down.
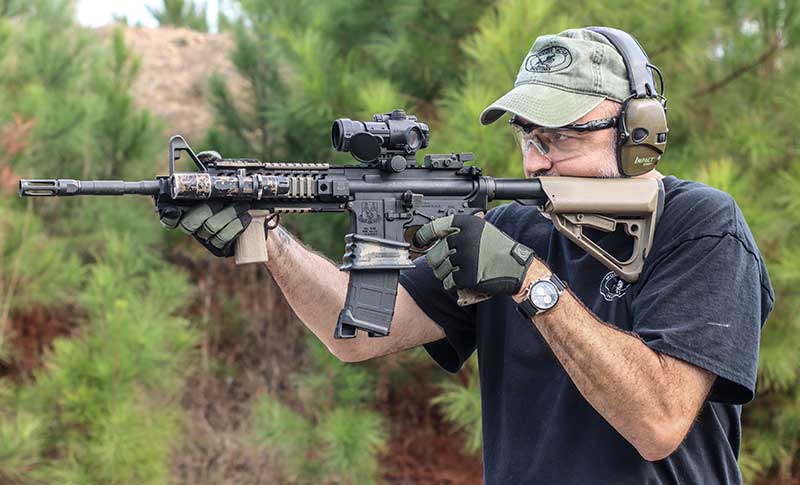
At close range under stress, many forget to compensate for the height of bore difference between the optic and the muzzle. With ARs and most red dots it’s at least 2 ½ inches.
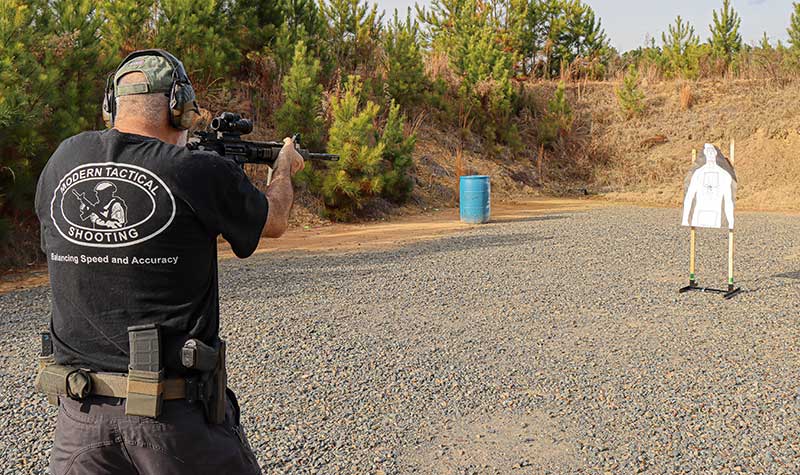
At seven yards when aiming center mass the rounds impact low. Aiming with the red dot placed at the base of the neck, would ensure heart and lung shots, significantly increasing lethality.
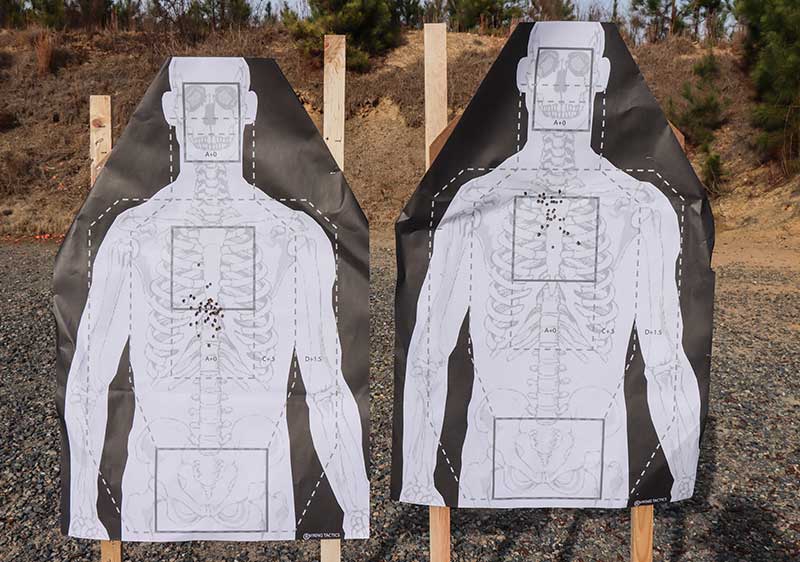
Traditional aiming center mass (left) bullets impact low just under the vitals. Using the JSWBR’s recommendation (right) to shift the point of aim to base of the neck. This takes into account the height of the optic and would significantly increase lethality.
JOINT SERVICES WOUND BALLISTICS REPORT
A similar finding was made by the U.S. Army back in the early years in Iraq and Afghanistan during the War on terror. In 2006 the Joint Services Wound Ballistic Report, (JSWBR), was published. This report was basically an after-action review of both soldiers shooting performance and the terminal effectiveness of the M855 62-gr. 5.56 round. Basically, the JSWB highlighted two issues as to why the M855 round was a poor performer at close range.
The first was the design of the bullet itself and its failure to yaw or turn in the body like the old M193 55-gr. bullet out of a 1:12 twist barrel (as was used with M16A1s in Vietnam). Secondly and pointed out as a bigger of the two issues, was poor shot placement. Basically, soldiers were not hitting enemy combatant in vitals areas for instant incapacitation.
It was noted, in many instances, threats were hit too low, meaning instead of center mass in the heart and lung area they were instead, hit in the abdomen area, which resulted in the need to shoot multiple rounds. Well above the taught, two round, double tap to get the job done. The JSWBR identified training as the issues as to why this was happening.
One reason being an offset issue at close range and soldiers not accounting for the height above bore between the optic and the muzzle. So, as soldiers aimed center mass as they were trained to do. The mechanical offset of the point of aim (POA) and point of impact (POI) resulted in hitting low, just under the vital heart and lung area.
Basically, being trained to shoot center mass and not holding off high around the base of the neck to account for the POA/POI difference was a problem. And while the JSWBR did not come out right and say it, the report did recognize the difficulty in trying to fix this flaw in training due to the natural tendency when under stress to aim at the portion of the body guaranteeing a better chance of a hit over that of a vital area if it’s deemed harder.
This was pointed out in the report’s recommendation to change from aiming center mass to aiming at the base of the neck on a threat. The reported stated it may be hard to get soldiers to do this based out of fear of missing over the soldiers of the target. Again, they do not come out and say, “natural reaction,” but if you read the entire report, they do mention how some aspects could be “counter-intuitive” and recognized that this might have to be overcome somehow in training.
TRAINING SCARS
Based off this information, as well as with feedback from soldiers who had participated in real world CQB, changes were implemented within my Special Forces unit. Double taps were placed with shooting five-round strings as the standard method of engagement when faced with close range threats. One thing that was noticed after implementation was the overall poor accuracy in strings of fire beyond two rounds.
Basically, firing two rounds had become a training scar. Soldiers were finding it hard maintaining good fundamentals throughout a longer string resulting in large groups and weak hits with any subsequent rounds past the traditional two from a double tap.
This was in training so one can have little doubt that in real combat, after shooting a double tap, basically panic fire is happening, peppering shots all over the threat. Once again, it’s a natural reaction to keep shooting until there is visual stimuli letting one know the threat is defeated.
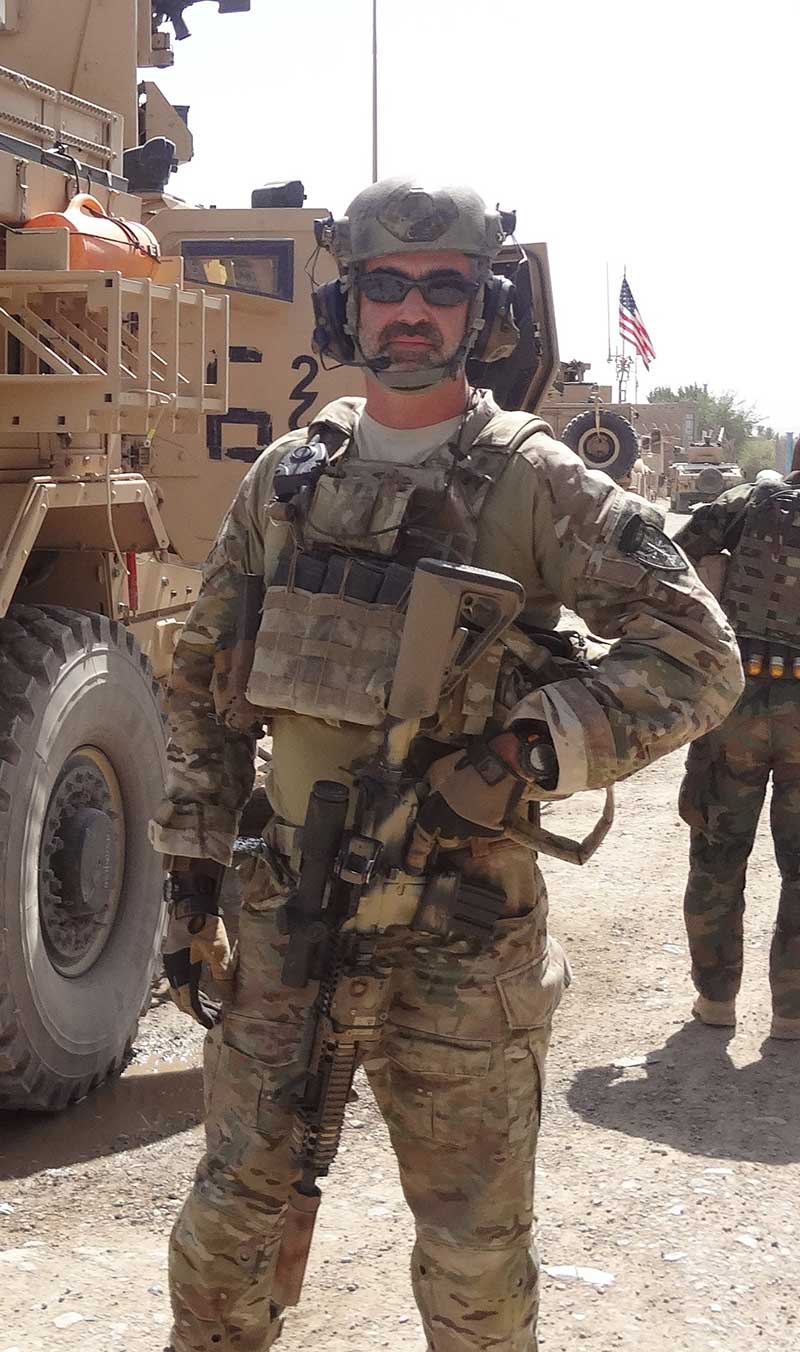
Jeff Gurwitch is a 26-year Army Veteran, 19 of those years with U.S. Army Special Forces, with nine tours of combat. He is the owner/operator of Modern Tactical Shooting, providing free how to and shooting informational videos via YouTube and offers marksmanship training courses.
THE SOLUTION
The first time an officer shoots a high round count string into a target should not be in the middle of a life and death fight. Instead, the sooner one starts training to shoot at least five round strings the more natural it will become, resulting in being able to drive the gun and maintain it on target throughout all shots being fired, whether its two or a dozen.
If one starts training from the get-go to deliver high round counts, it results in both much tighter groups and faster delivery of shots.
HEAD SHOTS?
Why not just practice head shots? After all, take out the brain and you get instant incapacitation. Sure, in training headshots can be easy, but it still takes conscious thought to make that decision aim for the head. Under stress this not a natural reaction to go for the smaller target. In real combat the head is a hard target to hit even at close range, especially if the threat is moving.
Our brain knows this and under stress for many the natural reaction will be to shoot the widest part of the body (easiest shot). So again, why not pair training with natural reaction and train from the get-go, to put a high volume of fire, high center of the threat, and drive it down.
A good way to test this, which I have tried during CQB training, is clear a structure shooting all targets with two to the body and one to the head. Then go back and conduct a run shooting all targets with five-round strings. What you will more than likely find is not only will one be faster shooting five round strings, but also just how difficult it is putting accurate head shots when faced with multiple targets at one time.
THE WRAP UP
While there are certainly plenty instances of one shot stops in gunfights that is not the norm. There is a good chance one will need to fire multiple shots into a threat to get the desired result.
So instead of hoping to rise to the occasion and having the mental clarity to be able to evaluate one’s hits while engaging a threat instead, how about paring one’s training with both proven methods of engagement and one’s natural reaction to danger? Doing so can improve one’s chances of coming out on top.

For preppers, survival skills are just as important as supplies and gear.
Any bad situation can be easily mitigated if you have survival skills to fall back on. Even if you only have a handful of basic tools in your bugout bag (BOB), knowing the following crucial skills will help increase your chances of survival when SHTF: (h/t to UKPrepper.Life)
1. Building a shelter
A shelter could mean the difference between life and death in an SHTF scenario. The dangers and risks in such a situation could be compounded by rain, snow or even a thick fog if you don’t have a shelter to protect yourself from the harsh elements. Therefore, it’s important that you know how to build a makeshift shelter.
How you build your shelter will depend on the season and the terrain of your surroundings. You could start with a basic lean-to or tarp tent and slowly build up your skills until you’re comfortable building a tepee. If you live in an area with heavy winter snows, you can take advantage of the weather to practice digging a snow cave.
2. Finding and purifying water
Humans can survive for weeks without food but only for a few days without water. As such, you should be well-acquainted with techniques in finding water and purifying it to make it safe to drink.
If you find yourself in hilly terrain, know that the flow of water is always downhill. Look for streams and creeks in the areas where hills meet. Listen for the sound of water cascading over rocks, then just follow that sound. It also helps to look for signs of life, as animals and insects frequent areas with suitable drinking water.
Avoid stagnant water as it is likely chock-full of parasites and bacteria. Your best bet for finding suitable water, be it for washing or drinking, is in places with a flowing stream. Always purify the water before drinking it. The easiest way to do that is by boiling water. You can also use a water filter, purification tablets and bleach.
3. Starting a fire
A fire keeps you warm, wards off predators and provides heat for cooking food and boiling water. Knowing you can start a fire using simple materials can give you the confidence boost that you need to survive for several days in the wilderness. When packing your BOB, make sure you have several fire starters included in your gear. (Related: Firestarting tips: 5 Types of campfires and how to build them.)
4. Hunting and foraging
In a survival situation, you’ll need to know how to find or catch food to keep yourself alive. There are a number of ways to do this, such as hunting and foraging. You can sharpen a long stick and use that to spear small game or fish. You can also make use of traps to catch small critters or forage for edible plants.
5. Tying knots
When properly learned and executed, knots can be used to secure fishing lines, hunting traps and bandages. Here’s a handy guide on 20 essential knots you should know.
6. Navigating
Mobile navigation applications or Global Positioning System (GPS) devices are convenient. But it’s better to know how to read a paper map or a compass in case your gadgets or electronic devices run out of battery.
7. First aid
In a survival situation, basic first-aid skills can save your life or a companion’s life if you’re in a remote or secluded area. Learn basic first-aid skills like how to close and disinfect a wound and how to brace a limb.
Make sure your first-aid kit includes essentials like bandages of different sizes and rubbing alcohol.
Disasters and emergencies can strike at any time. Therefore, it’s important to learn essential survival skills and practice them regularly so that you are always ready.
Sources include:
Tagged Under: emergency preparedness, firestarting, first aid, foraging, hunting, navigating, off grid, preparedness, prepper, prepping, self-reliance, SHTF, survival, survival skills, survivalist, tips, wilderness survival
Categories
Pineland Rules



Categories
The Small Unit Tactics SMARTBook

Categories