Category: Fieldcraft
Categories
Very Clever!


And pray you don’t hit the rocks at the bottom.
Categories
The Hickok45 Range
Categories
Mysterious knot
Categories
The Grizzly Conundrum
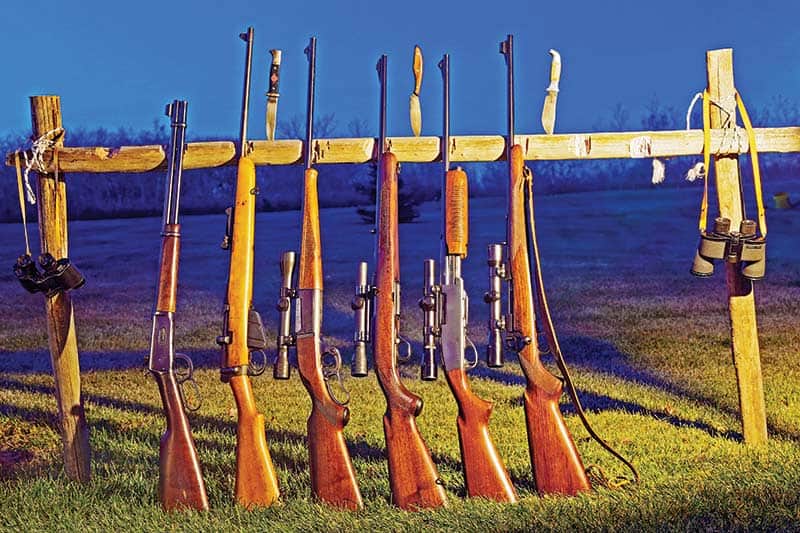
Rifles from the ’50s and ’60s (from left) — Winchester 94 .30-30, Lee Enfield
.303 British, Savage 99 .250 Kollmorgen 4x, Winchester 100 .308 Kollmorgen 2 3/4x,
Remington 760 .257 Roberts Weaver 2 1/2x, Winchester 70 .308 Kahle 4x.
Big game rifles have evolved continuously with the introduction of new models, new cartridges, new manufacturing methods, changing hunting conditions and methods.
I’ve illustrated some of the changes with hypothetical gun racks from deer camps beginning with the 1950s, both heavy cover whitetail hunting and open country mule deer and antelope hunting, as I did plenty of both.
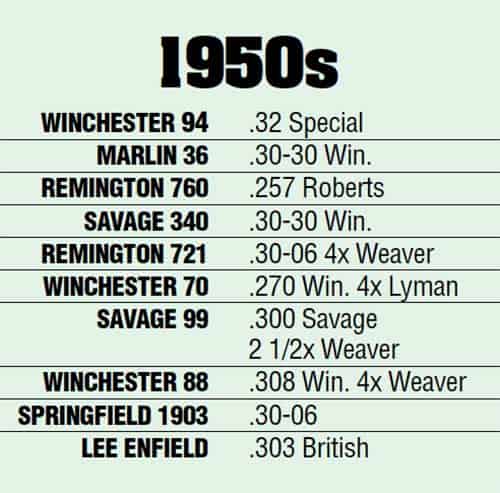
1950s
The post-WWII era was a time of tremendous economic growth in the U.S. with a corresponding increase in hunting and shooting. Converting surplus military rifles for sporting use was a major business. Several cartridges were introduced. The big change in my view was the shift from iron sights to scopes. In 1950 it was unusual to see a hunting rifle with a scope. After the early ’60s it was safe to assume a rifle that could be scoped would be scoped.

1960s
The big change I saw in the 1960s was increased interest in Magnum cartridges in large part due to the brilliant and tireless efforts of Roy Weatherby. Whitetail hunters liked semiautos and pump actions and began finding scopes useful even on running game in wooded terrain.
The Remington 700 7mm Rem. Mag., usually fitted with a 3-9 Redfield, was the hot set-up of the era. Both rifle and cartridge were in such demand they were often hard to find for sale.
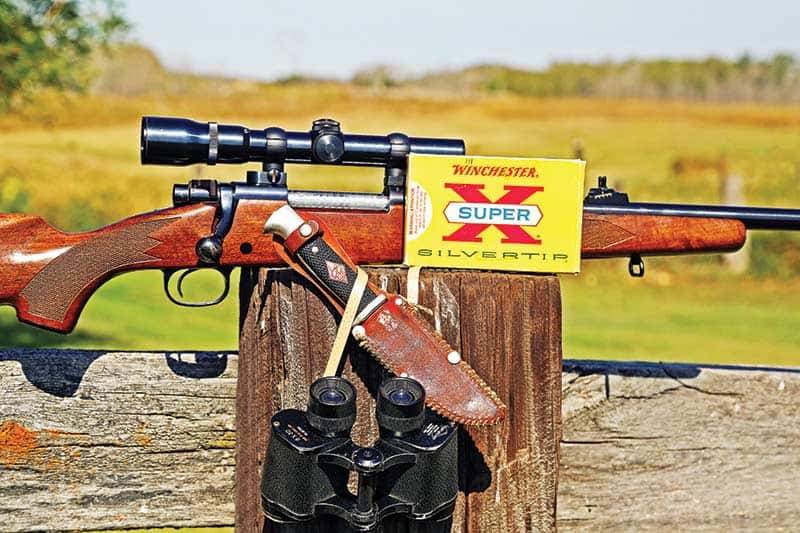
Dave’s first “modern” hunting rifle (above) following a Winchester 94 .30-30
and Lee-Enfield .303 British — an early ’70s era Winchester 70A in .270 Win.,
Weaver 1.5 – 4.5 scope. Remington pump rifles have been taking deer reliably for 70 years.
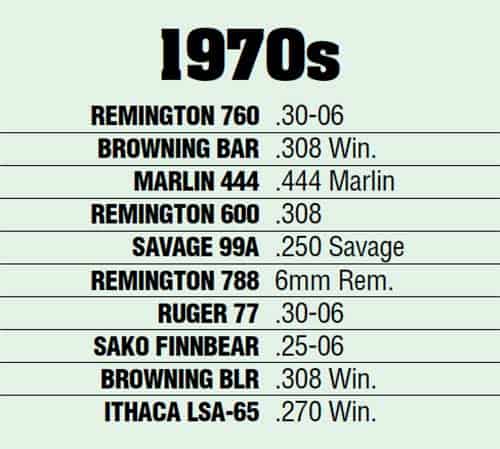
1970s
This decade saw manufacturers trying to respond to the demands of rifle enthusiasts for better quality control, improved fit and finish, cut instead of impressed checkering and in general, a more aesthetic and less utilitarian approach. Computer-assisted manufacturing was taking its first baby steps.
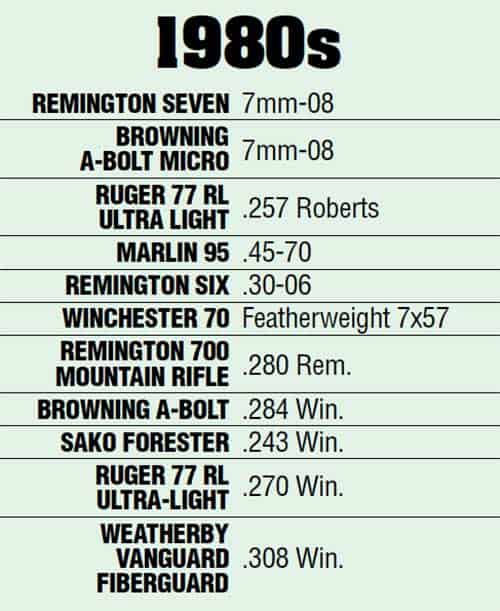
1980s
The rifle trend I remember most from the 1980s was the demand for “mountain rifles” though there were never a lot of mountain hunters. Major manufacturers came out with lightweight/featherweight models — actually not very light by today’s standards — while quality control, fit and finish continued to improve. “Standard” cartridges made a comeback and major manufacturers began offering synthetic stocks.
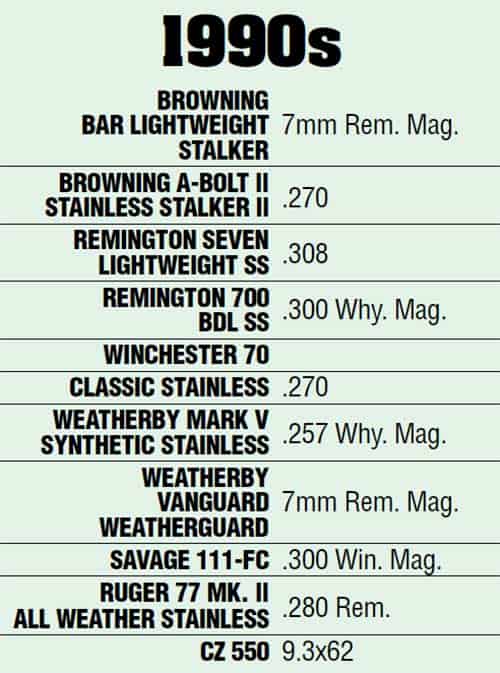
1990s
The biggest change I recall from the 1990s was the rapid acceptance of synthetic stocks and stainless steel components.
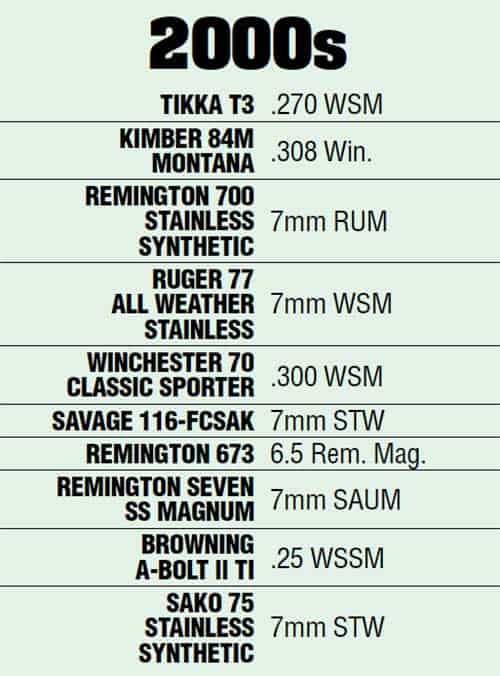
2000s
Laser rangefinders were being used by the military in the 1960s. In the 1990s small personal-use laser rangefinders were being used by golfers and rifle shooters and rapidly got more accurate, more user-friendly and more affordable. New cartridges appeared so quickly it seems some got dropped almost before the shooting world knew of them.

Left is a ’50s era model in .257 Roberts. At right, essentially the same
rifle but a .243 with synthetic stock from around 2015.
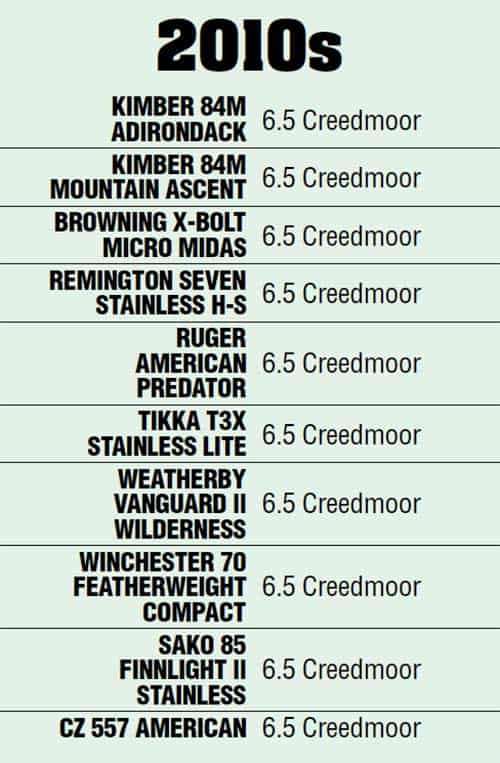
2010s
Through the 2000s rifles became more accurate and more consistently accurate. Much of the improvement came from greater manufacturing precision in rifle barrels and triggers. A major and often overlooked improvement resulted from the application of computer design to bullets. The ballistic efficiency of modern bullets is astonishing.
Categories
How to make a ‘Dakota Fire Hole’
