MARTINSBURG, WV –-(Ammoland.com)- AmmoLand News learned through a leaked Bureau of Alcohol, Tobacco, Firearms and Explosives (ATF) conference call that the agency is starting to run gun buyers retroactively through the FBI’s National Instant Criminal Background Check System (NICS).
In the conference call, the ATF leadership asked its Industry Operations Inspectors (IOI) to collect information on the customers that used concealed carry permits instead of obtaining a background check through the NICS. The purpose of obtaining this information would be to run the customer’s data through the NICS to see if the customer would have received an approved or denied status. In addition, the IOI will pass on the names and information of customers denied by the NICS to the criminal branch for a special agent to follow up.
Some states, such as Alaska, allow gun buyers to use their concealed carry permits to buy a gun instead of being subjected to a background check through NICS. Gun buyers in these states believe that using a concealed carry permit to purchase firearms gives them a level of anonymity that the NICS doesn’t provide.
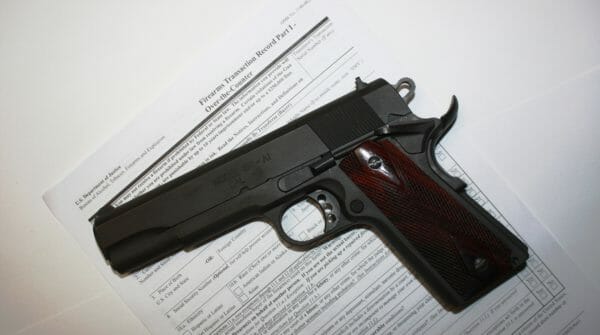
The information from the firearms background check paperwork (ATF Form 4473) is not submitted to the FBI when the customer uses their permit. Before the new policy, the only time the government would know a person bought a gun is when the FFL goes out of business, a trace request is submitted, or the customer buys multiple handguns within a seven-day period.
Congress wrote an exemption to the mandated background check using the NICS into the Brady Handgun Violence Prevention Act in 1998. However, the ATF has not been a fan of states letting their citizens use their concealed carry permits to buy guns without going through the NICS. In fact, the ATF has told states like Michigan that they can no longer use the concealed carry permit exemption.
According to the Brady Act, states can let gun buyers use concealed carry permits instead of going through the NICS if the permit meets or exceeds the NICS requirements, and the issuing agency performs a background check on the permit applicant using the NICS. However, even though states like Michigan meet all the conditions laid out in the Brady Act for a NICS exemption, The ATF had an issue with how some issuing agencies implemented the law.
Some sheriffs used the National Crime Information Center (NCIC) to perform background checks instead of the NICS. The NCIC database is where the NICS database pulls most of its information. They claimed since that the sheriffs were not following the proper procedure, that the FFLs of the state could not use the concealed carry permit to buy a gun.
Gun Owners of America (GOA) sued the ATF over their decision to revoke the NICS exemption for Michigan and other states. GOA claimed that the ATF did not have the right to reinterpret the Brady Act law. The ATF stopped revoking exemption status for states once the lawsuits started to be filed in multiple states by the gun rights organization.
It seems like the ATF has found another way to run customers through the NICS. Unfortunately, the ATF would not provide AmmoLand News a comment.
About John Crump
John is a NRA instructor and a constitutional activist. John has written about firearms, interviewed people of all walks of life, and on the Constitution. John lives in Northern Virginia with his wife and sons and can be followed on Twitter at @crumpyss, or at www.crumpy.com.

There was a great deal happening in the world of handgunning in the ’70s and ’80s. Many new models became available, as the proverbial envelope was pushed in all directions—bigger, smaller, longer, et cetera. It stands out in my recollections as a time when the concept of the semi-automatic pistol was more aggressively explored than ever before.
Since it was also a time when Americans were lusting for ever more powerful handguns, we saw several interesting and powerful semi-autos. In this short piece, we’ll look at one of my personal favorites, but we need to briefly look at what has to happen when you make a semi-auto pistol more powerful.
Since there were already a number of powerful revolvers from S&W, Ruger, Colt and others, we already had a standard for handgun cartridge power. Since the mid-1950s, the most commonly used big handgun cartridge was the .44 Magnum. There is plenty of power in this aging slugger, so much so that if a big semi-auto was chambered for it, it might have got a lot more attention than it did. The grand old .44 is a cartridge that is configured with a rim that headspaces against the back of the cylinder of a big revolver. Making that cartridge feed through a typical magazine and up a feed ramp is very difficult. The answer is a new rimless cartridge.

There were four different magnum-power semi-automatic pistols. They were the AutoMag, Wildey, Desert Eagle and Grizzly. Another model, called the Coonan, was a fine gun, but never went over the .357 Magnum level of power. Both the AutoMag and Wildey used special rimless cartridges. For the Automag, it was the .44 Automag—usually wildcatted from .308 Winchester brass.
Wildey promoters were able to persuade Winchester to build special 9mm Winchester Magnum and .45 Winchester Magnum ammo. Wildey pistols never managed to get made in commercially profitable quantities. Clever engineering permitted the Desert Eagle to use regular Magnum ammo: .357, .41 and .44 Magnum. That may have had something to do with the fact that they are the only survivor in the quartet. Still made, the guns are both reliable and accurate.
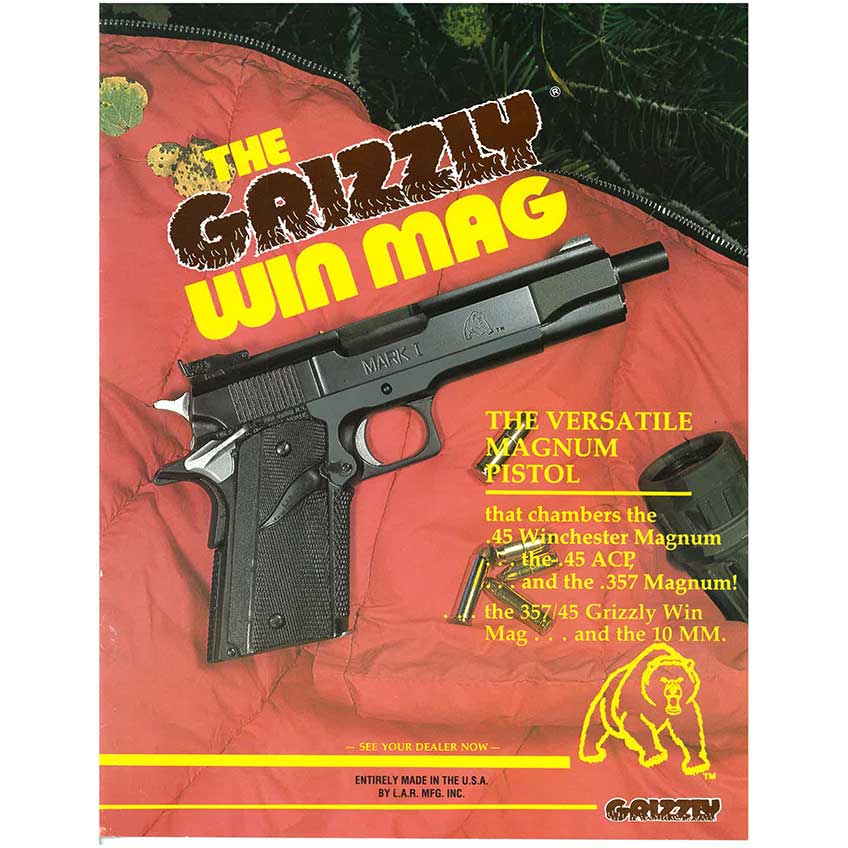
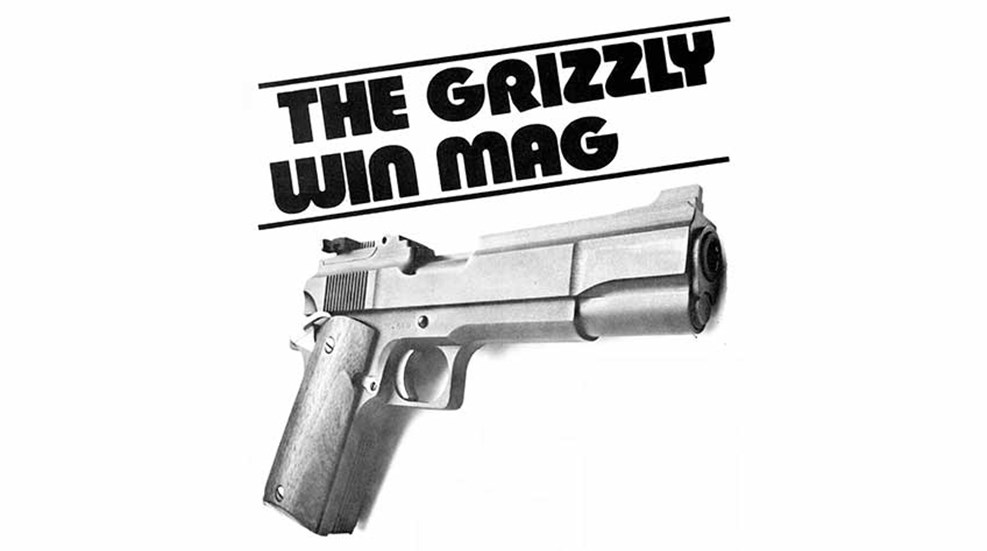
This leaves the Grizzly, which caught my fancy for several different reasons. I had several review samples of this interesting gun and shot them extensively. They proved to be nearly trouble-free guns that did what they were supposed to do with rare malfunctions. Grizzlies were chambered for several long cartridges, but the main round associated with the gun was the .45 Winchester Magnum. About the same length as the .44 Magnum (or .45 Long Colt), this round was essentially a lengthened and strengthened .45 ACP. Extra case capacity meant more propellant and velocity. Winchester was delighted to see the gun enter the market, because they had produced quantities of .45 Win. Mag. ammo for use in the Wildey, which promptly tanked.
There were some 15,000 Grizzlies made and the majority were .45s. Several sources have identified the Grizzly as a “scaled-up” 1911. The plan was influenced a great deal by the grand old gun, but the Grizzly is best described as a lengthened 1911. With a cartridge as long as a .44 Magnum, you have to have a 1911-looking magazine that is longer by a good bit. The designers at LAR came up with a seven-rounder that filled the bill. Naturally, the magazine was longer than a 1911 in the fore-and-aft vector. It went into a suitably extended magazine well of the longer receiver.
The Grizzly got a longer slide and 5.4″ barrel. Many versions of the gun had barrels that extended beyond the front of the slide. The most common was probably the 6.5″ version. While every part on the Grizzly performed the same function as its counterpart in a 1911, almost all of them are longer and very few are interchangeable. The major point is that the shooter who has gone armed with the 1911 gun will have no problem managing the Grizzly. Same properly-located thumb safety, crisp four-pound trigger, drop-free magazine—all just like what he’s used to. The Grizzly came with a nice rear sight adjustable for windage and elevation.

The lengthening process did nothing for the pistol’s ergonomics. This was a big handgun, and a lot of shooters just could not master the sheer mass of the arm. Also, shooting heavy bullets at high velocity spells recoil. The Grizzly kicks—hard. But there is nothing you can do about it. You just plain have to get past the blow that comes with every shot. It is, by the way, slightly less than any of the other magnum semi-autos.
In the course of those long ago stories, I fired the Grizzly in .45 Win. Mag. more than any other caliber. It was very accurate, particularly with special ammo from Pro Load Ammunition. Later in the production life of the Grizzly, they were able to perfect a (rimmed) .44 Magnum, and I worked with one of them. The Grizzly in that caliber was just as accurate as all but a small percentage of revolvers. I also did some work with a wildcat called the .357/.45 Win. Mag. It was a .45 Winchester Magnum case, necked down to take .357-cal. bullets. It was an excellent performer, particularly in the accuracy sense.
For a couple of years, there was a great deal of interest in the big .45. I had nothing but pleasant recollections of range sessions that went smoothly. That’s more than I can say about the other magnum semi-autos, although the Desert Eagle seems to do just fine. I speculate that some of the Grizzly’s good performance stems from the gun’s operating system—just like the 1911.
Categories
I miss this Old Man!

Golden State Arms Corporation
Pasadena, California
|
|
|


Introduction
Golden State Arms, also known as Pasadena Firearms, was a major military surplus importer, wholesaler, and retailer, located in the Pasadena area 1952-1966. Major to the point they did short term jobs with almost every rifle stock maker, refinisher, gun machine shop, etc in the Western United States, and often nationwide, during their existence. They were the source of work and income for many different companies, most of whom were not owned and operated by the people who owned Golden State Arms.
A fair amount of incorrect information regarding Golden State Arms and the people and companies affiliated with them in various ways, has been circulated for many years and has found it’s way onto many locations on the internet. What led me to research Golden State Arms were M1 carbines. What I learned as a result of the research goes far beyond M1 carbines. This research provided me with a window of opportunity to meet and interview a number of the people affiliated with Golden State Arms, companies they did business with, and companies that were founded by individuals who got their start at Golden State Arms. The high level of interest by owners of small arms manufactured, distributed, and/or sold by Golden State Arms, led to my decision to include their history on this website.
What follows is a historical account based on interviews, newspaper archives, and a variety of different documents from the time period the company existed. History is what history was, and Golden State Arms was a big part of it, in many different ways.
M1 Carbines by Golden State Arms or Santa Fe… not
Larry Ruth, author of War Baby Comes Home, received information from an employee at National Ordnance of South El Monte, CA, that the Santa Fe Division of Golden State Firearms contracted with National Ordnance to manufacture an unknown quantity of M1 carbines with the Santa Fe name.
Alvin Gettler, the founder and owner of Golden State Arms (1952-1960), Leo Grizzaffi, part of management (1958-1966), and Bob Penney, founder and owner of National Ordnance (1958-1962), all indicated the information provided to Larry Ruth was incorrect. Golden State Arms sold National Ordnance carbines in their retail store after 1960, but did not manufacture, or contract for the manufacture, of any M1 carbines with the name of Santa Fe or Golden State Arms. Larry Ruth has been made aware of this information.
Gettler indicated the only M1 carbines he imported were two cases of surplus U.S. GI M1 carbines from Denmark. His information was they had been used on one or more islands Denmark lays claim too in the arctic area. These were sold as GI surplus with no non-GI markings.
Background
The amount of military surplus that became available after the end of WWII was immense. Weapons captured or seized from the Axis powers were sold by various countries to the commercial market almost immediately after the war ended. For a number of years after the war, the vast amount of weapons used by the Allied powers were being refurbished, placed in storage, and provided or sold to dozens of countries throughout the world as military aid. In the years after the end of the Korean War, U.S. military surplus became available from many of the countries who had purchased it, and through auctions conducted by the U.S. Army Office of Ordnance and various branches of the U.S. military.
The cost of the surplus, in comparison to the money it could be sold for retail, made the surplus small arms business extremely lucrative. The potential attracted more than a few individuals and companies from around the world. During the 1950’s, a few of these companies emerged as surplus giants.
Golden State Arms: 1952-1960
The Beginning
In the San Gabriel Valley Tribune, December 7, 2001 there appeared an article entitled “Memories still vivid 60 years later – Area Pearl Harbor survivors recall events of Dec. 7, 1941”, by Rodney Tanaka. Half way through the article, was an interview with Al Gettler.
“Monterey Park resident Alvin Gettler, 88, worked as a civilian rigger for the Navy at Pearl Harbor in 1941. He spent Dec. 7 helping the wounded and fighting fires. Gettler heard about the attack while home in Waikiki. He and a co-worker reached the harbor during the second wave of bombings at about 8:50 a.m. “I did anything I was told to do,” he said. “I didn’t leave until 9 p.m.” Gettler left his Navy job in 1943 and served in the Merchant Marines until 1951. He does feel excluded from Pearl Harbor survivors’ events because he was a civilian instead of a serviceman, he said. He and many other civilians went to Pearl Harbor to help when they weren’t required to.”
Gettler served in the Merchant Marine during and after WWII.
In 1952 Alvin Gettler acquired Roland H. Vazquez & Company, a gun store located at 972 E Colorado Blvd, Pasadena, CA. Vasquez and Gettler had previously partnered up to import a shipment of surplus small arms. A dispute and court case resulted in Gettler taking possession of Vazquez’s gun store. Working at the store at the time of the takeover was Robert E. Penney Jr. Gettler wanted to rename the gun store and asked Penney for suggestions. Thus was born Pasadena Firearms.
Gettler’s first import after acquiring Roland H. Vazquez Co. and naming it Pasadena Firearms, was a joint financial venture in 1952 with Bob Penney for 1500 Mexican Mausers from Mexico. In late 1954 Penney left the gun business and a short time later began a career with the Jet Propulsion Laboratories in Pasadena, CA. The career change did not change his interest in small arms, he remained active with Gettler and others part time while at JPL. In 1958 Penney left JPL and founded National Ordnance in Arcadia, CA. In 1962 he separated from National Ordnance and began manufacturing M1 carbines under the Alpine name. For further on Penney, National Ordnance, and Alpine, refer to the web pages on National Ordnance and Alpine.
The First Move
In February 1952 Gettler moved Pasadena Firearms to a larger building located at 1165 E Colorado St., Pasadena, CA. sometime during 1952-1953, Seymour Ziebert left Western Arms Corp. and joined Al Gettler at Pasadena Firearms.
The local Pasadena newspaper, The Independent, on December 6, 1955 ran a small article introducing Alvin Gettler and Golden State Arms at 1165 E Colorado St., Pasadena. The article gave an overview of the store and indicated Gettler had been in the gun sales business for 7 years. In 1955 the retail store took on the name of Golden State Arms, the import end of the business used the name Pasadena Firearms.
The Second Move, and the Big One…
By 1956 the surplus small arms business was booming. The retail store at 1165 E. Colorado Blvd. in Pasadena was becoming too small for the retail operation. The import and wholesale operations were requiring the rental of warehouses. In March 1957 Golden State Arms and Pasadena Firearms relocated to an old Pasadena mansion located at 386 Green St., Pasadena, CA [American Rifleman magazine, February and March 1957]. The mansion built in 1915 and renovated in 1948 with 24,302 square feet. Golden State Arms included the building east of the mansion, which was built in 1905 and renovated in 1933, having 17,329 square feet. Total square footage for Golden State Arms was 41,631 square feet.


Golden State Firearms
386 Green St., Pasadena, CA

Golden State Arms was the buildings on the right, with the mansion at the top.
Green Street is to the right of the buildings.

A Temporary Merger leaves a 3rd Owner
In the July issue of The American Rifleman, the advertisement for Golden State Arms announced Martin B. Retting had merged with Golden State Arms at 386 Green St. in Pasadena. Retting had operated a retail gun store and small surplus business in West Hurley, NY. Retting sold the facility to George Numrich. Over time Numrich and the company’s subsequent CEO, Gregory Jenks, expanded the business into what is known today as Numrich Gun Parts of West Hurley, NY (E Gun Parts, Gun Parts Inc., Numrich Arms).
Retting had relocated to Southern California where he incorporated his name in January 1956. Along with Retting came one of his partners, Burton “Bob” Brenner. Retting, Brenner, and Seymour Ziebert joined Al Gettler as partners at Golden State Arms and Pasadena Firearms. During the same time period Leo Grizzaffi joined Golden State Arms and Pasadena Firearms as Assistant Director of Sales, with Walter “Andy” Anderson as Vice-President and General Sales Manager.


 |
In 1958 Petersen Publishing of Los Angeles, CA published the first, and only edition, of “World’s Guns and Other Weapons” by Golden State Arms (288 pages). The Editor in Chief was Philip McFarland, Executive Editor Burton Brenner, Associate Editors Jack Karnes, James Thompson, Alan Feldstein, and Keith Campbell. “Gun Digest” and “Stoeger’s Shooter’s Bible” were annual publications in print at the time that focused primarily on current small arms and accessories. “World’s Guns and Other Weapons” focused exclusively on surplus small arms and used weapons of all types, from the first firearms up through post Korean War weapons.
Golden State Arms Peaks
On Sunday August 16, 1959 the Independent Star News (Pasadena, California) ran a large article entitled “Local Firm Searches World for Guns, Unique Quests Help Company Grow into World’s Largest” about Pasadena Firearms, their owners, and affiliated companies, claiming they were the world’s largest importers of surplus small arms. Their biggest competitor, Sam Cummings at Interarmco in Virginia, probably would have disputed this claim, had he been asked. These two companies were certainly the two biggest in the United States at the time. Both were buying surplus worldwide.
The article identifies the owners and primary employees as:
- Alvin D. Gettler, President
- Seymour Ziebert, Executive vice-president; travels throughout the world coordinating and overseeing purchases and sales
- Burton Brenner; youngest of the 3 owners, authority on antique weapons, just returned from a buying trip abroad
- Walter E. Anderson; vice president & general manager, quoted “I have no personal interest in guns. To me, their just merchandise. I’m a businessman”
- Sr. Daniel Mendia; learned about guns in the Spanish Civil War, recently became an American, worked briefly in South America for Pasadena Firearms
The article says Pasadena Firearms is the importer and has the following distribution corporations:
- Golden State Arms; Markets surplus arms and ammunition to the sporting public
- Pasadena Gunshop; Largest retail gun shop in the world
- The Derringer Corp.; Double barrel Derringers from Europe
- The Swordsman; Swords, daggers, & knives
The article indicates Pasadena Firearms employed 60 people, with weapons stored in warehouses throughout the area.
The article didn’t mention it, but the sidewalk leading up to the entrance at Golden State Arms 386 Green St. in Pasadena had various surplus rifles and swords embedded flush in the concrete, covered and encased in clear epoxy.
The article also mentions the growing popularity of western action revolvers, fast draw competition, and western revolver twirling competition. Illustrating this, is a photograph of Douglas A. Cox practicing his quick draw at Golden State Arms. This article doesn’t indicate if Cox was an employee (he was) or a wandering hipshot, but a prior article in the same newspaper in January 1959 clarifies this point, and indicates this was not first time Cox twirled guns at Golden State Arms …
 Independant Star News August 16, 1959 |
 Independant Star News January 4, 1959 |
Golden State Arms: 1960-1966
Ownership Changes
In 1960 Al Gettler separated from Golden State Arms and Pasadena Firearms completely, leaving Seymour Ziebert and Bob Brenner as the owners. Gettler opened a separate retail gun store, The Gun Room, located at 1150 E Garvey, West Covina, CA [Star-News of Pasadena, California; 06 May 1965]. In 1979, at the age of 66, he went back to sea for four years. When the Gulf War broke out in 1992, he went back to sea at the age of 79, as First Officer on a merchant ship hauling supplies, ammo, and troops to and from the Middle East. From 1992 until approximately 2004, Gettler volunteered as the navigating officer (2nd officer) for the S.S. Lane Victory, a National Landmark in Los Angeles harbor. In 2008 he is 95 years old and finally retired. Maybe.
The Santa Fe Division
The Santa Fe Division of Golden State Arms was started by Ziebert and Brenner after the departure of Al Gettler. The earliest record or advertisement found so far was in The American Rifleman issue of May 1960. The ad was for unprimed brass for hard to find calibers.
The September 1960 issue of The American Rifleman, carried a large Santa Fe Division advertisement using two full pages. It listed retail dealers in all fifty states and the District of Columbia, over one hundred total. The address was the address of Golden State Arms at 386 W. Green St. in Pasadena, CA. According to several prior employees, this was the only address used for the Santa Fe Division (contrary to information confusing this company with the City of Santa Fe Springs, CA).

The American Rifleman September 1960
The “Santa Fe Division” was just a marketing tool for selling reconditioned military surplus, some of which had been “sporterized” due to the lack of genuine original stocks, others were surplus parts built onto a cast receivers having the Santa Fe name, etc. The Santa Fe Division was Golden State Arms.

Sporterized British .303 Enfield

Sporterized Swiss Schmidt-Rubin K31, rechambered to .308

British .303 Enfield “Jungle” Carbine (see text below)
Support Operations
To those who worked with him, Jack Karnes was known as an “old school” machinist. Whatever tools he needed that he didn’t have, or broke, he made from scratch. For a variety of reasons, Ziebert and Brenner decided to open a warehouse in Puerto Rico to handle some their surplus machine work, assembly, and overseas shipments. Karnes was sent to Puerto Rico to run the operation. While there he met and married his second wife, Ilia. In the early 1960’s Bob Penney of National Ordnance and John Arnold of Alpine visited Karnes to see the operation. Arnold was trying to talk Penney into relocating the National Ordnance operation to Puerto Rico. Unsuccessfully.
At about the same time the Santa Fe Division was started, Pasadena Firearms became a machine shop for Golden State Arms ala Santa Fe, located at 304 S. Fair Oaks in Pasadena, approximately three miles from the Green St. location. They handled all of the machine work, refinishing, and stock repair. Sometimes the volume exceeded the abilities of this facility and work was contracted out to other companies. This location was managed by Frank Day.
The Shotgun News issue dated October 15, 1964 included an advertisement by Golden State Arms regarding the Santa Fe M59. The ad states that Armi Beretta of Brescia, Italy had granted an exclusive license to Golden State Arms to manufacture the Beretta BM-59 rifle for the U.S.A. in .308 caliber. The ad states that Golden State Arms was now producing the Santa Fe M59 in Pasadena, CA.
The Business Ends
On October 30, 1966 the Long Beach Press Telegram, page C4, ran an advertisement for Rosen Public Auctions for a mortgage sale of Golden State Arms and Pasadena Gun Shop at 386 W. Green St. in Pasadena on November 1 & 2, 1966, and a second auction to be held November 3, 1966 at Pasadena Firearms at 804 S. Fair Oaks in Pasadena. The auction at Green Street included $250,000 in weapons inventory, office furniture, and everything related to the business. The auction at Fair Oaks included the machinery and equipment used by a gun manufacturer.
The reason(s) Golden State Arms foreclosed included a high level of competition that impacted their sales and long term mismanagement by Ziebert.
After the closure of Golden State Arms, Burton Brenner started Federal Ordnance and shortly thereafter partnered with John Arnold at National Ordnance in So. El Monte. Karnes returned from Puerto Rico, and with his wife Ilia and their children, founded A.R. Sales in So. El Monte, CA, manufacturing lightweight 1911 receivers. The business was eventually sold to Bob Brenner, and Karnes went to work for Brenner at Federal Ordnance. For further on Brenner and Karnes, refer to the pages on National Ordnance and Federal Ordnance.
Leo Grizzaffi attended law school and became a criminal and civil attorney, practicing law in Los Angeles County.
Seymour Ziebert moved to Spain, before the auction. On August 31, 1975 Ziebert was killed near Toledo, Spain. Officially, Ziebert died from gunshot wounds sustained during a hunting accident. Information shared with this author by one of Ziebert’s immediate family members supported the official conclusion that his death was an accident. A number of people who were close to Ziebert and/or worked with him at Golden State Arms do not believe the official records. Over the years Ziebert did business with a number of countries whose leaders were less than pleased with the outcome of the transactions. One of these countries and leaders may have possibly been Spain and Franco. A few of these countries, Ziebert sold large numbers of small arms to their enemies. One of the countries who was someone’s enemy was Egypt. The weapons were delivered just prior to the start of a war with a northern neighbor, whose heritage was not unfamiliar to Ziebert.
Golden State Arms Distributors, Inc. (GSAD)
Golden State Arms Distributors, Inc. (GSAD) was incorporated in California in July 1984. This business was another surplus arms importer, with a retail store located at 1097 Aviation Blvd. in Hermosa Beach, CA (N/W corner of Prospect at Aviation). They utilized a warehouse at 630 Mary Ann Drive in Redondo Beach, CA. The importer marking on a number of their surplus imports indicated GSAD MANH. BEA., CA, presumably for Manhattan Beach, CA.
This company and it’s owner were not affiliated with Golden State Arms of Pasadena, CA or any of their affiliated company names.