For most people, war in Vietnam means just one thing: the doomed US campaign of the 1960s and 70s. As Stuart Hadaway explains, there was a much earlier conflict involving the British and arising out of the post-war chaos in the region. Bizarrely, it also involved surrendered Japanese forces and aircraft in support of British operations.
In August 1945, the sudden outbreak of peace caught South East Asia Command completely by surprise. Plans were being laid for operations stretching far into 1946, including Operation Zipper, the amphibious invasion of Malaya. Extensive preparations had been made, including training and equipping RAF units and personnel for detached, expeditionary operations under field conditions, with adequate supplies and vehicles. This would prove invaluable as an urgent need suddenly arose to send smaller forces to targets all across the region to seize key points, free prisoners of war and take the official surrender of Japanese forces still in the field.
For French Indochina, this led to Operation Masterdom. The Japanese had moved in Indochina in 1941 to secure their route to the oil and rubber reserves of Malaya, effectively taking over control from the Vichy French. Throughout the war the country had been something of a sideshow. It fell between the Chinese Theatre of Operations and South East Asia Command, who clashed several times over who should take control of the area. Neither particularly wanted it for immediate strategic reasons, but rather for political reasons relating to post-war spheres of influence. In the end, at the Potsdam Conference, the country was split along the 16th Parallel, the north going to China and the south to SEAC.
Inside the country chaos reigned. A tenuous French government maintained power, while a dizzying array of internal splinter groups agitated for independence in various political flavours. In March 1945 the Japanese officially toppled the French government and the country was declared to be the independent country of Vietnam.
The Allies, particularly the Americans, had supported various groups regardless of ideology, looking for likely leaders of post-war regimes that they could control. (Famously, the Americans even convinced the Chinese to let Ho Chi Minh out of prison so he could return to Indochina.) As the war neared an end, the activities of the Americans became increasingly focused on not just removing the Japanese and their puppet government, but also the French. Their staunch anti-Imperialist stance meant they wanted all of the European Powers to give up their possessions in the Far East, but they faced a tough resistance to this idea from the British. The French, however, were in less of a position to protest. Soon, US-backed Indo-Chinese groups were attacking not only the Japanese, but also the French attempting to regain control.
On the other hand, the British were equally determined to let the French keep the country, and a task force was sent to reinstall the French government in mid-September 1945. The 20th Indian Division was despatched under Major General Douglas Gracey, who was to have both military and political control in the country (although he reported militarily to Field Marshal Slim in Burma and politically to Lord Mountbatten at SEAC, who provided sometimes contradictory instructions). To support these separate missions, two RAF formations were also detailed for Indochina. An RAF Element under Air Cdre Walter Cheshire was added to the Control Commission, again reporting to Mountbatten, while No. 908 Wing under Gp Capt F. C. Sturgiss was formed to support the Army, and was controlled via AHQ Burma by Sir Keith Park as Allied Air Commander at SEAC.
The lines between these two formations was blurred from the start, and became more so when No. 908 Wing was disbanded and Air Head Quarters French Indochina, under Cheshire, was formed at RAF Saigon, the airfield at Tan Son Nhut just outside the city. The two RAF headquarters were co-located, and nobody seemed entirely clear to which organisation they nominally belonged. Instead, the whole HQ staff simply pitched in and did the work that needed doing, without worrying too much about the administrative distinctions.
Diverse Groups
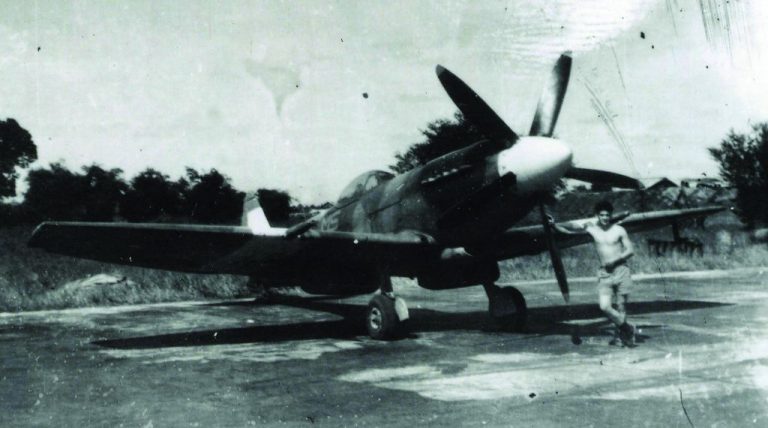
If the members of the higher command structure were confused, this was even truer for those lower down the chain. The Spitfire Mk. VIIIs of 273 Sqn began to arrive at Tan Son Nhut on 19 September 1945, eight days after the army had begun landing, and found themselves occupying an airfield full of Japanese aircraft still guarded and operated by the Japanese! Even a month later the Operations Record Book (ORB) would record: ‘The situation in Saigon is bewildering, though, when we have our former enemies now our allies against a foe of which nearly all the squadron never knew the existence.’
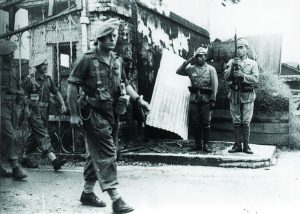
This view permeated all ranks, with the subtle shades of political allegiances and agendas being lost on most of the incoming British. After the British and French mounted a coup to overthrown the new Vietnamese government and re-establish colonial rule, violence broke out around the capital and across the country. The diverse groups taking up arms against the French, and now the British, were a bewildering array – one intelligence report, slightly hysterical in tone, even talks about ‘Buddhist guerrillas’ – and for the most part the whole lot were lumped together as ‘Annamites’, after one of the country’s regions.
Although the war was over, victory did not mean a reduction of commitments for the British. Victory brought new challenges which ran well into the 1960s. For the first time in Britain peacetime conscription was maintained, but National Service could not alleviate the manpower shortage, nor was it cheap. Garrisons in Europe and the Middle East drained resources, as would financial difficulties – efforts in the Malayan Emergency only sustainable because profits from the colony funded military action. However, in 1945, there were urgencies Britain had to tackle in the Far East. Japanese forces had to be surrendered and repatriated, and newly-liberated colonies had to be administered until European governments returned.
Operation Masterdom was one case. Eager to go in, the British only arrived after the official surrender of Japan because of restrictions imposed by General Douglas MacArthur. This meant those imprisoned in camps were denied access to aid, but local revolutionary groups filled the power vacuum. When British and Indian troops entered Indochina to free prisoners and secure the country, they faced a new war. In one of history’s oddities, they utilised rearmed Japanese soldiers in a successful campaign after imposing hard won victory upon them.
Setting a precedent for the next half century, a professional and experienced British force led by men well-versed in internal security matters completed their objectives and signed responsibility over to French authorities before withdrawing.
The Spitfire pilots also found themselves in unfamiliar operational as well as geographic and political territory as strict rules of engagement were imposed by high authority. Only in certain areas, and under specific conditions, could they open fire on ground targets, and even then only after leaflets had been dropped. In effect, these rules meant that no action was possible at all – even on the rare occasions all of the conditions were met, the pass to drop leaflets was enough to cause the enemy to melt away.
For pilots fresh from the crucible of the Burma campaign, this was a deeply frustrating situation, especially as British and (more so) French units on the ground were coming under regular attack and they were impotent to help. When the first offensive strike operation was authorised on 16 October, the ORB records that there was ‘great excitement’, and that: ‘The team was selected by drawing out of a hat and then they were briefed. Then there was a great disappointment, the show was cancelled.’

Successful Attacks
Finally, on 11 December, it was recorded that: ‘At last the great day has arrived and permission has been given to strafe the Ammanites and give close support to French troops who are threatened by 1,000 Ammanites in the area MZ8086 northeast of Ban Me Thuot.’ Three Spitfire Mk. XIVs (which had begun arriving in late November) made successful attacks. To add to the momentousness of the day, that afternoon another highlight of the deployment occurred: the official surrender of the Japanese garrison: ‘At 16:00 hours a very impressive ‘Sword Surrendering’ ceremony took place outside Station Headquarters, when seventy-three Japanese Air Force Officers surrendered their swords to a similar number of Royal Air Force officers being of the same rank or status. Sqn Ldr W. J. Hibbert, Flt Lts W. E. Steele, S. S. Shisho, Fg Offs R. K. Parry, W. Hayes, B. Hirst, J. B. Wingate, Plt Offs H. Keen, and E. Gaukroger were the officers of the squadron who received swords from their equivalent Japanese officers – and weren’t they delighted!’
No doubt the event was particularly satisfying for Flt Lt Shisho, a Burmese officer who had not seen his family since the Japanese invasion.
While the Spitfires continued to fly regular reconnaissance sweeps and make ‘shows of force’ in support of land operations, the French had no such restrictions on their actions. Or rather, their only restrictions were with their equipment. There were not many French aircraft in the country; a few Moraine 500s (license built Fiesler Storchs), some Catalina flying boats, and a handful of salvaged Japanese fighters.

This issue was passed all the way up to Mountbatten and Park, the latter of whom was emphatic that the RAF could not loan aircraft to foreign powers. A wave of political issues entered the equation, from the Air Ministry wanting to help the French so as to ease negotiations to keep using Tan Son Nhut as a transport base, the disapproval of the anti-French Americans. SEAC itself was not keen as the Americans were demanding their Lend-Lease aircraft back, leaving the Command short of aircraft across the theatre. In the end, some cast-off Spitfire VIIIs were reluctantly passed to the French in mid-November, on the strict understanding they had the personnel and equipment to operate and maintain them. As it turned out, they French did not. As a consequence, they would be plagued by high accident and unserviceability rates. In fact, the attack by 273 Sqn on 11 December had only been staged because the French had no serviceable Spitfires themselves.
Gremlin Task Force
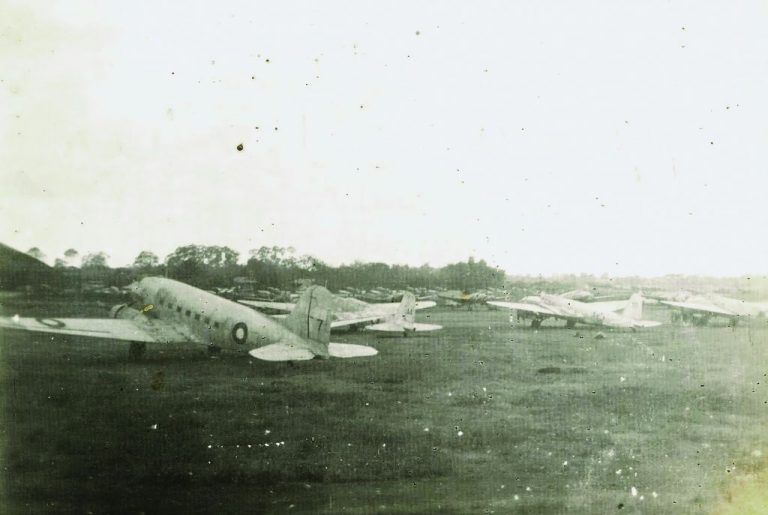
While the Spitfires conducted patrols and occasional close air support, and a detachment of Mosquitos of No. 684 Sqn conducted a photographic survey of the country to aid map-making, an entirely different RAF force was also in the air over Indochina: Gremlin Task Force.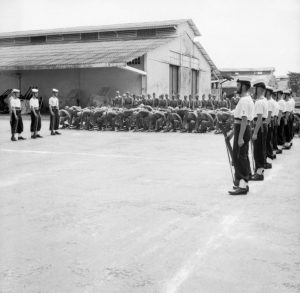
Saigon was ideally placed to form an important hub in the various air routes that criss-crossed South East Asia. However, transport aircraft, or even bombers that could be used as transports, were in short supply, with fuel for them even rarer. Or, at least, British and American aircraft and fuel was. What the RAF had access to at Tan Son Nhut, though, were plentiful Japanese aircraft, along with stores, aircrew and maintenance staff along with large stocks of fuel that could not be used on Allied aircraft. Japanese soldiers were already being used to supplement the British and Indian Army (and RAF Regiment) on the ground in defending key points, including the airfield, which was attacked by guerrillas several times.
the British.
Doubtless these same problems caused alarm and despondency among the controllers at their destinations, especially if they had not been warned in advance that ‘mute’ Japanese aircraft were about to descend on them. For the most part the system ran smoothly, and British and Japanese ground crew worked well together. To begin with they were not supposed to mix, but inevitably, and as working relations improved, so any tension between the erstwhile enemies cooled. LAC Stan Collinson recalled: ‘The one thing that really annoyed us was that there was an edict from above that there was to be no fraternising in any conceivable way. Of course, it’s like all these rules, they’re all open to interpretation, and it becomes a necessity if you are working on these jobs, you have to talk with them… The people who were actually there [in Saigon] were what you might call the draftees, not the gung-ho types we’d had out in Burma or anything like that – they were a load of nutters, them.’
Heightened Circumstance
On the other hand, there was distinct friction between the British and the French authorities, even if among the civilian population relations were good. After months or years living in the jungle, the ORB for 273 Sqn records that ‘morale was high and everybody was delighted to see the well dressed French women in Saigon… [as well as at] the novelty and proximity of a practically European town with plenty of things to buy’.
However, over time the interaction with the local populations decreased as the level of violence increased, and the amenities on the airfield improved to include a cinema and a canteen. For many the only French that they came into contact with, albeit indirectly, were the authorities – military and political – who were doing their best to reimpose colonial control. In these heightened circumstances their actions were, at times, heavy handed.
At RAF Tan Son Nhut, a symbol of this was the saga of the flagpole on the terminal building. When the French Air Force returned to the station, they insisted on taking the Union Flag down from the flagpole and putting up the French Tricolour. The author’s source, who claimed to have had nothing to do with the episode, yet was strangely well-informed, recalled the consensus among the RAF staff was: ‘…that was an obvious insult, wasn’t it?’ So, at night, the Tricolour mysteriously disappeared and the British flag went back up. The French insisted the flags be swapped again, and they were. This time a group of RAF personnel, who had carefully worked out that the flagpole outside the Governor’s Palace in Saigon was the tallest in the country, ‘borrowed’ the pole and placed it next to the existing one on the terminal. Come dawn, there was the British flag alongside but above the tricolour. In fairness to the French, no effort was made to remove the new pole even though they were clearly less than impressed. The local RAF opinion was that, as a consequence, the French suffered something of a ‘sense of humour failure’.
Tight Rules of Engagement
At the end of 1945, RAF operations began to wind down. Their surveys finished, 684 Sqn withdrew their Mosquito detachment in January, 1946, moving it to Bangkok. Gremlin Task Force supported this move as one of their last tasks, standing down soon afterwards after having clocked up over 2,000 sorties.
Partly this was a logical progression as the French strength in Indo China grew, but it was also due to an increasing shortage of spares for the Japanese aircraft. On the other hand, 273 Sqn were notified they would be disbanded at the end of that month. In mid-January, the first personnel were being withdrawn to Burma, and on 31 January the squadron stood down. Two weeks later RAF Saigon was also closed, although a small staging post remained at Tan Son Nhut.
The RAF contribution to the liberation and re-colonisation of French Indochina had been small but important. It had also been shackled by tight rules of engagement and other limitations imposed by the French, Americans and by the British themselves. While this may have been frustrating at times, particularly to the Spitfire pilots, it did at least keep Britain largely disengaged from the problems within the country, and avoided an escalation of involvement in a shooting-war that was none of their concern. Unlike other operations, such as that to liberate the Netherlands East Indies, the British were able to do their job and get out without getting bogged down.
The French and the Americans would not be so lucky. In that respect, Operation Masterdom was a complete success.
The British in Indonesia
A particularly bloody episode was had in the Dutch East Indies. Following the Japanese occupation of the Dutch colonies, a republican government was installed, this government did not desire a Dutch return. However, the Dutch were keen to regain control, and despite a dislike of a European administered Far East, the US loaned $10m to the Dutch to facilitate their return. Weakened by German occupation, the Dutch had no real significant force until early 1946 and the British agreed, reluctantly, to administer the East Indies in their place.
British troops arrived in September 1945, tasked with restoring order and faced with the repatriation of some 300,000 Japanese as well having to free POWs. While clashes occurred, the British had not the will nor resources to commit to a long struggle to regain Indonesia for the Dutch. In October, the Japanese tried to regain the authority they relinquished to Indonesians. The cities of Pekalongan and Bandung were taken with ease, but Semarang was the scene of a bloody contest. By the time Japanese soldiers were repatriated, 500 Japanese and 2,000 Indonesians had been killed. A British led evacuation of Indo-Europeans and European internees followed as troops encountered stronger resistance. A brief ceasefire was arranged on 2 November 1945, but fighting soon resumed. Republican attacks against Allied and pro-Dutch civilians reached a peak in November and December, with 1,200 killed in Bandung alone.
The Battle of Surabaya would be bloodiest battle of the revolution. 6,000 British and Indian troops landed in the city and there was hand-to-hand fighting in every street. Thousands perished as the fighting continued until 29 November. Defeat at Surabaya permanently disadvantaged Republican forces, yet the battle galvanised support for independence and reminded the Dutch they faced a well-organised and popular resistance. On Java and Sumatra, the Dutch enjoyed success in urban areas, but could not subdue rural areas. On outer islands Republican sentiment was not as strong and they were occupied with ease. Indonesian independence would eventually be achieved in 1949. 5,000 Dutch would die in the campaign, as would tens of thousands of Indonesian combatants. Estimates of Indonesian civilian deaths vary between 25,000 and 100,000. The last British troops left Indonesia in November 1946 and in their shorter campaigns, 1,200 British and Indian soldiers would be killed, as would more than 1,000 Japanese.


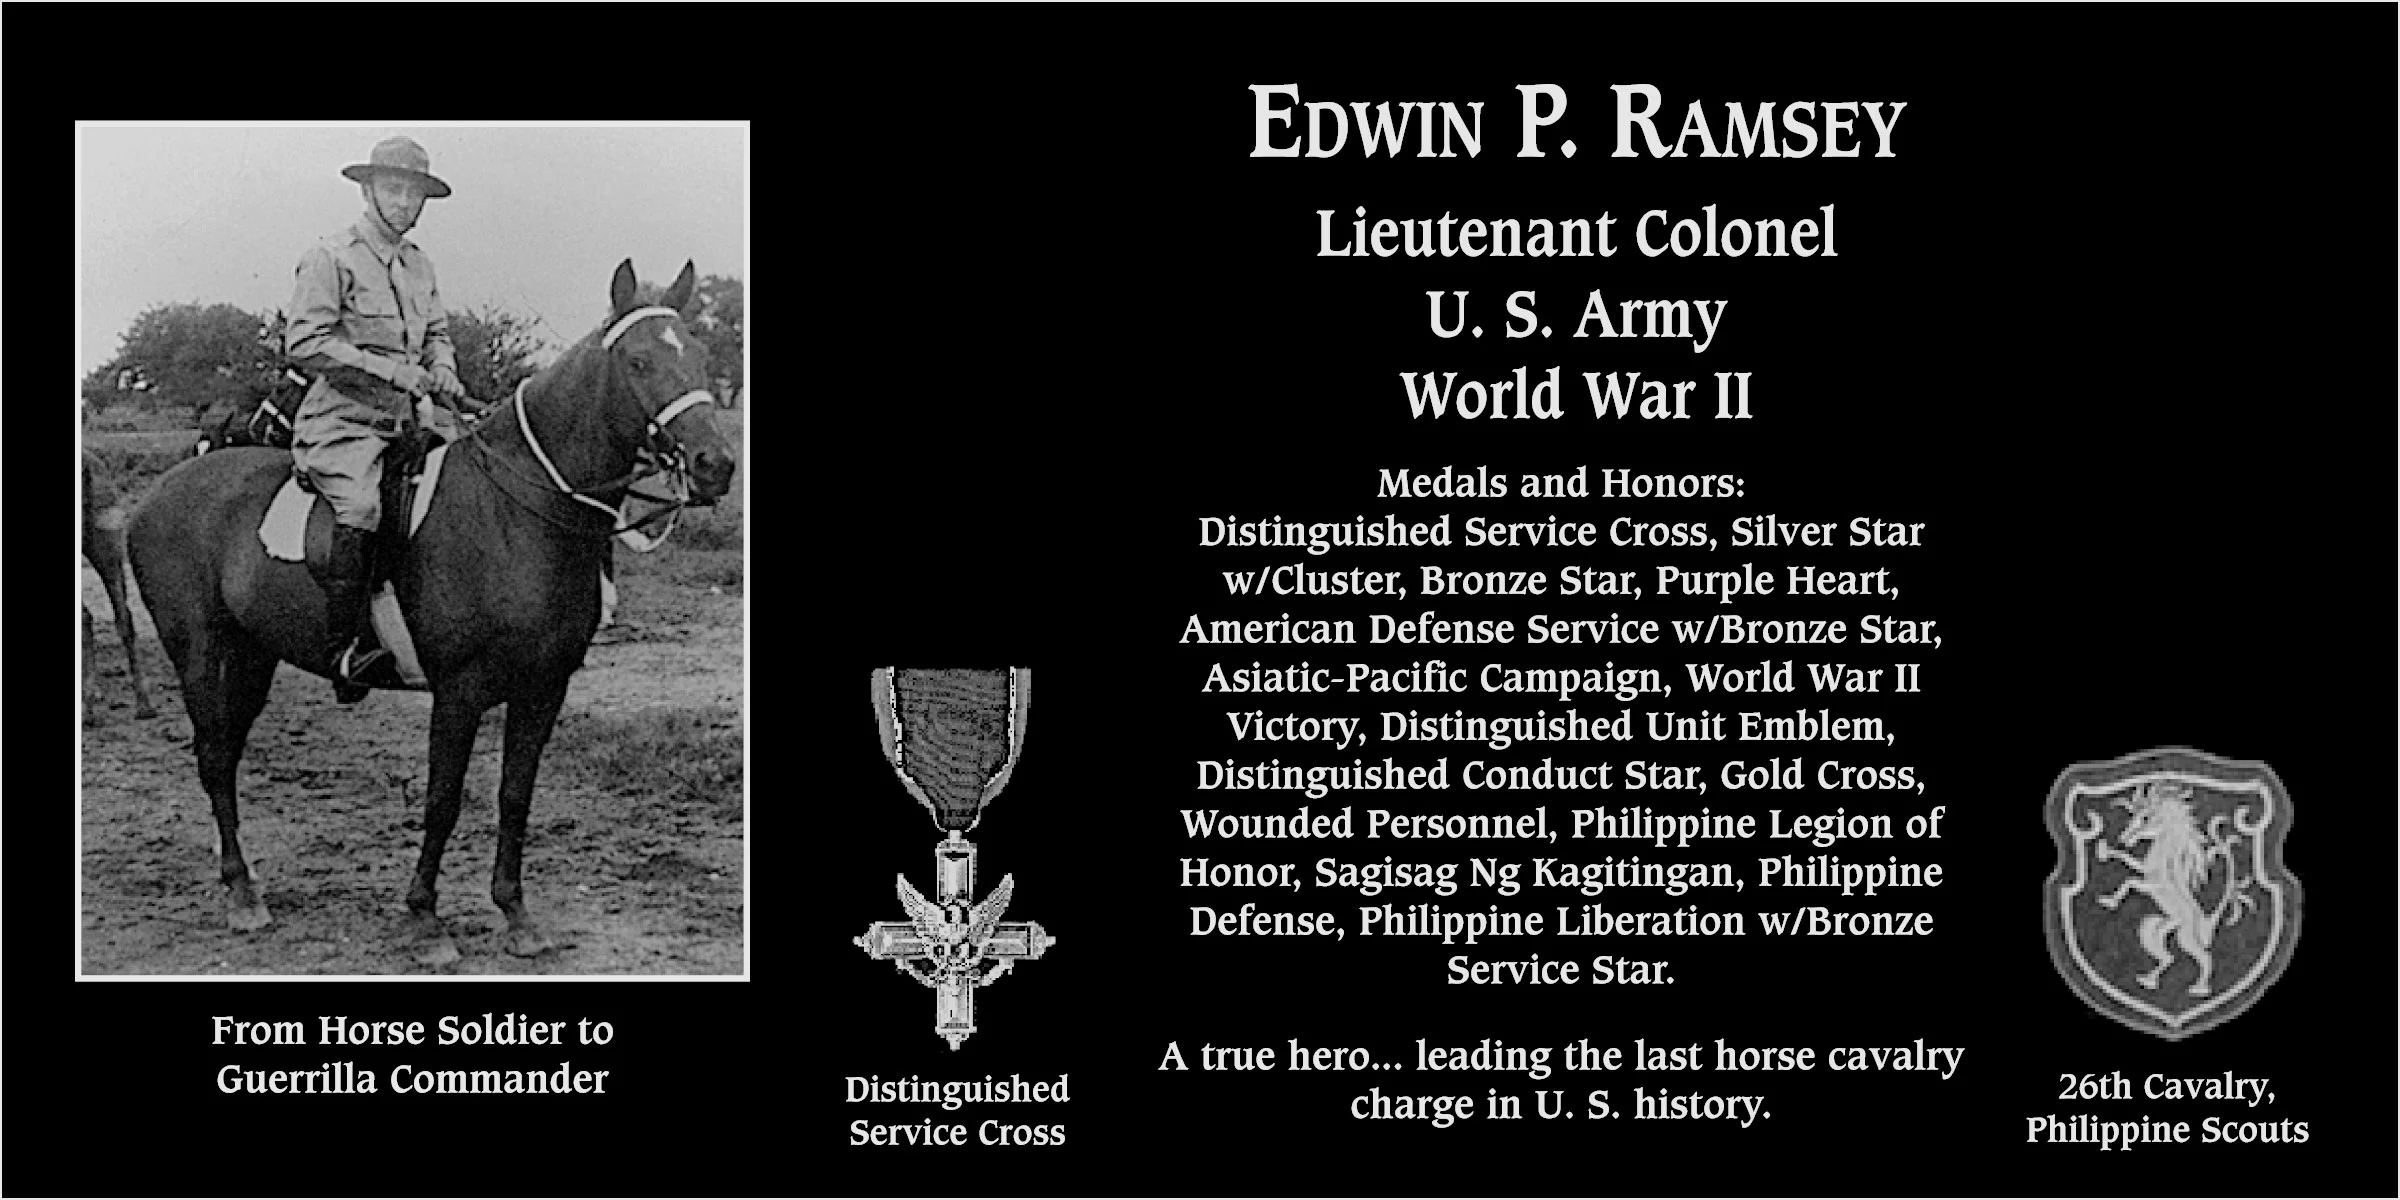 Ramsey quickly signaled his men to deploy into forager formation. Then he raised his pistol and shouted, “Charge!” With troops firing their pistols, the galloping cavalry horses smashed into the surprised enemy soldiers, routing them.