Category: Gun Info for Rookies

Wildfires have long been a feature of life in the western states. Unfortunately, target shooting starts some of those fires. The good news is that target shooting fires are preventable, so let’s discuss how we can keep them from happening. Public lands make for some of the best shooting spots, but they are at risk of closure every time a negligent shooter starts a wildfire.

A DC-10 firefighting aircraft working on the Range Fire in Orem, Utah in 2020
Two years ago, a major wildfire in my neck of the woods was started by target shooting at the local police shooting range. It was aptly named the Range Fire, and grew to approximately 3,500 acres. The fire originated in the “wildland-urban interface” where the city stops and public land begins, and assets from multiple states had to respond. This included massive DC-10 tankers, helicopters, and water-scooping planes. It was not cheap to put out this fire.
The Range Fire, along with several other gunfire-sparked wildfires, led the state of Utah to start a public outreach campaign. I came across a display at the local Sportsman’s Warehouse with a cardboard cutout of a firefighter, a burned tree, and what appeared to be free targets on a table.

“Target” informational flyer put out by the State of Utah
On closer inspection, the “targets” were actually informational flyers about fire mitigation steps that target shooters can take. Personally, I prefer informing the public so they can help prevent the problem rather than use overbroad controls like seasonal shooting closures. This seems like a low-cost, high-return effort if it prevents even a single wildfire.
Don’t Shoot Near Rocks or Dry Grass
The first two pieces of advice from the Utah flyer are certain types of backstops that should be avoided. Rocks make unwise targets because they can spark when hit depending on their composition. Ricochets can also lead to unpredictable fire starts in distant places. If those sparks land in dry grass, they can grow to become a flame. Avoiding both is the safest course of action.
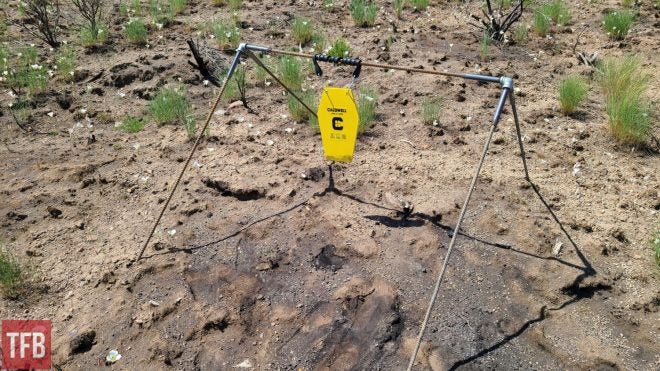
Caldwell Targets AR-500 steel set up in a spot that burned the previous year, where there is nothing left to burn
Don’t Shoot Exploding Targets
Exploding targets have been linked to several wildfires, and their use is banned on many public lands. In one extreme example, a 47,000-acre fire was started in Arizona with an exploding gender reveal target. That fire resulted in a $220,000 fine and five years of probation for the Border Patrol agent who started the blaze. Explosions are cool, but.
Don’t Shoot on Hot and Windy Days
We have all heard the phrase “if it ain’t raining it ain’t training,” but rain also (obviously) reduces fire risk. What may be less obvious is that hot and windy days with low humidity increase wildfire risk. The National Weather Service issues warnings when weather conditions like these pose a high fire risk called “red flag warnings.” Shooting outdoors, especially outside of a controlled range, is more dangerous. High winds can fan a flame and spread a small fire into a large conflagration before it can be contained. As much as it sucks, sometimes the right call is canceling a range day rather than taking your chances.
Risky Ammo
The flyer did not talk about types of ammunition that are more likely to cause sparks. Some are very obvious and already banned on most public lands, such as tracers or incendiary ammo. These pose obvious fire risks because they are designed to burn.
Steel core ammunition is also a frequent culprit, such as M855 “green tip” 5.56x45mm. The steel penetrator acts like a flint and steel fire starter and can create a large shower of sparks. Bi-metal jacketed projectiles have copper plating over a steel jacket and produce similar results. Bi-metal jackets are frequently found in Russian steel-case ammunition, which will, unfortunately, be drying up on the U.S. market. If in doubt, put a magnet on the projectile and see if it sticks. If so, it is unwise to use it when wildfire risk is high.

(L to R) 5.45x39mm with bimetal jacket, 5.45x39mm with steel core, 5.56x45mm with steel core
Studies have also shown that solid copper projectiles also tend to start fires at a higher rate than common lead core, copper jacketed bullets. However, all bullets are extremely hot when fired and can ignite a fire in the right circumstances.
Being Prepared
The flyer did not talk about extinguishing fires you may start, but that type of mitigation is also worthwhile. I generally take a shovel and plenty of water along with me in the dry months. A fire extinguisher is not a bad idea either (one saved me from starting a huge fire, but that is a story for another day). Obviously, do not put your life at risk to put out a fire you may have started. But a gallon of water or a few shovelfuls of dirt might be enough to put out some smoldering grass.
Conclusion
Don’t be that guy who starts a big wildfire. They put lives and homes at risk, cost millions of dollars to contain, and can lead to permanent shooting closures. Be smart about what you are shooting, where you are shooting, and when you are shooting.

Though many shooters these days use some sort of optic on their AR-15 as their primary sight, having a good set of backup iron sights is still a really good idea. However, though they are similar in many ways, the backup iron sights on an AR-15 are slightly different from iron sights on many other rifles.
Here is a step-by-step guide on how to zero the backup iron sights on an AR-15.
Many of the “flat top” AR-15s on the market today come ready to accept a backup iron sight (BUIS) to use in case something happens to the optics on the rifle. While they come in a wide variety of configurations, the basics of how to use them remain pretty much the same.
First, ensure that your backup iron sights are properly installed and mounted securely to the rifle. If you are able to wiggle the sights with your hand, they are not secured properly.
Second, mechanically zero your backup iron sights. For the rear sight, ensure that the aperture is exactly centered in the housing. To do this, adjust the aperture until it is all the way to one side. Then, count how many clicks it takes to adjust the aperture until it is all the way on the opposite side. Divide this number by two, then move the aperture back that number of clicks.
Assuming that you have a standard front sight, adjust the base of the front-sight post until it is level with the sight housing in order to mechanically zero it. To do this, depress the detent on the front side of the post and turn the post at the same time. You can use the tip of a bullet, a multitool, a nail or a specially designed front-sight adjustment tool to accomplish this.
After mechanically zeroing the backup iron sights, you’re ready to start shooting. I like to shoot at 25 yards, then move out to longer ranges after I adjust my sights. This saves time, ammunition and frustration in the long run by ensuring that my shots are at least on the paper. Don’t worry too much about the type of target you use. Almost any target will work, as long as it has a distinct aiming point.
Just like when zeroing any rifle, it is important that you shoot using a stable, supported position when zeroing your backup iron sights. Try to avoid supporting the rifle with your muscles and use a stable object like a sandbag instead.
From a steady shooting position, fire three shots at the center of your target at 25 yards (or whatever range you are shooting at). After firing your first group, check the target. Measure from the center of the group to your aiming point, and adjust your sights accordingly.
For most sets of backup iron sights, you must adjust the front sight to move the impact of the bullet up or down and adjust the rear sight to move the bullet impact left or right. As you can see in the photo above, turning the front-sight post clockwise will raise the point of impact of the bullet. On this same rifle, turning the rear-sight adjustment knob clockwise moves the bullet point of impact to the right.
However, different AR-15 variants will often have different MOA adjustment values. On some rifles, one click on the front sight will move the bullet impact 1.2 MOA (about 1.2 inches at 100 yards), while others will move the bullet impact 1.5-2 MOA.
The same goes for the rear sight, and you can expect one click to move the bullet impact .5-.75 MOA, depending on the rifle. The only way to be 100 percent sure with your rifle is to take it to the range and experiment with it.
Also, don’t forget that when shooting at 25 yards, you will need four times the number of clicks (4 MOA equals about 1 inch) to move the bullet impact the same distance at 25 yards as you would at 100 yards.
For example, assume that I shot a group at 25 yards that hit 1 inch high and 2 inches to the left with a rifle that has 1.25 MOA elevation and .5 MOA windadge adjustments. Since I need to move the bullet impact down and to the right, I’d rotate the front sight three clicks counterclockwise (round to the nearest whole number) and adjust the rear sight 16 clicks clockwise.
After making the required number of adjustments, shoot another group. If that group hits where you’re aiming, your AR-15 is now zeroed at 25 yards. If not, make the necessary adjustments to your sights and continue shooting until you have a good 25-yard zero.
Using the same techniques described earlier, you can now start shooting at longer range, if desired. Since you zeroed the rifle at 25 yards, it should be at least hitting the paper at 50 or 100 yards. The only difference now is that you need to remember that the number of clicks necessary to move your bullet impact at 50 or 100 yards is different than at 25 yards. At 50 yards, moving your sight 2 MOA/inch and at 100 yards 1 MOA/inch.
There is a lot of debate in the shooting community about the best distance at which to zero your AR-15. The correct answer all depends on the specifics of your rifle and ammunition as well as the typical distances at which you plan to shoot your rifle. For most people, a 50- or 100-yard zero for their back up iron sights will work great.
Regardless of what range you choose for your final zero range, after you’ve made your final adjustments, fire one last group to confirm your zero. If your group hits where you were aiming, you’re done. While you hope to never have to use it, a good backup iron sight will hold a zero for a long time.