Month: June 2018

Not like my old BB gun!
I am a firm believer that it should be within the reach of every person to own a ludicrously fast car, a stupidly powerful handgun and a magnum rifle that could take a T-rex off its feet at 1,000 yards.

Savage’s Model 110 BA Stealth chambered in .338 Lapua Magnum offers high-quality features at a reasonable price point.
In case you were wondering, I’m not referring to when you are 50 and having a midlife crisis. Out of the gate, with a reasonably grown-up job these goals should be an option.
We all draw our power floor somewhere, be it a small Glock or a .454 Casull. I stopped at a .44 Magnum for handguns, but for my rifles I’m bolder. A rifle chambered in .338 Lapua has been on my wish list for a long time, and Savage had made that wish attainable for people with normal salaries.

The .338 Lapua Magnum originated in the 1980s as a cartridge for military snipers. Its parent case is the .416 Rigby.
The .338 Lapua, like most European imports, has always been expensive. The average price for a rifle is around $6,000, with lower end ones around $4,000. That is well out of the acceptable limits of most working stiffs, me included.
Couple that, with ammunition on average at $7 a round, and you have a very expensive hobby. Developed as a cartridge developed for military snipers during the 1980s, the .338 Lapua based upon the .416 Rigby parent case has always had a hefty price tag.
Similar to a Rolex and a Porsche, it’s long been considered in civilian circles as a display of wealth to own, and you had to open your fruity European ammo box with a smug look and one pinkie in the air.
The .338 Lapua was not for you, peasants. In the fine tradition of Detroit Muscle Cars decimating more expensive Supercars, Savage kicked that model in the teeth — with a steel toe.
Savage Brings the Heat

The author fired the Savage 110 BA Stealth out to 1,000 yards and it produced extremely accurate groups with the Federal 250-grain Gold Medal Match .338 Lapua.
The Savage 110 BA Stealth retails for $1,622 and has a street price closer to $1,200. Less expensive or cheap rarely translates to quality, but Savage is one of the most underrated of all the rifle manufactures.
This rifle delivers and at a fraction of most magazine fed .338 Lapua competitors. The Savage AccuTrigger delivers all you need right out of the box. I’ve heard tactical Timmys’ poo-poo the AccuTrigger. The trigger on GunsAmerica’s test rifle broke at a clean 2½ pounds out of the box, and I didn’t bother adjusting it.
SPECS
- Type: Bolt-action, detachable magazine
- Cartridge: .338 Lapua ( 300 Win Mag also available.)
- Barrel Length: 24 in.
- Overall Length: 49 in.
- Weight: 11 pounds
- Stock: Aluminum chassis
- Finish: Matte black
- Twist: 1:9.3 in.
- Capacity: 5+1 rds.
- Safety: Selector switch
- MSRP: $1,629
Most consumers don’t even realize the trigger is adjustable, it is so good at the factory setting. The crisp trigger aside, what matters the most in a rifle is the accuracy.
Ergonomics are nice as are smooth bolts, and don’t forget aesthetics. (Yes, it looks like James Bond would shoot it.) In the end, accuracy is king.
There are a lot of factors that results in a rifle being accurate. In that department, the Savage BA 110 Stealth crushed it out of the park.
Article Continues Below
Range Time
My zero group was a ½ inch at 100 meters, which is pretty good. Undoubtedly, ½ MOA is a nice starting place, and it is something very difficult to hold at range.
I moved straight back to 1,100 meters, because this is a .338 Lapua after all — not a BB gun. I didn’t bother to ask what the truing range should be (1.2 Mach, which is a long ways for this caliber), I picked 1,100 because it was as far as I could reach without some serious hoop jumping.
I tried my muzzle velocity on a steel target, then shot a paper group for GP. My Savage 110 printed a 4½-inch group on paper, in a 20 mph wind. Out of the box, it produced sub half MOA in high winds.
I have been shooting long-range and testing rifles for a while, and that is the best group I have ever printed on paper at that range. Uncle Sugar spent a lot of taxpayer money making sure I could shoot.
Before my internet commandos get all excited, it was a three-shot group. Remember, .338 is expensive, and when I went to check the target, I didn’t expect a group that tight. Wind, luck and all things considered: That is a damn tight shot group.
Fodder
What did I feed it to produce that performance? Glad you asked: Federal Gold Medal Match 250 grain. Gold Medal has been performing like a champ, and this .338 Lapua takes the cake.
Federal puts a lot of quality control standards in the Gold Medal that are reflected in the price, but it absolutely delivers. Every bit of standard deviation and neck tension starts to really matter past 1,000 meters. For performance like this, it’s worth the price.
For glass, I mounted a Bushnell DMR II 3.5x21X with the G3 reticle. Bushnell continues to be one of the best for the money, and this DMR proved no differently. The DMR II offers a locking windage knob, and a RevLimiter elevation stop.
Also new for this model, included is a removable Throw Hammer lever for rapid magnification adjustments. Clarity was still good at 1,100 meters on a relatively hot day, and the scope tracked correctly.
Parallax adjustments were easy and functioned correctly. The G3 reticle is a pretty good compromise for those that don’t like a full Horus reticle. I prefer the H59, by a long shot. But it’s not for everyeon. The G3 is proved decent for using holdovers, but in my opinion, the H59 is better in the wind.
The G3 offers half mil markings for windage on the primary crosshair, and full mils of windage on the sub tensions. Even with the elevation dialed on, a half a mil is a lot of space when you are trying to finesse a shot in gusting winds.
The DMR II is available with either reticle. Bushnell has always delivered tough optics, and package for the price is fantastic. I know shooters that have $20,000 Accuracy International switch barrel packages that mount a Bushnell DMR or HDMR.

The Bushnell DMR II held up against the punishing recoil of the .338 Lapua. When shooting out past 1,000 yards, a scope level is essential.

The Accu-Tac bipod’s spike feet attachments allowed the author to front-load with ease. The Federal Gold Medal Match 250-grain load fed reliably.
Bipod Bidness
Also worth noting is the bipod you use. Currently, I’m in month four of Accu-Tac SR-5 bipod durability test, and they continue to impress me.
For the first time, I swapped the rubber feet out for steel spikes, and the result was fantastic. The spikes make it very easy to load your bipod the same every time, which played a part in today’s adventure.
The only issue, I had was that it snapped one of the M-LOK rails in half during the .338 test, but the rifle and bipod are fine.
This was also the first time I tried out the spike feet for the Accu Tac, and they worked well in the field. It made loading the bipod easy. I am going to go ahead and fully recommend these for your shooting kit. Just make sure you take them off before you put your rifle back in the bag.
Lasting Impressions
Overall, the trigger and value of a .338 at the is price point is unreal. Savage has outdone themselves. However, there’s always room for improvement, increasing weight in the forend would increase cost and machine time but would improve the balance slightly.
The buttstock bit my hand every time I shot. However, Savage considered shooters may want to swap it out. The modularity of the rifle makes swapping out the buttstock with ease.
If you’re going to purchase and outfit it with Picatinny rails and a bipod, as I did for testing: A word to the wise, buy the aluminum version. In my first at bat to zero the rifle, I snapped one of the polymer ones in half.
The magazine fed flawlessly every time. After about one hundred rounds the bolt broke in and smoothed out. Most importantly, this rifle is accurate. It’ll put lead on target every time. I’d call this the best buy in .338 Lapua that I have seen. The only reason I’m returning this rifle to Savage is that I am slated to review the Model 112 target version next month.
To learn more about the Savage 110 BA Stealth, click http://www.savagearms.com/firearms/model/110BAStealth.
To learn more about the Bushnell DMR II 3.5x21X, click http://bushnell.com/tactical/riflescopes/elite-tactical/dmr-ii-3-5-21x-50mm.
To learn more about Federal Gold Medal Match, click http://www.federalpremium.com/ammunition/rifle/family/gold-medal/gold-medal-sierra-matchking/gm338lm.
To purchase a Savage 110 BA Stealth on GunsAmerica, click https://www.gunsamerica.com/Search.aspx?Keyword=Savage%20110%20BA%20Stealth.








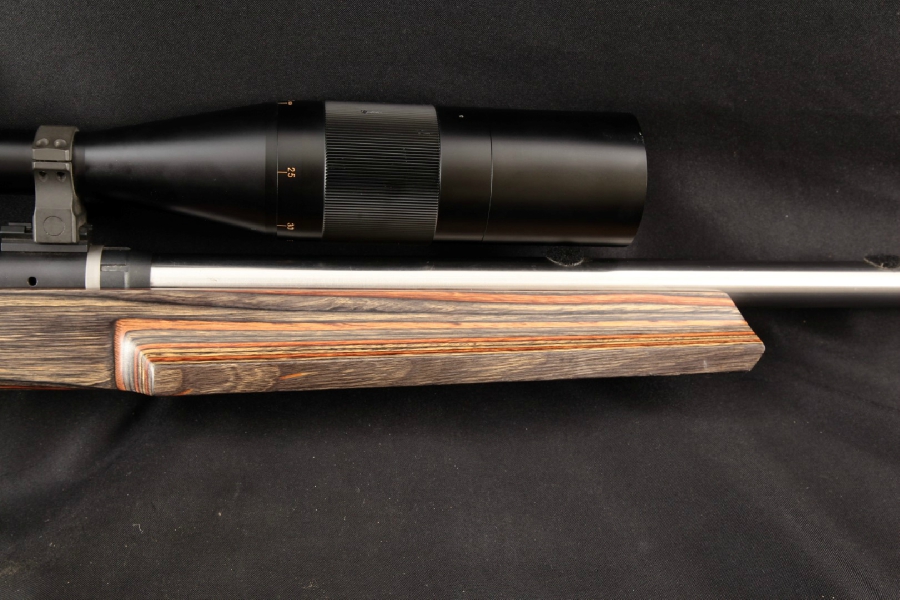
What is looked like before!


In any survival scenario, water is by far your most important resource. You can easily go a day without food, and usually don’t need shelter right away, unless you’re in freezing conditions. Not having any water for 24 hours, however, while survivable, depletes both your physical and mental strength, making it more difficult to perform the tasks necessary to making it out the other side. And after just three days without hydration, your body will shut down, and it’ll be lights out for you.
With about two liters per day your body will be able circulate blood, process food, regulate body temperature (which prevents hypo- and hyperthermia), think clearly, and successfully carry out a host of other internal processes.
You can see how crucial water is to your survival. Luckily, with just a little bit of know-how, water can be found relatively easy in almost any environment on the planet. In today’s article, we’ll walk you through several methods for finding water that will work for temperate climates and a variety of others, as well as methods that are particularly suited for tropical, freezing, and desert regions.
A Note Before Starting: Always Filter
Any survival expert will tell you that no matter where you find water in the wild — be it from streams, lakes, condensation on plants, etc. — it should always be filtered or purified before drinking. Now, in many cases this isn’t possible, as you may not have the right supplies on you. Just know that any water you ingest without purifying could carry harmful bacteria, and is a risk on your part. If your choice is life or death, that’s a risk you’re most definitely going to take. Some water collection methods are safer for straight drinking than others; we’ll outline those below.
General Methods and Tips for Finding Water in the Wild
The following tips work especially well in temperate and tropical areas, but many also apply to other climates too.
Start With the Obvious: Streams, Rivers, Lakes
These are your most obvious sources of water in the wild. Clear, flowing water is your best option, as the movement doesn’t allow bacteria to fester. This means that small streams should be what you look for first. Rivers are acceptable, but larger ones often have a lot of pollution from upstream. Lakes and ponds are okay, but they’re stagnant, meaning there’s an increased chance for bacteria.
Now then, how do you go about finding these bodies of water? First, use your senses. If you stand perfectly still and listen intently, you may be able to hear running water, even if it’s a great distance away.

Next you’ll use your eyes to try and find animal tracks, which could lead to water. Insect swarms, while annoying, are another sign of water close by. And in the mornings and evenings especially, following the flight path of birds may lead you to your much-needed H2O. Watching animal behavior is especially important in the desert. Animal tracks will be easier to spot in the sand, and they’ll almost always eventually lead to water. Birds will also especially flock towards water in dry areas.
Also just scout the environment you’re in. Water runs downhill, so follow valleys, ditches, gullies, etc. Find your way to low ground, and you’ll often run into water.
Collect Rainwater
Collecting and drinking rainwater is one of the safest ways to get hydrated without the risk of bacterial infection. This is especially true in wild, rural areas (in urban centers, the rain first travels through pollution, emissions, etc.).
There are two primary methods of collecting rainwater. The first is to use any and all containers you might have on you. The second is to tie the corners of a poncho or tarp around trees a few feet off the ground, place a small rock in the center to create a depression, and let the water collect.

You can combine these methods and make your containers more effective by tying the poncho or tarp to funnel into your bottle or pot or whatever you have (as long as it doesn’t overflow and waste water!).
Collect Heavy Morning Dew
Looking for a way to collect up to a liter of water per hour? Tie some absorbent clothes/cloths or tufts of fine grass around your ankles, and take a pre-sunrise walk through tall grass, meadows, etc. Wring out the water when the cloths are saturated, and repeat. Just be sure you aren’t collecting dew from any poisonous plants.
Fruits/Vegetation
Fruits, vegetables, cacti, fleshy/pulpy plants, even roots contain a lot of water. With any of these, you can simply collect the plants, place them into some kind of container, and smash them into a pulp with a rock to collect their liquid. It won’t be much, but in desperate situations, every little bit helps.
This method is especially helpful in tropical environments where fruits and vegetation are abundant. Coconuts can be an excellent source of hydration. Unripe, green coconuts are actually better, though, as the milk of ripe coconuts acts as a laxative, which will just further dehydrate you.
Collect Plant Transpiration

Another easy option for water collection is taking advantage of plant transpiration. This is the process in which moisture is carried from a plant’s roots, to the underside of its leaves. From there, it vaporizes into the atmosphere; but, you’re going to catch the water before it does that.
First thing in the morning, tie a bag (or something you can make into a bag; the larger the better) around a leafy green tree branch or shrub. Place a rock in the bag to weigh it down a little bit so the water has a place to collect. Over the course of the day, the plant transpires, and produces moisture. Rather than vaporizing into the atmosphere, though, it collects at the bottom of your bag. Never do this with a poisonous plant.
Tree Crotches/Rock Crevices
Like with fruits/vegetation, this is another source that won’t provide all that much water, but again, it’s definitely something when the straits are dire – particularly when you’re stranded in a desert. The crotches of tree limbs, or the crevices of rocks can be small collecting places for water. In an arid area, bird droppings around a rock crevice may indicate the presence of water inside, even if it can’t be seen. To remove water from crotches and cracks, stick a piece of clothing or cloth in, let it soak up any moisture, and wring it out. Repeat if you can, and return after a rain for a fresh supply.
Dig an Underground Still
The benefit of creating a still is that it provides a reliable, fairly substantial source of water (compared to other methods), and you know roughly how much you’ll be getting, which helps you plan and ration better.
There are aboveground and underground varieties of sills; the underground is your best bet as it collects more water, but the aboveground variety can be useful if you’re extremely energy-depleted and can’t dig a large hole. Click here to see instructions for doing that (page 58).
Directions for your underground still:
Supplies
- Container (the largest you have)
- Clear plastic sheeting
- Digging tool
- Rocks
- Optional: something to act as a drinking tube/straw (CamelBak straw, bamboo/other plant)
Instructions
- Find an area that gets sunlight most of the day.
- Dig a bowl-like pit 3’ wide by 2’ deep. Dig an additional small hole within that for the container.
- Optional: Attach the drinking tube to the bottom of the container. If you don’t have one, skip this step.
- Place the container in the pit, and run the tubing up out of the hole.
- Cover the hole with plastic, and use rocks and soil to keep it in place.
- Put a small rock in the center of your sheet, so that it hangs and forms an inverted cone over the container.
- If you have a tube, drink straight from it. Otherwise, collect the container from the bottom, and replace it when you’ve stored the water elsewhere.
There’s almost always moisture in the ground at that depth. That will react with the sun’s heat to produce condensation, which will collect on the plastic. The inverted cone forces that condensation down into your container. You can expect to gather .5-1 liter per day, so you’d need more than one (or another source) to account for an entire day’s supply.
Cold/Snowy-Specific Tips
Melt Snow and Ice
Especially in the mountains, snow and ice are abundant well into the summer months, and sometimes all year round. If you’re by or on the ocean in a polar region, look to icebergs for a source of fresh water and for “old ice” that has been through rains and thaws. As opposed to salty ice, which is opaque and gray, freshwater ice has a bluish color and crystalline structure, and splinters easily with a knife.
If you’re in a boat and surrounded by salt water, capture some in a container, and allow it to freeze. The fresh water will freeze first, while the salt will accumulate as slush in the middle. Remove the ice and discard the slush.
While snow and ice provide an excellent source of water, it should always be melted and purified first. Eating straight snow/ice will lower your body temperature, which dehydrates you because it forces your metabolic rate to speed up in order to keep you warm.
The best way to melt snow/ice and make it actually taste good is to simply mix it with other water you may have, even small amounts, and slosh it around until the snow melts. If you are heating it, add a little bit of other water to it; heating snow/ice directly can actually scorch it and produce a foul-tasting drink.
Desert-Specific Tips
In temperate, tropical, and frozen/icy climes, finding and collecting water is likely to happen within your 3-day window. Your primary concern is going to be collecting, storing, and purifying it. In desert environments though, simply finding a water source can be enormously difficult. Here a few tips specifically for arid environs:
Dig Wells
Start digging. Anywhere you see dampness on the ground or green vegetation, dig a large hole a few feet deep, and you’ll likely get water seeping in. The same is true at the feet of cliffs, in dry river beds, at the first depression behind the first sand dune of dry desert lakes, and in valleys/low areas. You may not be successful, but you just might. This water will of course be rather muddy, so it will especially need filtering/purifying, but you’ll have a water source nonetheless.
Collect Condensation from Metal
Extreme temperature variations between night and day can cause condensation on metal surfaces. Before the sun rises and vaporizes that moisture, collect it with absorbent cloth. This also means you should be placing your metal items in the open rather than stored in your pack.
Beach-Specific Tips
Dig a Beach Well
If you’re stranded on land near a body of saltwater, you can still attain fresh water by digging a well on the beach. Behind the first sand dune — typically about 100 feet from shore — dig a 3-5’ hole. Line the bottom with rocks, and the sides with wood (driftwood, most likely). This allows the well to fill up without collapsing or having too much sand in the water. In a few hours, you’ll have a well full of fresh water — a combination of collected rainwater (which runs down the dunes), and sand-filtered ocean water. If it tastes salty, you simply move a little further away from shore.
A variation of this method is to let the water seep in, but then heat some additional rocks and drop them in the water. This will create steam, which can be collected by holding an absorbent cloth over the well. Wring out the cloth and repeat. This ensures that your water is free of all salt and other contaminants, but you will yield less.
Avoid Water Substitutes
In any desperate survival scenario, you may be tempted to try non-water liquids as a substitute for the real thing. In all but the most dire of situations, these should be avoided. In general, non-water substitutes only worsen your heath and vigor. These substitutes, and their harmful characteristics below:
- Alcohol. Dehydrates and clouds judgment.
- Urine. Contains harmful body waste and is about 2% salt.
- Blood. May transmit disease. Also has high salt content.
- Seawater/Sea Ice. Contains 4% salt. It takes more water to rid your body of the waste from seawater than what you get from it. Just depletes your body’s H2O supply.
Of course, if you’re a Bear Grylls fan, you’ll know he famously drank his own urine while in the Sahara Desert. Is this safe to do, or was that for entertainment purposes? If you’re down to your very last resort, drinking your urine can keep you alive for another day or two. It’s 95% water, but that other 5% is comprised of waste products that will ultimately lead to kidney failure if subsisted on for more than a very short period of time. And of course as you get more dehydrated, this method becomes even more dangerous.
Before you resort to drinking your own pee, exhaust all the methods outlined above first. With a little effort, knowledge, and ingenuity, there’s a good chance you’ll be able to find genuine H2O.


